
Our scanner scans the login page but cannot log in, so it will only scan the first page. In this case, you need to create custom cookies to manually add them to the consent banner to inform users about all used cookies.
To add a custom cookie, follow these steps:
1. Log in to Cookie Information.
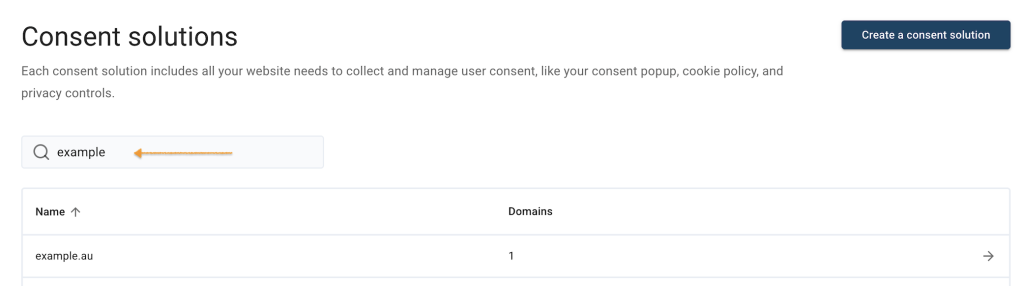
2. Go to Consent solutions.
3. Find the consent solution you want to add a custom cookie for.
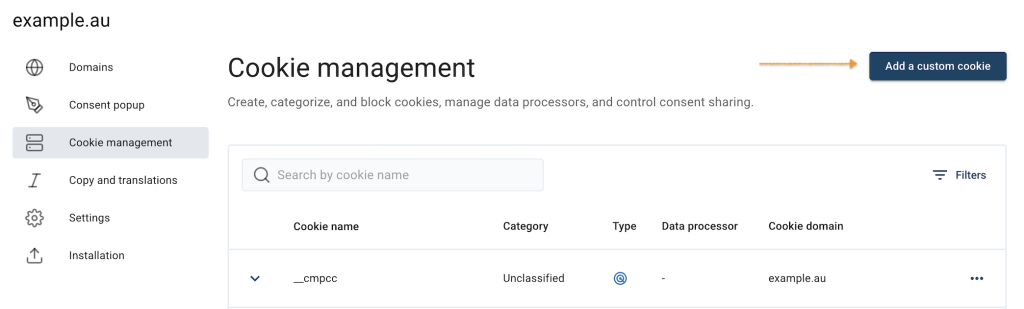
4. Navigate to Cookie management.
5. Select Add a custom cookie.
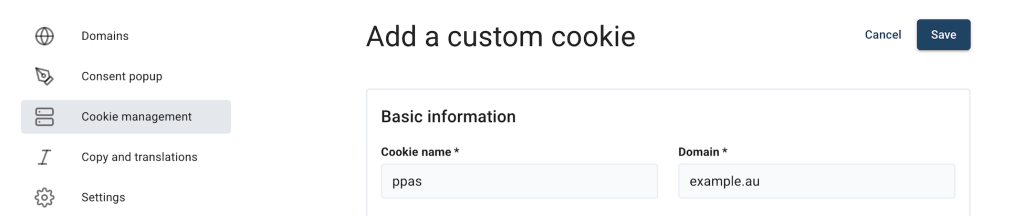
6. In Basic information, enter the cookie name.
7. Enter the domain name.
Note:
- Cookie name: The cookie’s name that will show on the website.
- Domain: The domain on which you can see the cookies.
8. Select a cookie category. The category that shows what the cookie is used for.
9. Set the cookie expiration.
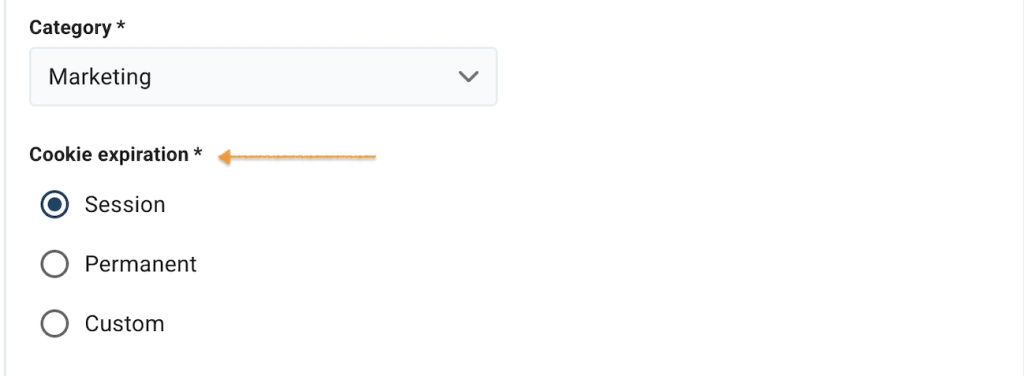
Note: The maximum expiration time is five years.
10. Select Data processor from the list or add a new one.
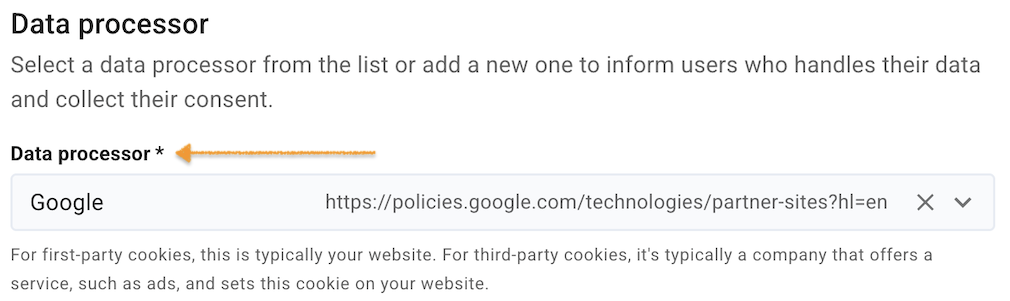
Note: You need to include a data processor to inform users about who handles their data and to gather their consent. For first-party cookies, this is typically your website. For third-party cookies, it’s typically a company that offers a service, such as ads, and sets this cookie on your website.
11. (Optional) If a data processor is missing from that list, you need to add it. Select Add a data processor.
12. Enter the data processor name.
Note: For first-party cookies, this is typically your website. For third-party cookies, a vendor providing services usually sets this cookie.
13. Enter the full privacy policy URL, for example, https://example.privacypolicy.com.
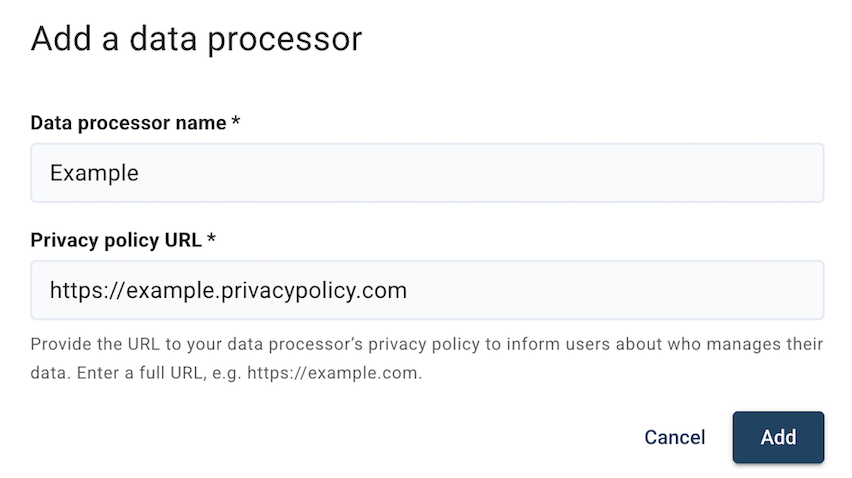
Note: You need to provide the URL to your data processor’s privacy policy to inform users who manage their data.
14. Select Add to save it.
15. In Purpose, set a purpose for each cookie category, like functional, statistical, or marketing. Add translations to support all languages on your website.
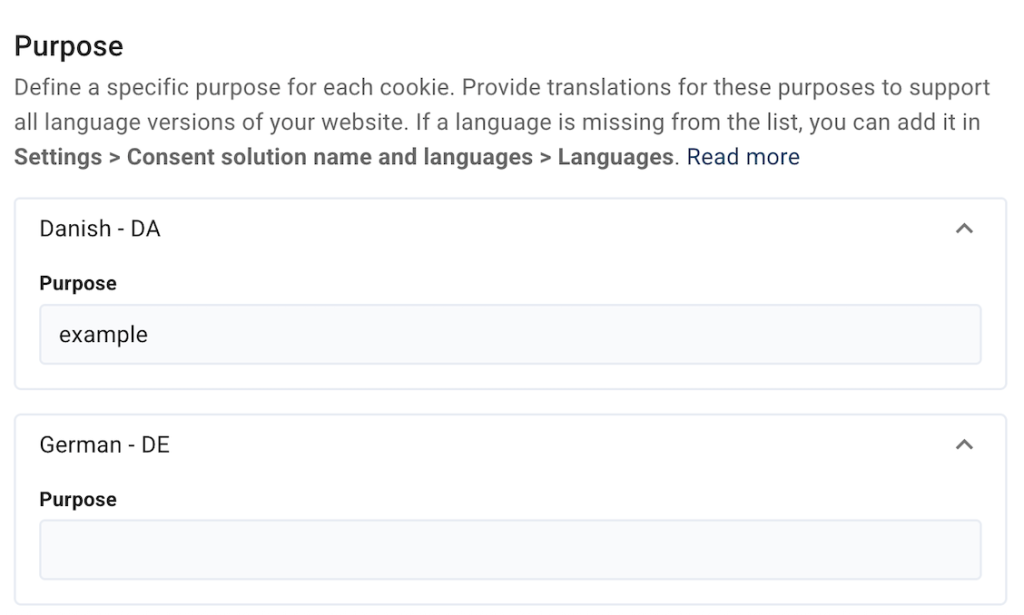
Note: If a language is missing from the list, you can add it in Settings > Add languages > Languages.
16. Select Save.
17. All done.


