Introduction to Matomo Tag Manager
You can use Matomo Tag Manager with our consent popup to make sure your website technologies only run after users give their consent.
To make this work, you need to have a Matomo account and add the Matomo container snippet to your website. If you haven’t done that yet, check out Matomo’s documentation to get started.
Set up your triggers
There are two main components that we will work on within this guide: tags and triggers.
A tag is a snippet of code that can be executed on your site. They are usually used to collect data or perform specific actions on a website or app.
A trigger is a predefined condition or set of conditions that determines when a specific tag should be executed or fired on a website. Triggers are essential components in tag managers as they control the timing and circumstances under which tags are activated.
In our case, the triggers that you will make during this guide will help you to only fire the tags you have set up when the user has given their consent to those cookies.
You will need to create the three following triggers to be used in your Matomo configuration:
Name: CI Functional
Event Name: cookie_cat_functional
Name: CI Marketing
Event Name: cookie_cat_marketing
Name: CI Statistical
Event Name: cookie_cat_statistic
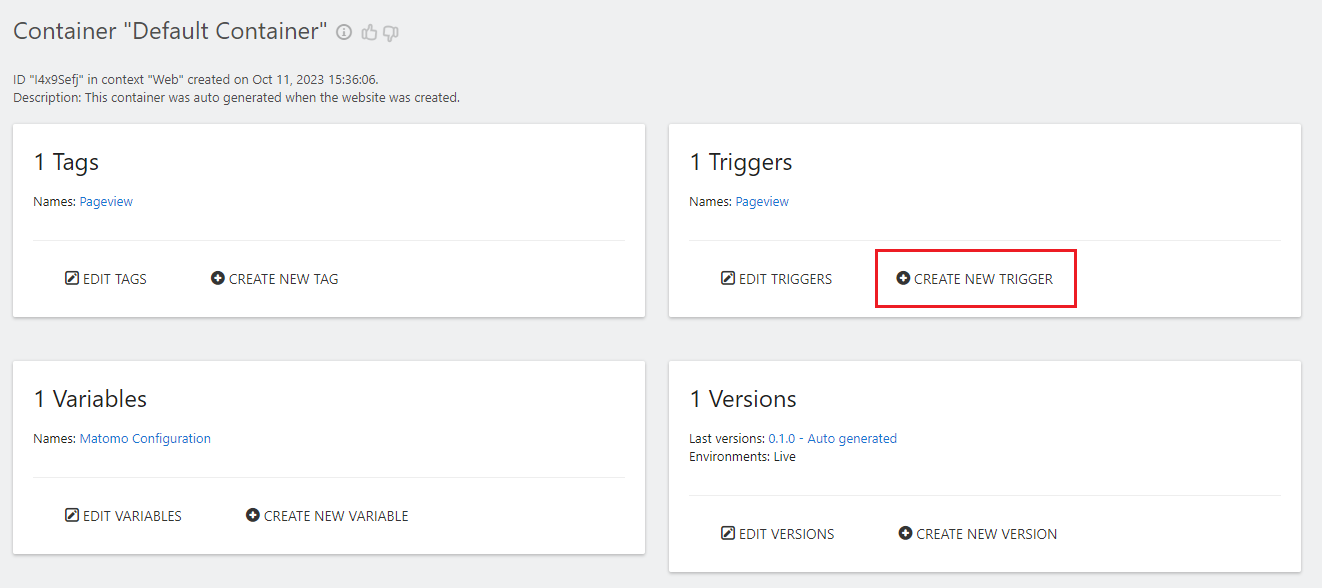
In order to get started, you should navigate to your Matomo Tag Manager Dashboard.
To create the triggers, repeat each of these steps for all three of the above:
- Under Triggers, click + CREATE NEW TRIGGER.
- Scroll all the way down and select Custom Event.
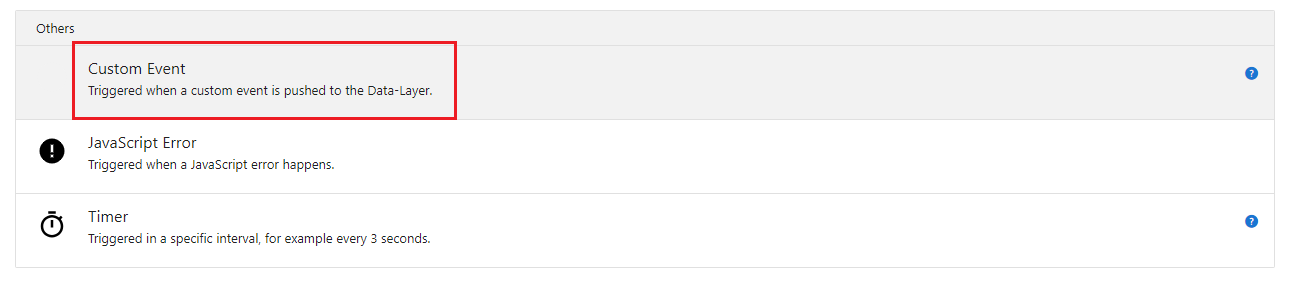
- Assign a name, description, and the matching event from the list above. Make sure the event name matches exactly: use all lowercase letters.

- Click CREATE NEW TRIGGER to save the trigger.
Repeat for all three triggers. You are then ready to start applying these triggers to your tags.
Applying the triggers to tags
Depending on the different technologies that you use, you will want to use different triggers on each of your tags. Each tag will set different types of cookies and you will need to ensure that the user has consented to that cookie category before firing the tag.
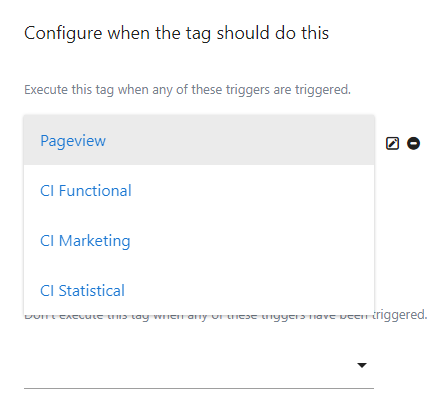
When setting up your tag, you should scroll down to the section called “Configure when the tag should do this”, as shown below.
You can choose the corresponding category based on the cookies that the tag will fire.
Once you have placed the correct triggers on your tags, the corresponding cookies should be held back from being fired until the user has given their consent.
If you have questions on how you can implement our solution into Matomo Tag Manager, please get in touch with us at support@cookieinformation.com