To make your consent popup match your website or brand, you can update its colors. Use the visual editor for Overlay v2 – Google Consent Mode v2 and Overlay v3 – Google Consent Mode v2 templates. Use developer mode for all other templates.
In this article, we’ll show you how to do it.
Before you start
Here are a few things to know before you start:
- You can use the visual editor only for Overlay v2 – Google Consent Mode v2 and Overlay v3 – Google Consent Mode v2 templates.
- You can’t edit templates that were published before the visual editor was released in the visual editor. To use the visual editor, choose a new template from Template gallery.
- Templates created before the visual editor was released are automatically migrated to developer mode. Developer mode lets you manually edit HTML, CSS, or JavaScript code.
- Once a template has been edited and saved in developer mode, that template and any copies of it can only be edited in developer mode.
- Starting from version 1.1.0, Overlay v2 and v3 templates support CSS variables. In December 2025, these templates were updated to version 1.2.0, so depending on when your setup was created or last updated, you may have version 1.1.0 or 1.2.0.
Change colors in the visual editor for Overlay v2 – Google Consent Mode v2
To change colors using the visual editor for supported templates, Overlay v2 – Google Consent Mode v2 and Overlay v3 – Google Consent Mode v2, follow these steps:
1. Log in to your Cookie Information account.
2. In Consent solutions, select the consent solution you want to update.
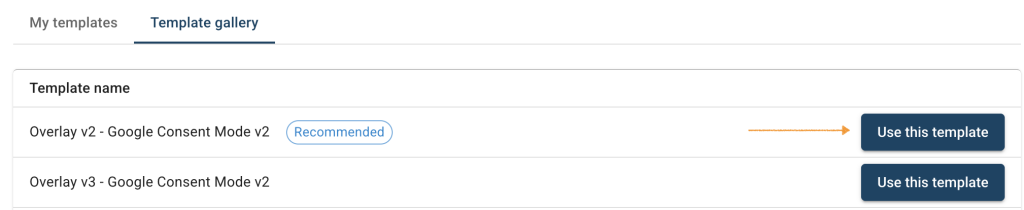
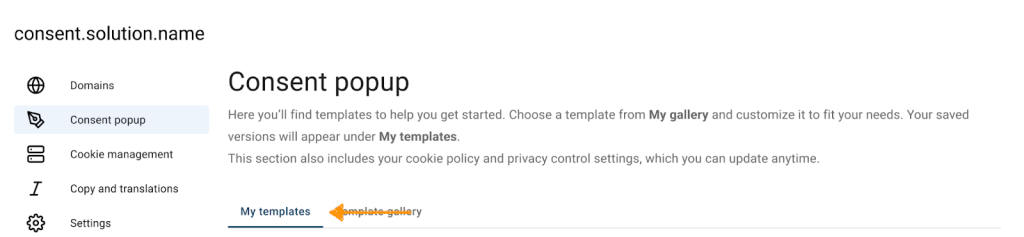
3. Go to Consent popup > Template gallery.
Note: You can’t edit the templates you published before this editor was released with the visual editor. You need to choose a new template from Template gallery.
4. Find the template, and click Use this template next to its name.
5. In Customize your template, you can style your template, for instance, the text color.
Note: In the visual editor, settings are grouped into sections:
- General appearance – Set background and overlay colors, border radius, spacing, and overall layout.
- Typography – Choose fonts and size, and link appearance.
- Buttons – Set up button colors, hover states, and border radius.
- Toggles – Adjust colors and style for toggle switches.
6. Go to General appearance > Colors
7. Click the color box next to the Text field. This opens the color picker.
8. Use your mouse to drag the circle to your desired color.

Note: To change the color, you can also enter a HEX code, for example, #3c88ae, in the field, or adjust the RGB values at the bottom if needed.
11. Once you’ve picked your color, the color box and HEX field will update automatically.
12. Click Save and publish.
Note: Clicking Save only saves changes to your template. To publish the updated template, click Save and publish.
13. Done
If your template isn’t supported in the visual editor, or if it has already been edited in developer mode, use the developer-mode instructions below.
Change colors in developer mode for template version 1.1.0
To change colors in developer mode for template version 1.1.0, follow these steps:
1. Log in to your Cookie Information account.
2. In Consent solutions, findthe consent solution you want to change the colors in the consent popup.
3. Go to Consent popup >My templates.

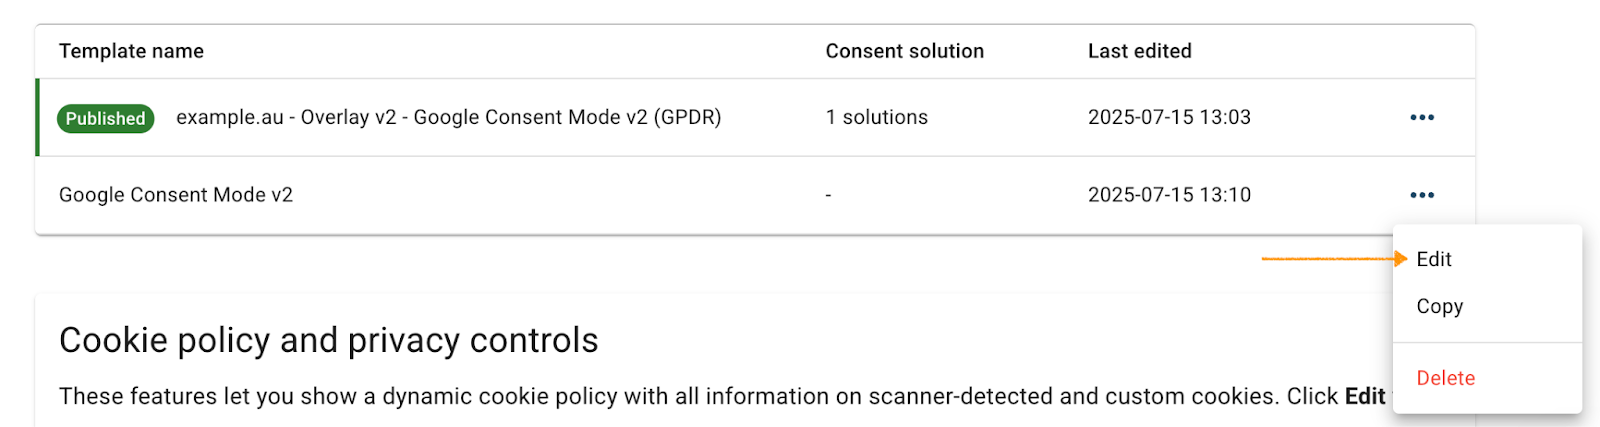
4. Find the template you want to update.

5. Click the ⋯ three-doticon next to the template name you want to change, then click Edit.

Note: The Published label shows which template is currently active for your consent popup:

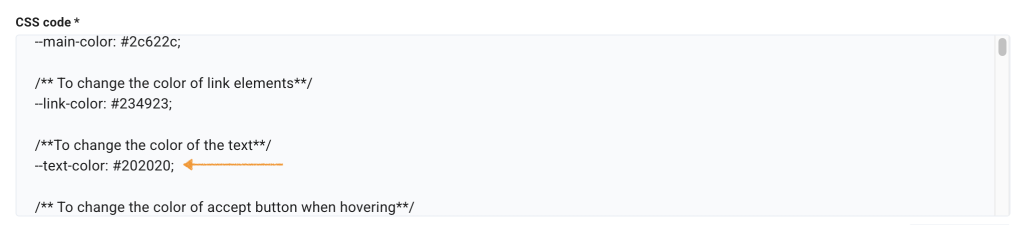
6. Let’s say you want to change the text color. In Template code, go to CSS code*.

Note: Make sure your template version is 1.1.0.
7. In CSS code, find the variable representing the text --text-color. You can use these variables in the CSS box:
| Variable name | Elements |
|---|---|
| –main-color | Renew icon colorAccept button colorConsent toggle colorCookie category link hover color |
| –link-color | About cookies linkData processor privacy policy linkAll links on the cookie policy page |
| –text-color | All non-clickable text Cookie category title (except Cookie Information branding text) |
| –hover-color | Accept buttons hover color |
| –decline-color | Decline all / Save settings / Settings button background color |
| –decline-text | Decline all / Save settings / Settings button text color |
| –decline-hover | Decline all / Save settings / Settings button background hover color |
| –footer-background | Changes the background color for the main text area, category toggles, cookie policy page and branding |
| –cookies-list-background | Changes the background color of the cookie list section |
| –cookies-details-divider | Changes the color of dividers between cookie items in that list |

8. Replace the current HEX value with the code for your preferred color, for example #262024.
Note: To change the colors of other popup elements, follow the same steps, but use the specific variable and the HEX code for your desired color.
9. Click Save.
Note: Clicking Save only saves changes to your template. To publish the updated template, click Save and publish.
10. Done.
Change colors in developer mode for template version 1.2.0
To change colors in a consent popup template version 1.2.0, follow these steps:
1. Log in to Cookie Information.
2. In Consent solutions, find the consent solution you want to change the colors in the consent popup.
3. Go to Consent popup > My templates.
4. Find the template you want to edit.

Note: Make sure your template version is 1.2.0.
5. Click the ⋯ three-dot icon next to the template name you want to change, then click Edit.
6. Let’s say you want to change the text color. Go to Template code.
7. In CSS code*, find the variable representing the text --popup-text-color. You can use these variables in the CSS box:
| Variable name | What it changes | Notes |
|---|---|---|
| –popup-overlay-opacity | Overlay darkness behind the popup | Higher = darker overlay (example: 0.7) |
| –popup-bg-color–primary | Popup background color | Example: #FFFFFF |
| –popup-bg-color–secondary | The background of the cookie categories section | Example: #F4F7F7 |
| –popup-text-color | Popup text color | Uses RGB values (example: 32, 32, 32) |
| –popup-link-color | Popup link color | Example: #234923 |
| –popup-border-color | Popup border color | Example: unset |
| –popup-button-color | Link underline / decoration style (global*) | Also affects the button that opens the popup |
| –popup-button-font-color | All buttons background color | Example: #FFFFFF |
| –popup-button-color–hover | All buttons text color | Example: #234923 |
| –popup-button-font-color–hover | All buttons’ background color on hover | Example: #FFFFFF |
| –popup-toggle-bg-color–active | Active toggle background color | Example: #2C622C |
| –popup-toggle-bg-color–inactive | Inactive toggle background color | Example: #7D8A89 |
| –popup-toggle-icon-color | Toggle knob color | Example: #FFFFFF |
*Global means “default.” It’s used across the popup unless a more specific setting changes it for a specific element.
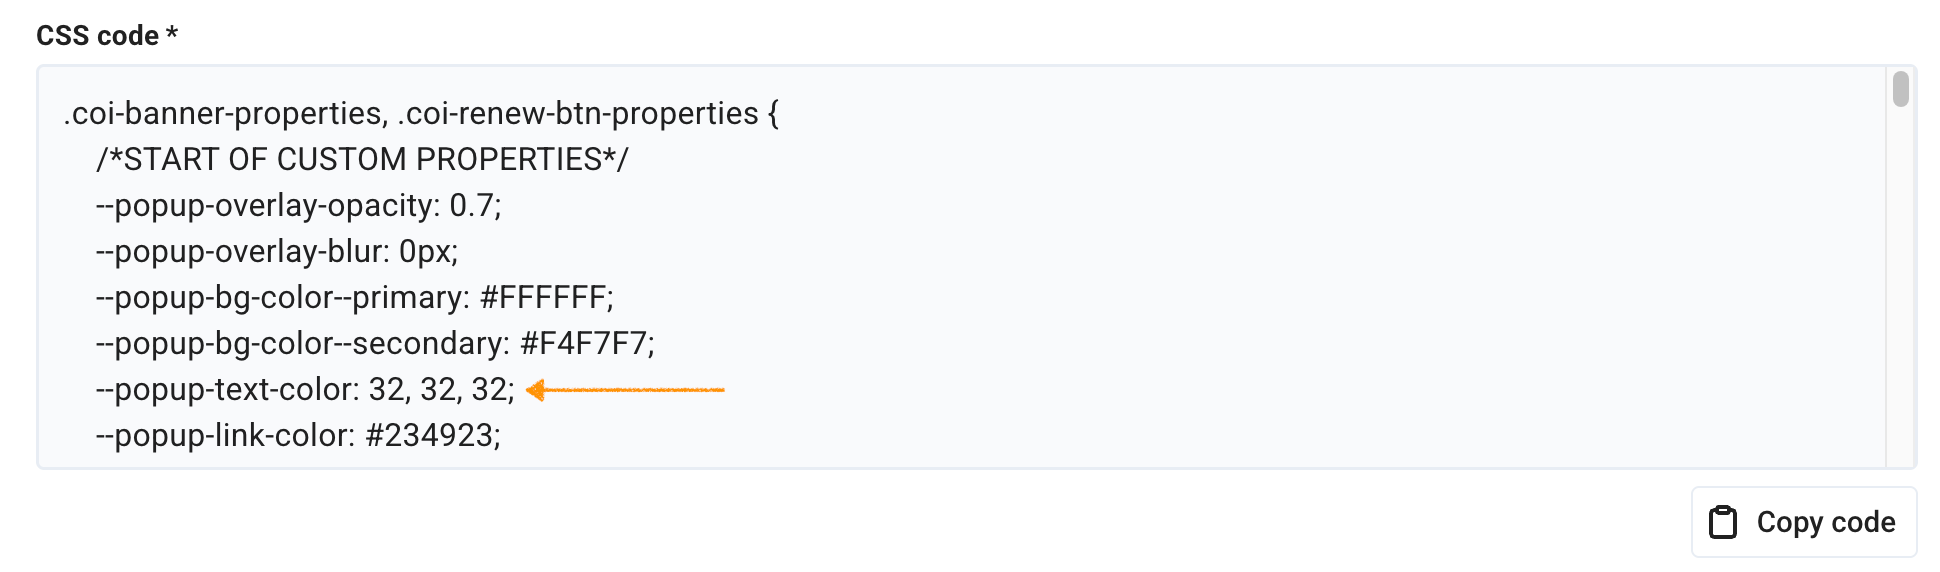
8. Replace the current RGB values, 32, 32, 32, with the code for your desired color.
Note:
- RGB stands for red, green, and blue, the three primary colors of light used in digital screens. RGB values define a color by mixing different intensities of each color. You provide three values, one for each color.
- Each value must be a number from 0 to 255, separated by commas. For example:
rgb(0, 0, 0)= blackrgb(255, 255, 255)= whitergb(255, 255, 0)= yellow
9. Once you’ve done with the changes, click Save and publish.
Note: Clicking Save only saves changes to your template. To publish the updated template, click Save and publish.
10. Done