In this article, we’ll show you how to change the size of the consent popup.
Before you start
Here are a few things to know before you start:
- The following guide is for Overlay v2 and Overlay v3 templates, version 1.1.0 or higher. The older versions might need different changes.
Change the size of the consent popup
To change the size of the consent Overlay v2 and Overlay v3 templates, follow these steps:
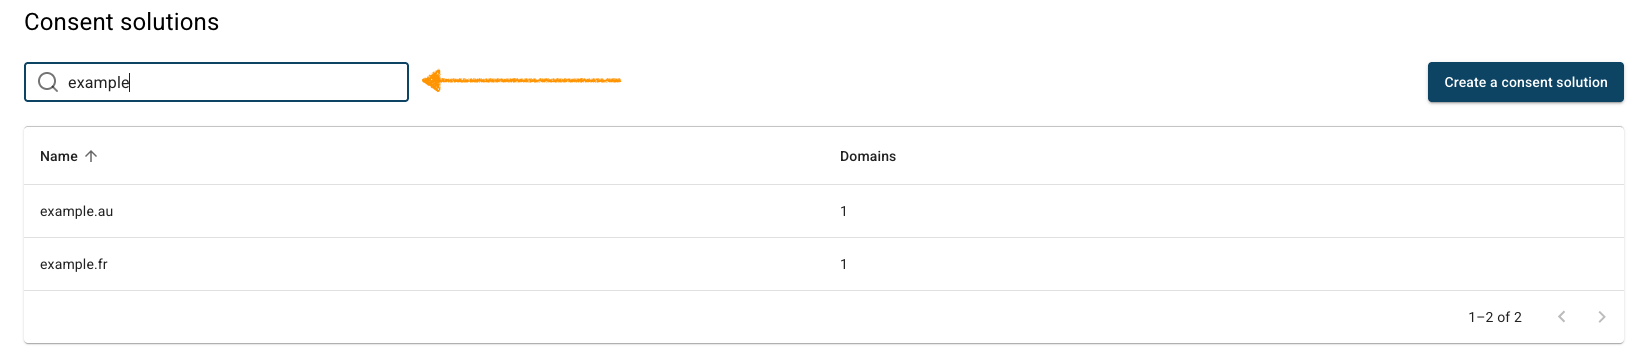
1. Log in to your Cookie Information account.
2. In Consent solutions, find the consent solution you want to change the popup size.
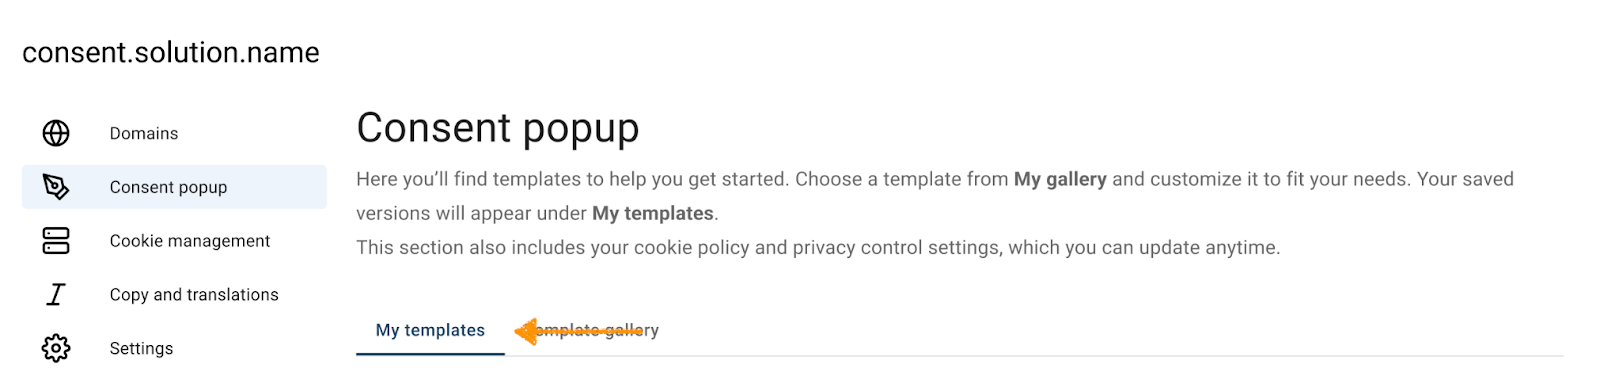
3. Go to Consent popup > My templates.
4. Find the consent template you want to resize.
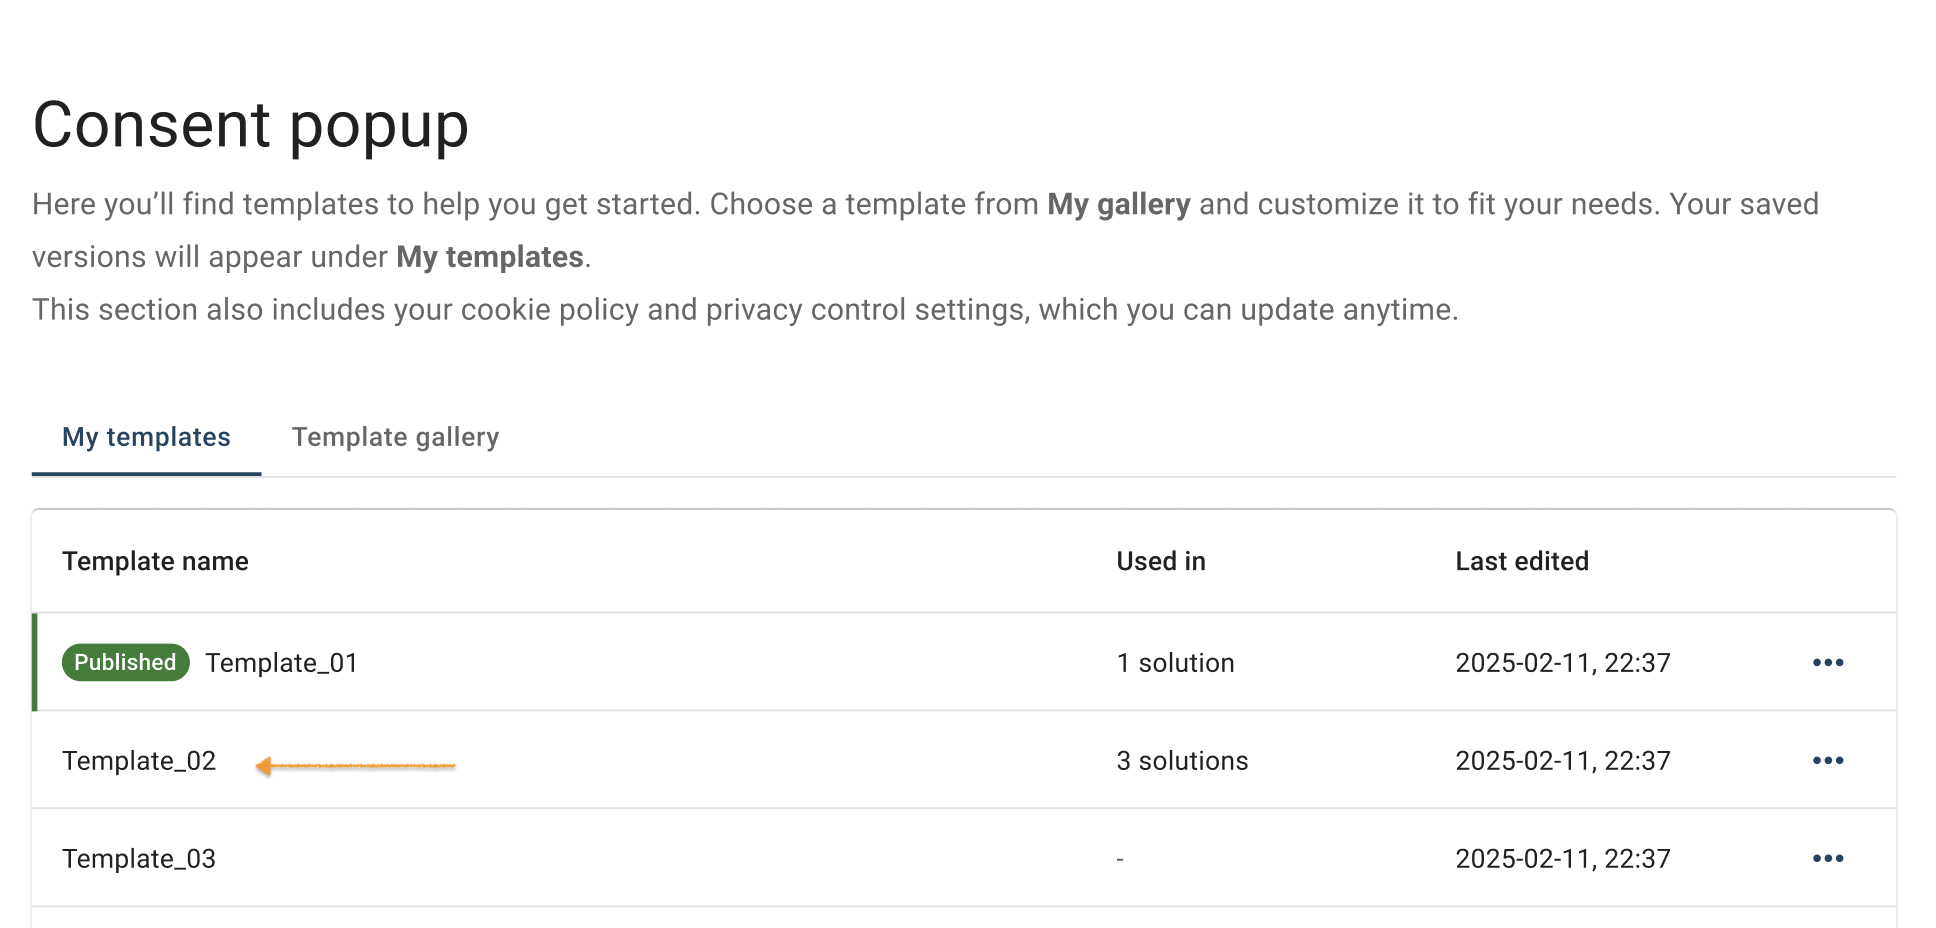
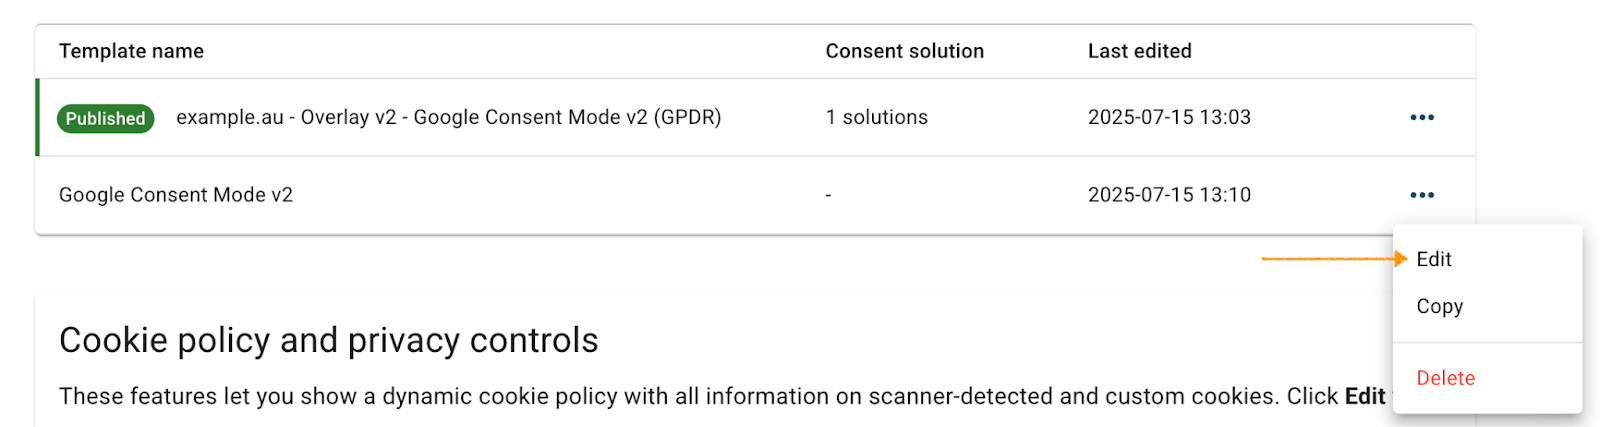
5. Click the ⋯ three-dot icon next to the template name you want to change, then click Edit.
Note: The Published label shows which template is currently active for your consent popup:

6. In Template code, go to CSS.
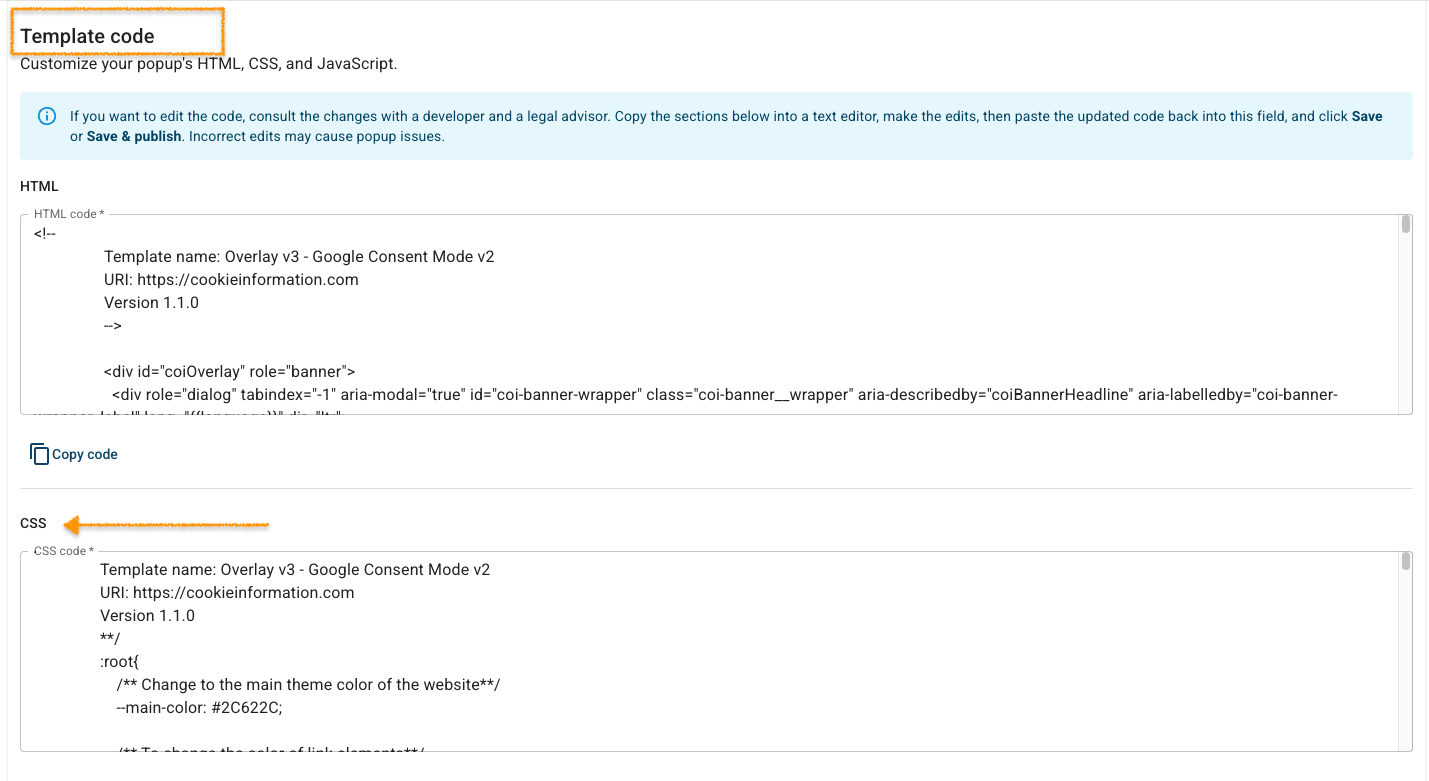
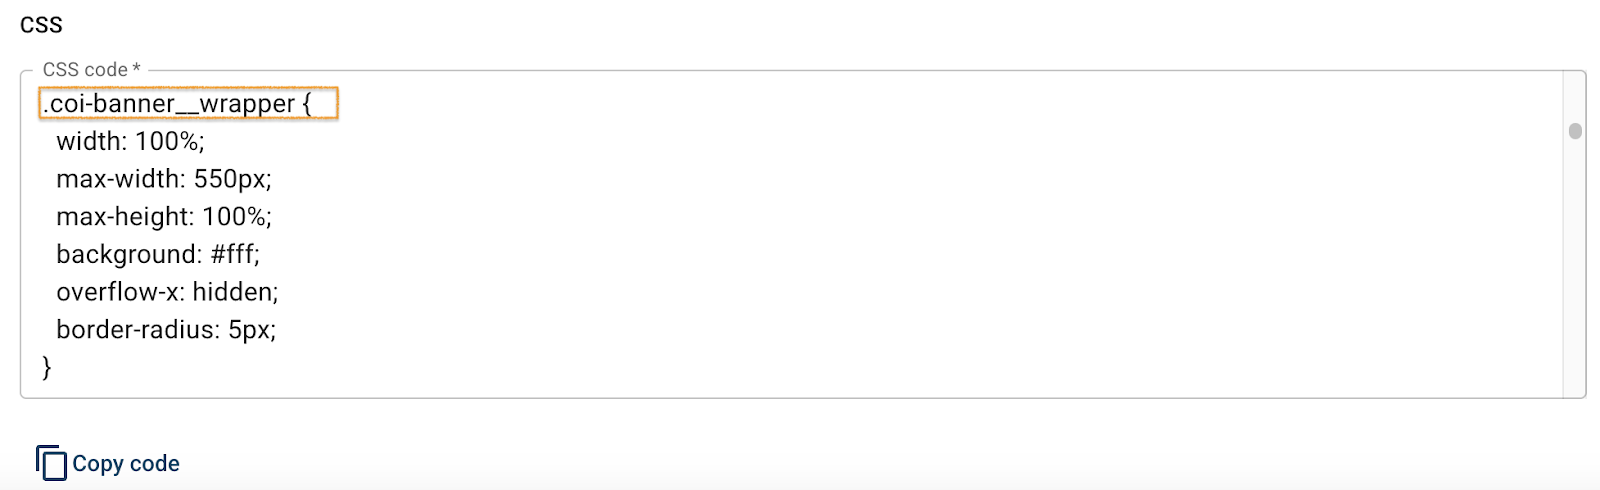
7. In CSS code, find the CSS class .coi-banner__wrapper.
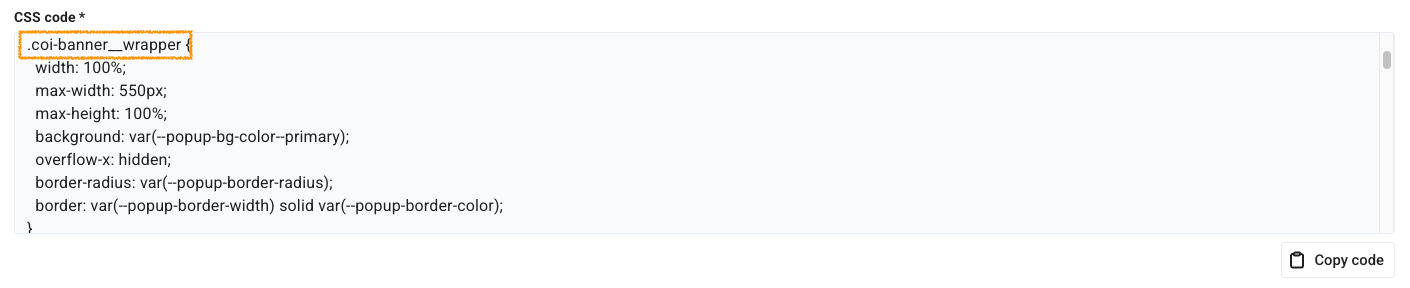
Note: In December 2025, we updated the Overlay v2 and v3 templates to version 1.2.0. You can still follow the same steps to change the popup size, but the code in your template may look slightly different:
8. You can adjust the width and height of the popup by changing the following values:
width: 600pxmax-width: 100%max-height: 100%
9. Click Save.
Note: Clicking Save only saves changes to your template. To publish the updated template, click Save and publish.
10. Done.