With the latest release, you can edit the Overlay v2 – Google Consent Mode v2 and Overlay v3 – Google Consent Mode v2 templates in the visual editor.
In this article, we’ll show you how to edit the Overlay v2 – Google Consent Mode v2 template in the visual editor.
Before you start
Here are a few things to know before you start:
- You can use the visual editor only for Overlay v2 – Google Consent Mode v2, and Overlay v3 – Google Consent Mode v2 templates. But you can’t edit the templates you published before this editor was released with the visual editor. You need to choose a new template from Template gallery.
All templates that were created before the visual editor feature was released are migrated automatically to developer mode. Developer mode is an editor that lets you manually edit HTML, CSS, or JavaScript code.

- Once a template has been edited and saved in developer mode, it and any copies of it can only be edited in developer mode.
- If you want to keep using the visual editor, make sure you copy a template that was originally edited in the visual editor.
- When you switch between the visual editor and developer mode in the same editing session, unsaved changes stay only in the mode where you made them. After you save the latest version in the visual editor, it will be available in developer mode too.
Edit your template in the visual editor
To edit the Overlay v2 – Google Consent Mode v2 template in the visual editor, follow these steps:
1. Log in to Cookie Information.
2. In Consent solutions, find the consent solution you want to edit the consent popup template.

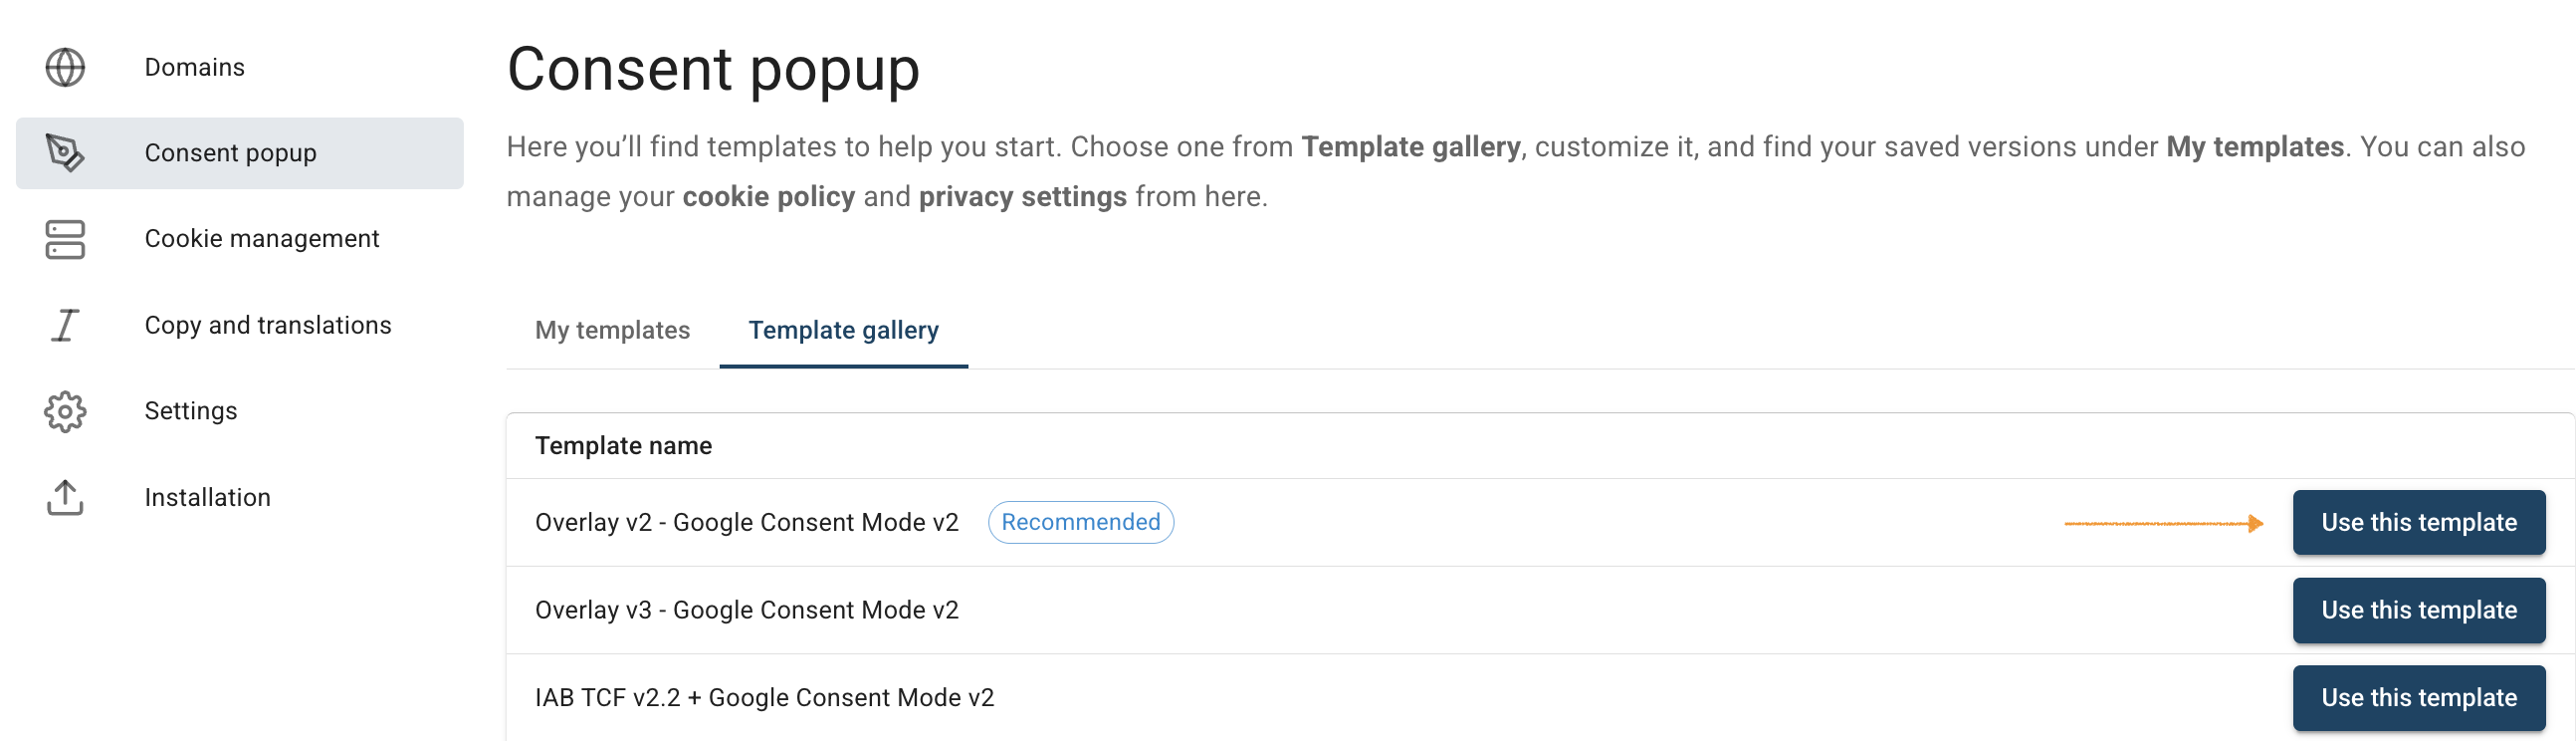
3. Go to Consent popup > Template gallery.
Note: You can’t edit the templates you published before this editor was released with the visual editor. You need to choose a new template from Template gallery.
4. Find the template, and click Use this template next to its name.
5. In Customize your template, you can style your template.
6. In the visual editor, settings are grouped into sections:
- General appearance – Set background and overlay colors, border radius, spacing, and overall layout.
- Typography – Choose fonts and size, and link appearance.
- Buttons – Set up button colors, hover states, and border radius.
- Toggles – Adjust colors and style for toggle switches.
7. For each section, update the fields you need. For example, change the background color in General appearance.
8. Go to Colors > Background.
9. Click the color box next to the Background field. This opens the color picker.
10. Use your mouse to drag the circle to your desired color.
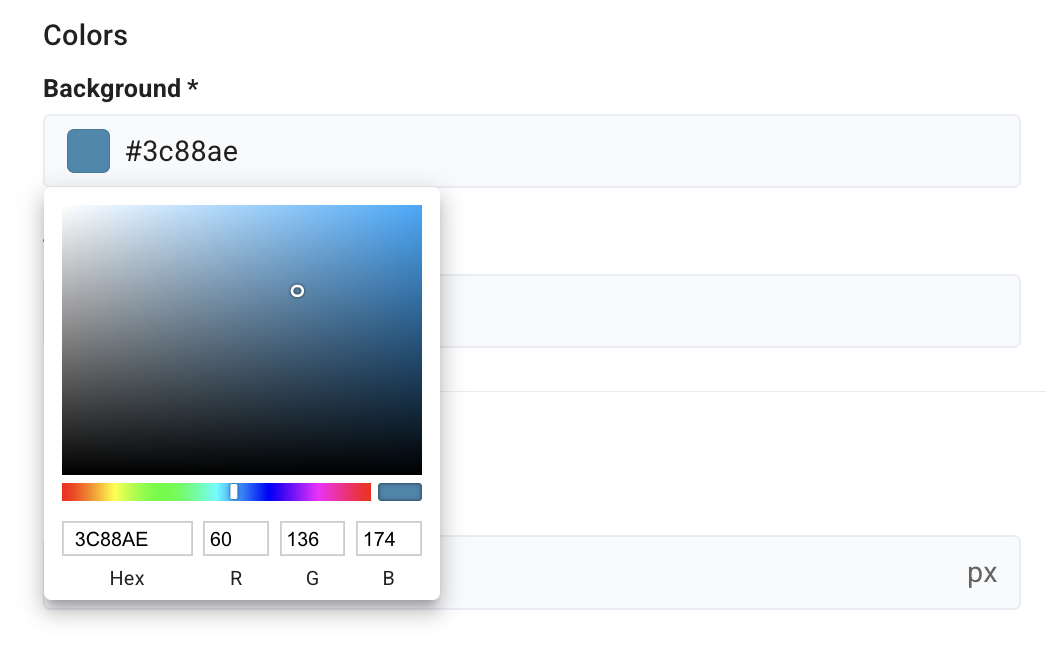
Note: To change the color, you can also enter a HEX code, for example, #3c88ae, in the field, or adjust the RGB values at the bottom if needed.
11. Once you’ve picked your color, the color box and HEX field will update automatically.
12. Click Save and publish.
Note:
- Clicking Save only saves changes to your template. To publish the updated template, click Save and publish.
- Changes to your consent template may take up to 10 minutes to appear on your domain.
13. Done.