If you’re using an older version of the Overlay v2 – Google Consent Mode v2 or Overlay v3 – Google Consent Mode v2 template, you’ll need to switch to the new version. The updated template now meets WCAG 2.2 accessibility standards.
After choosing the updated template version, you’ll need to reapply styling.
In this article, we’ll show you how to move from the old template to the new template version.
Before you start
Here are a few things to know before you start:
- Before you change a template, check which template version you’re using.
- We recommend using the latest version of templates to ensure everything works correctly. Before you change or update your template, check what template version you’re using.
- The following template versions meet WCAG 2.2 accessibility standards:
- Overlay v2 – Google consent mode v2: versions 1.1.0 and 1.2.0, 1.2.1
- Overlay v3 – Google consent mode v2: version 1.2.0
The update process is the same for all of them. In this article, we show the steps using the Overlay v2 – Google Consent Mode v2.
- When you update your template, it will revert to the default version. This means any changes you’ve made to the HTML, CSS, or JavaScript in Template code will be removed. That’s why, after selecting the new template version, you’ll need to reapply any customizations. Depending on your previous setup, this may include changing the colors, font sizes, or adding your logo.
Update your Overlay v2 – Google Consent Mode v2 template
To update your Overlay v2 – Google Consent Mode v2 template, follow these steps:
1. Log in to Cookie Information.
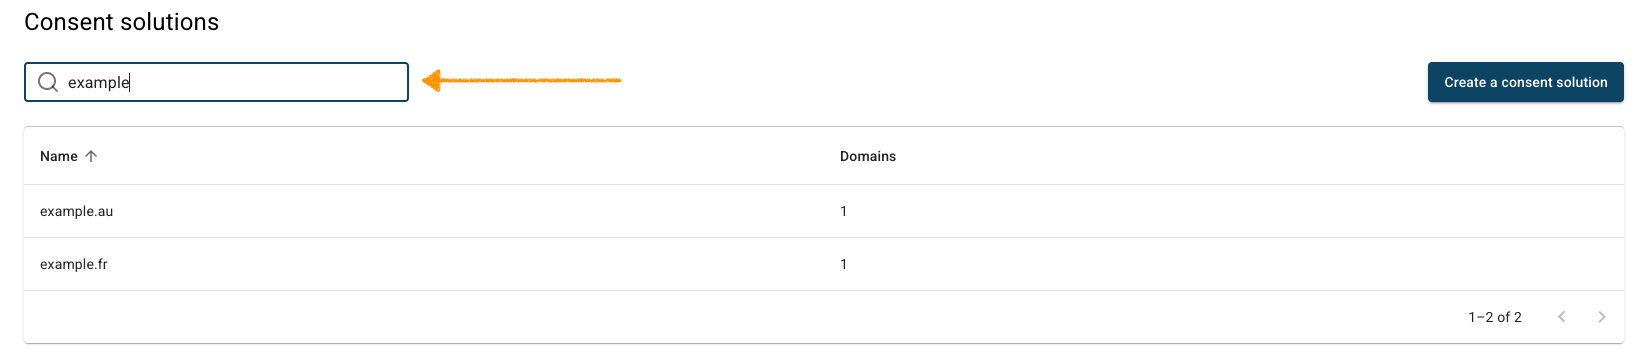
2. In Consent solutions, find the consent solution you want to update the consent popup template.
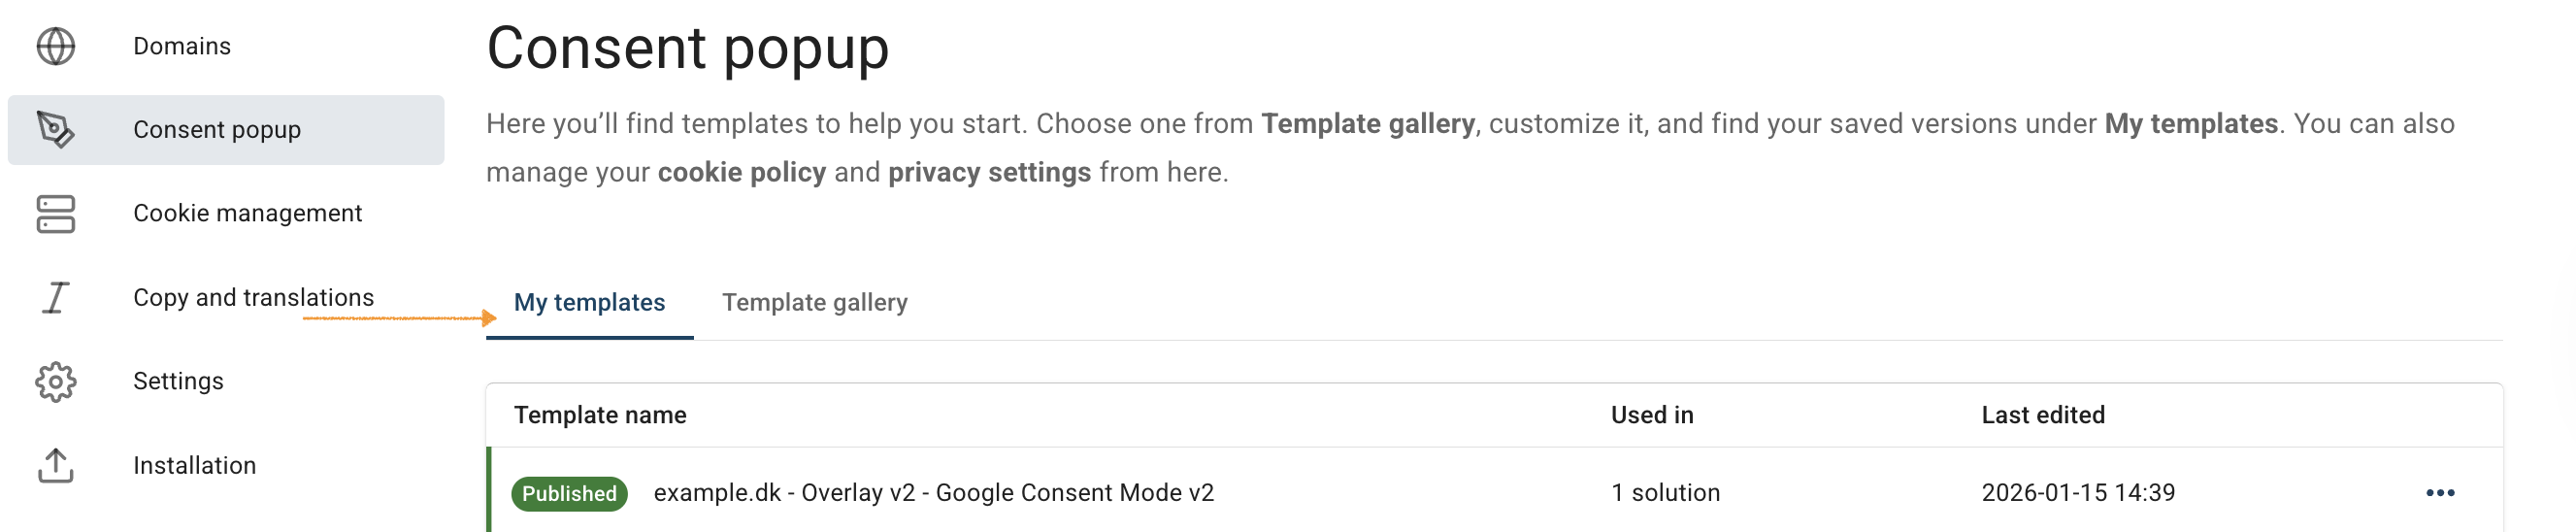
3. Go to Consent popup > My templates.
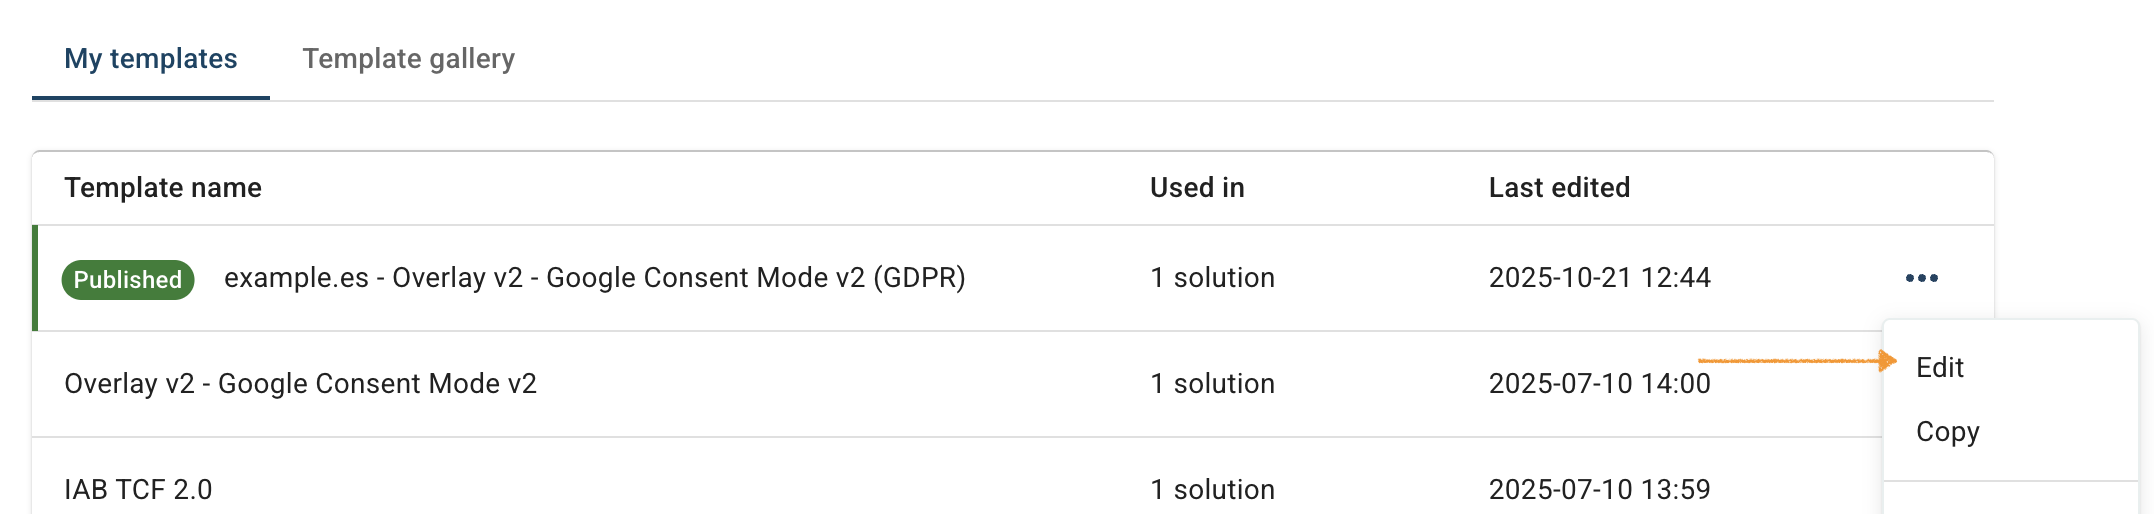
4. Find the Overlay v2 – Google Consent Mode v2.
5. Click the ⋯ three-dot icon next to the template, then click Edit.
6. In Template code, go to HTML code*
7. Look for the template version.
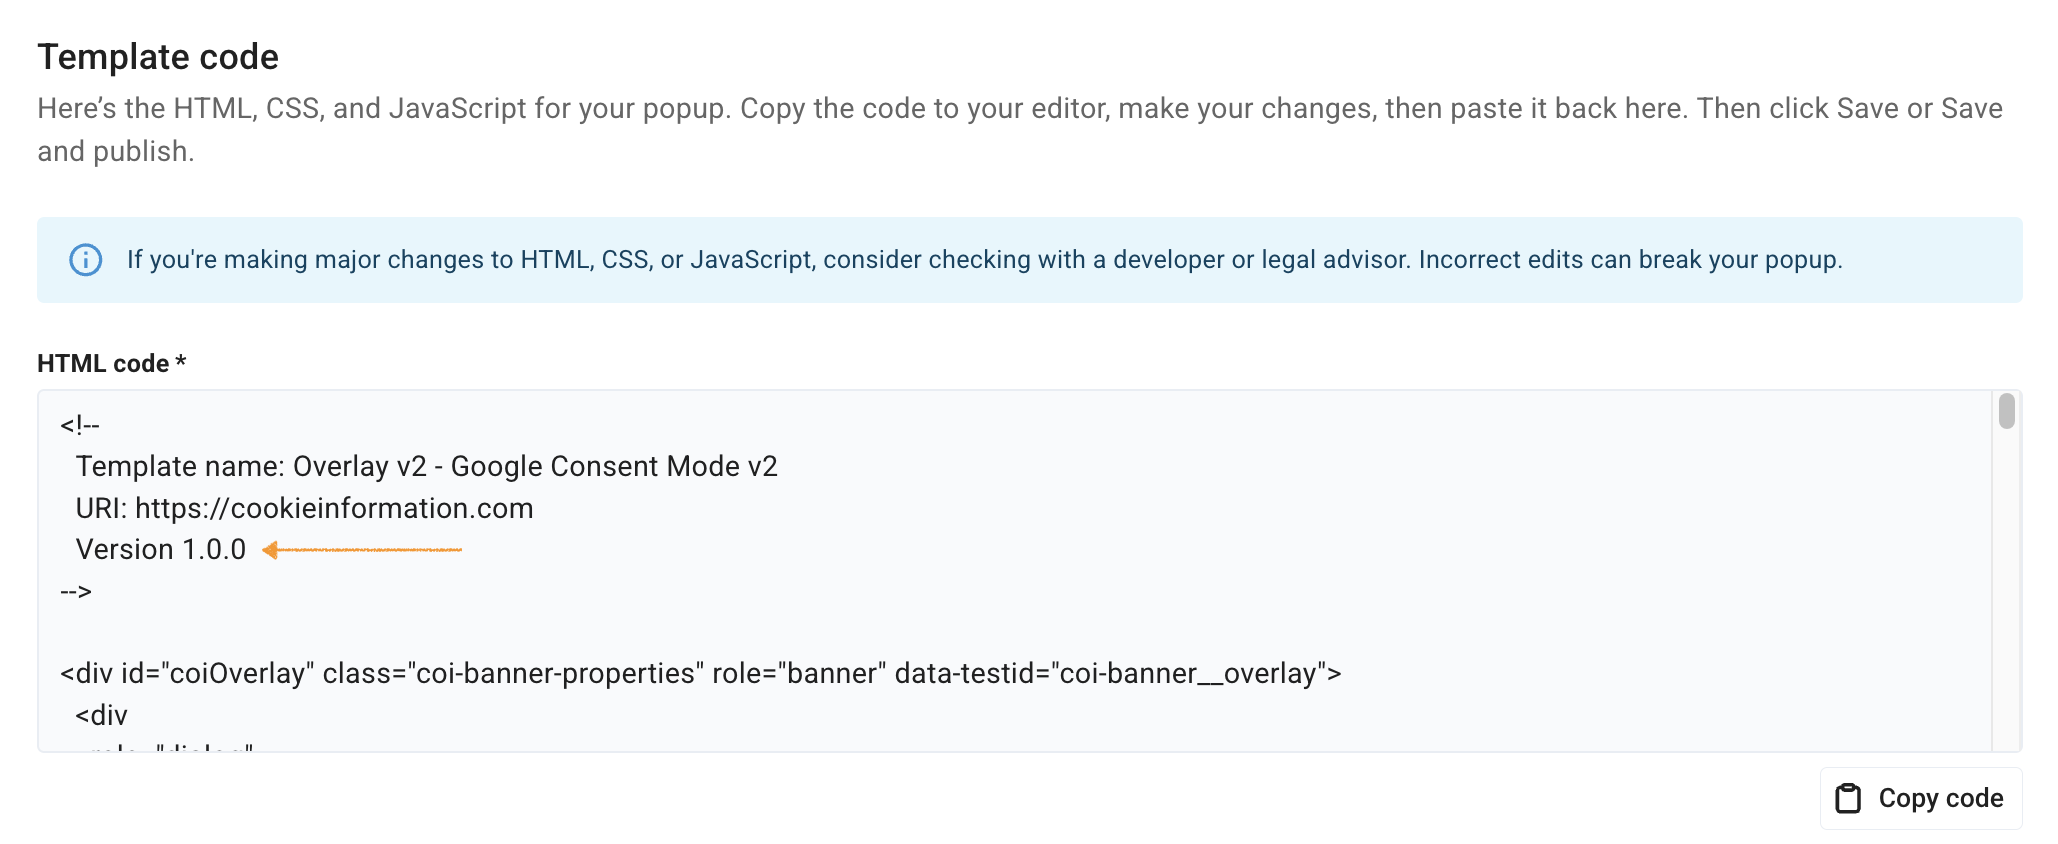
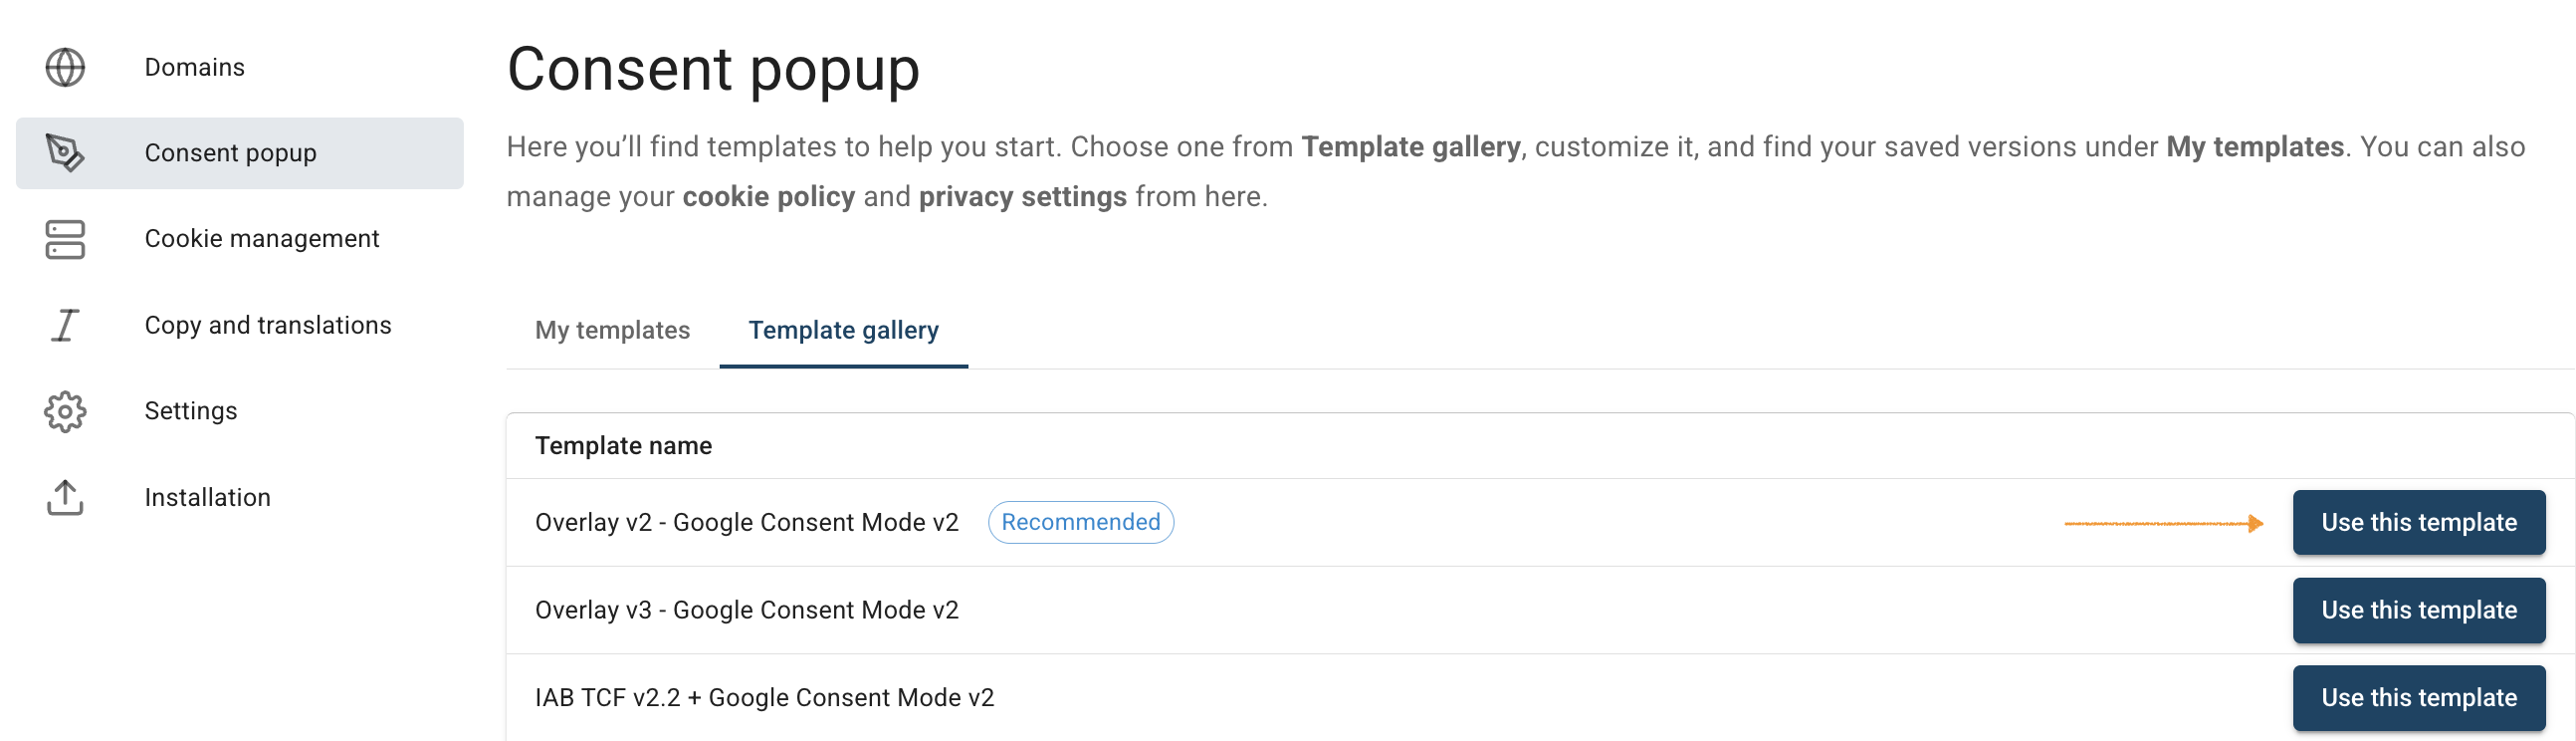
8. As 1.0.0 is an old version, you need to use the new one. Go to Consent popup > Template gallery.
9. Find Overlay v2 – Google Consent Mode v2.
Note: If you select any default template from Template gallery, it will revert to the default version. This means any changes you’ve made to the HTML, CSS, or JavaScript in the Template code section will be removed.
10. Click Use this template nextto the Overlay v2 – Google Consent Mode v2.
11. In Customize your template, you can now reapply any styling.
12. (Optional) To change the popup size, read more.
13. (Optional) To change the popup colors, read more.
14. (Optional) To change the font size and family, read more.
15. (Optional) To edit the logo in the popup, read more.
16. When you finish styling your popup, click Save and publish.
Note:
- Clicking Save only saves changes to your template. To publish the updated template, click Save and publish.
- Changes to your consent template may take up to 10 minutes to appear on your domain.
17. Done.