You will need a Exchange account with ApplicationImpersonations permissions to connect to your Exchange server. Step 1 till 9 of the following guide will show you how to add ApplicationImpersonations permissions to an existing account
- Go to Exchange Admin Center on your Exchange server (https://
/ecp) and log in using an Exchange admin account.
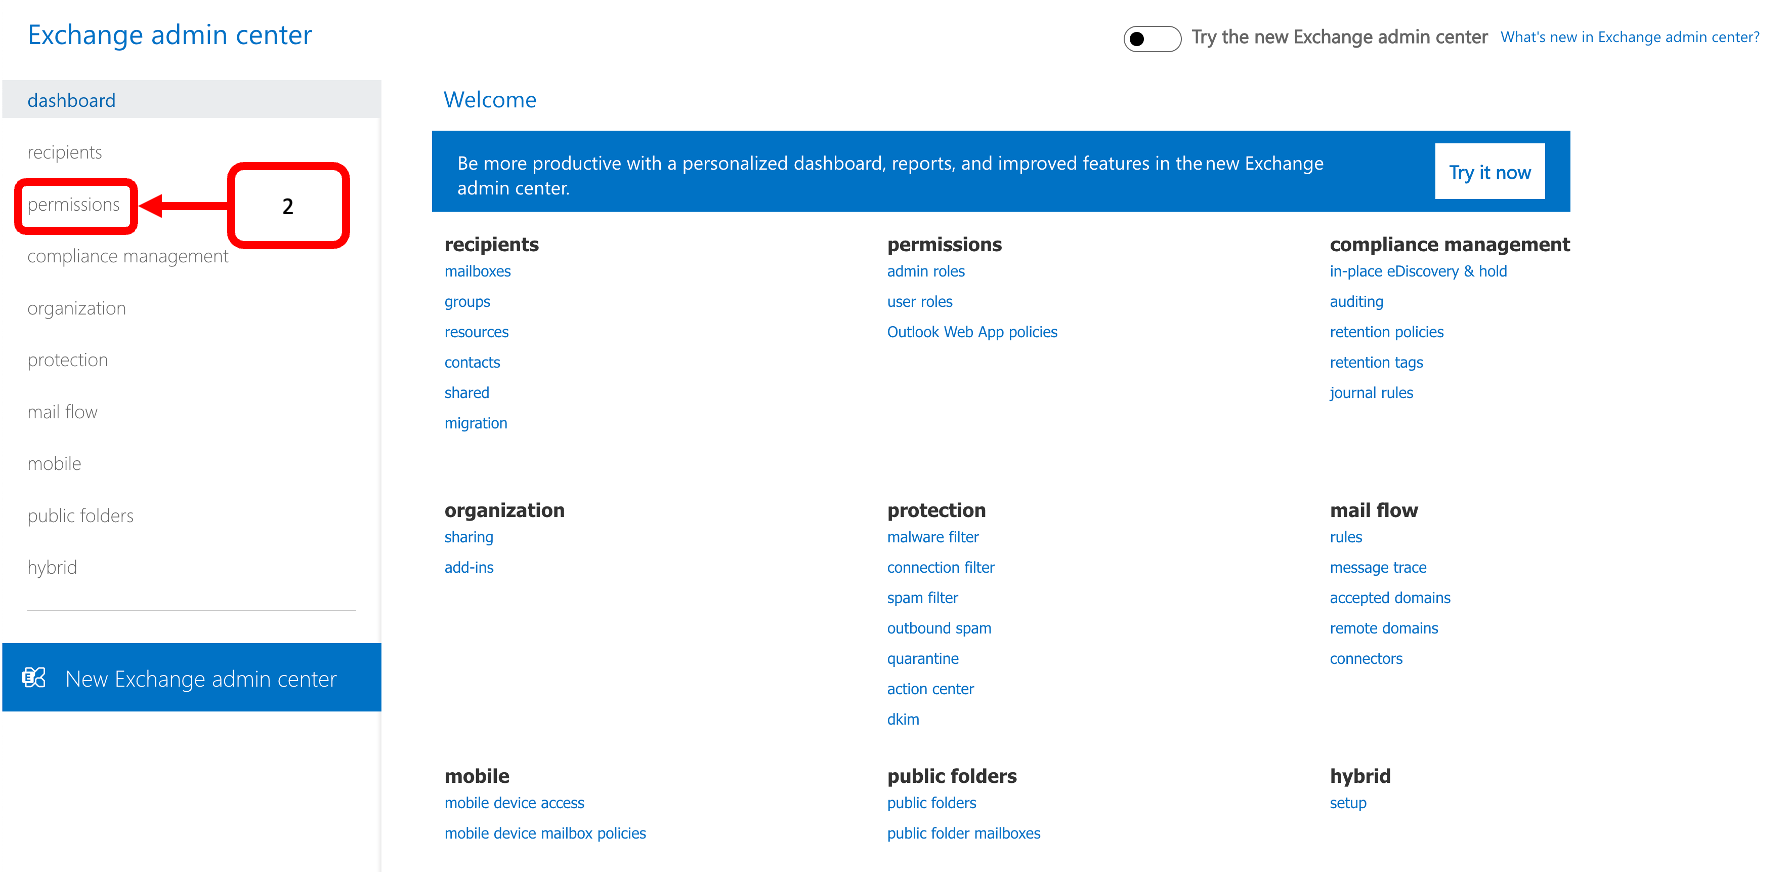
- Click permissions
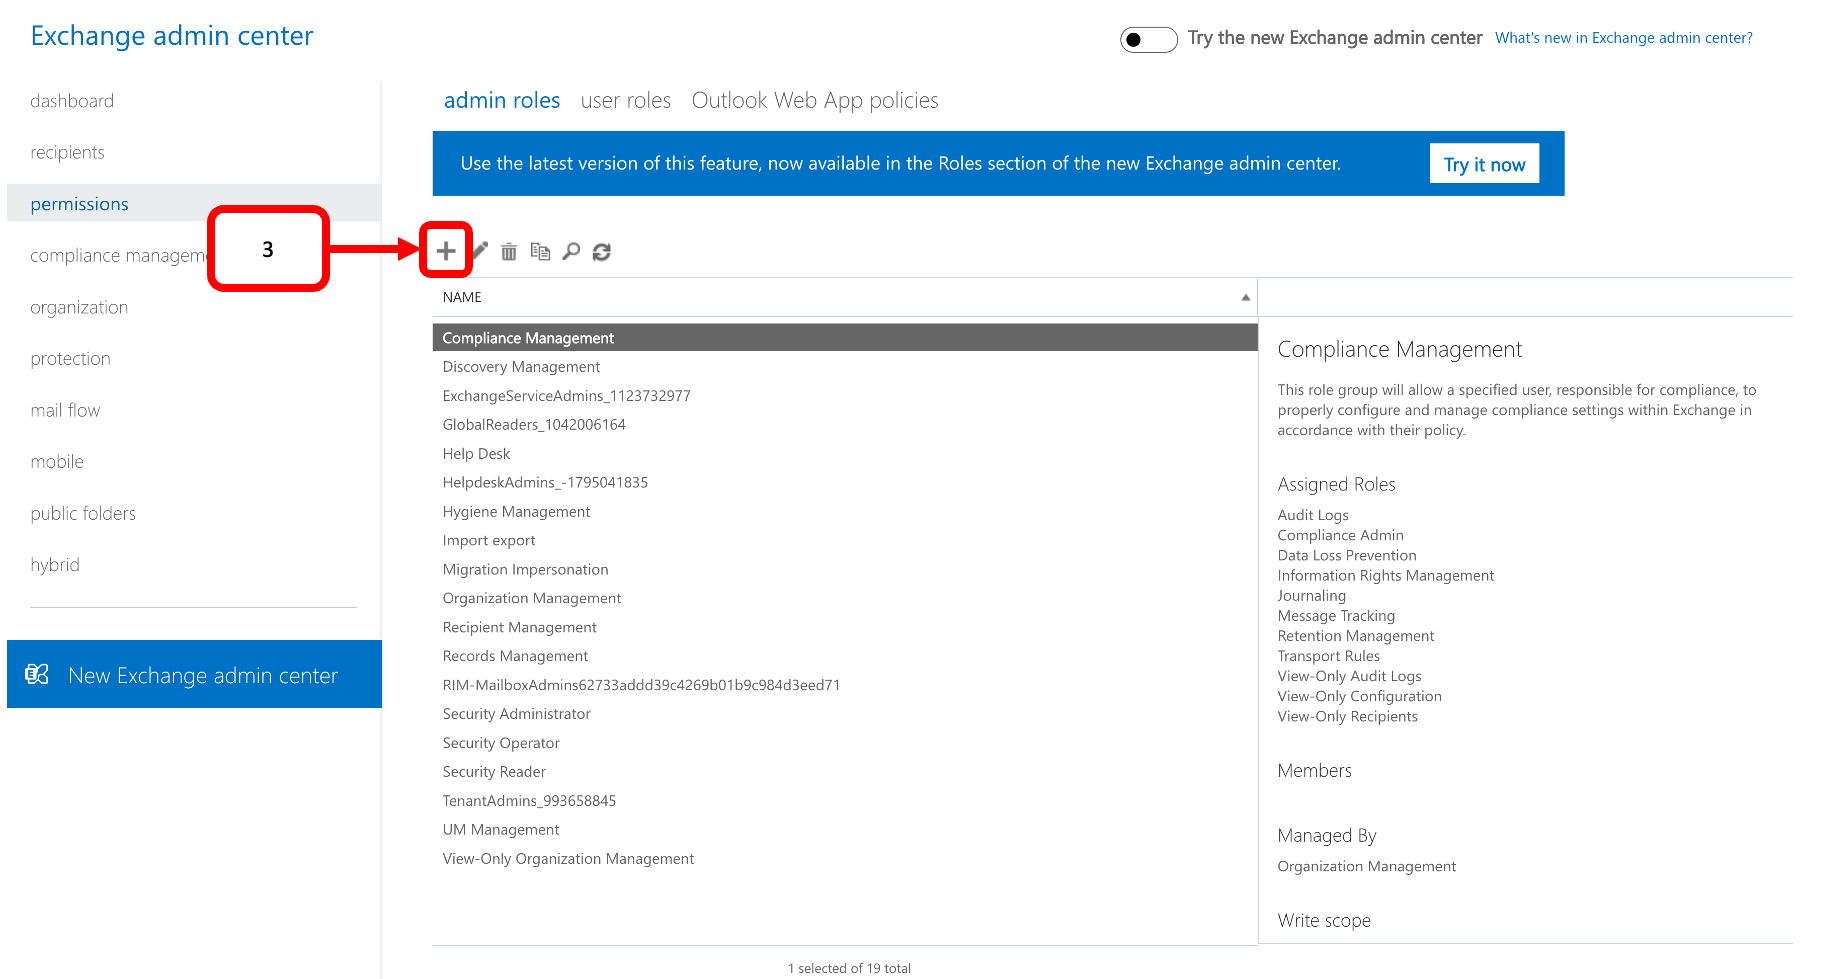
- Click on New
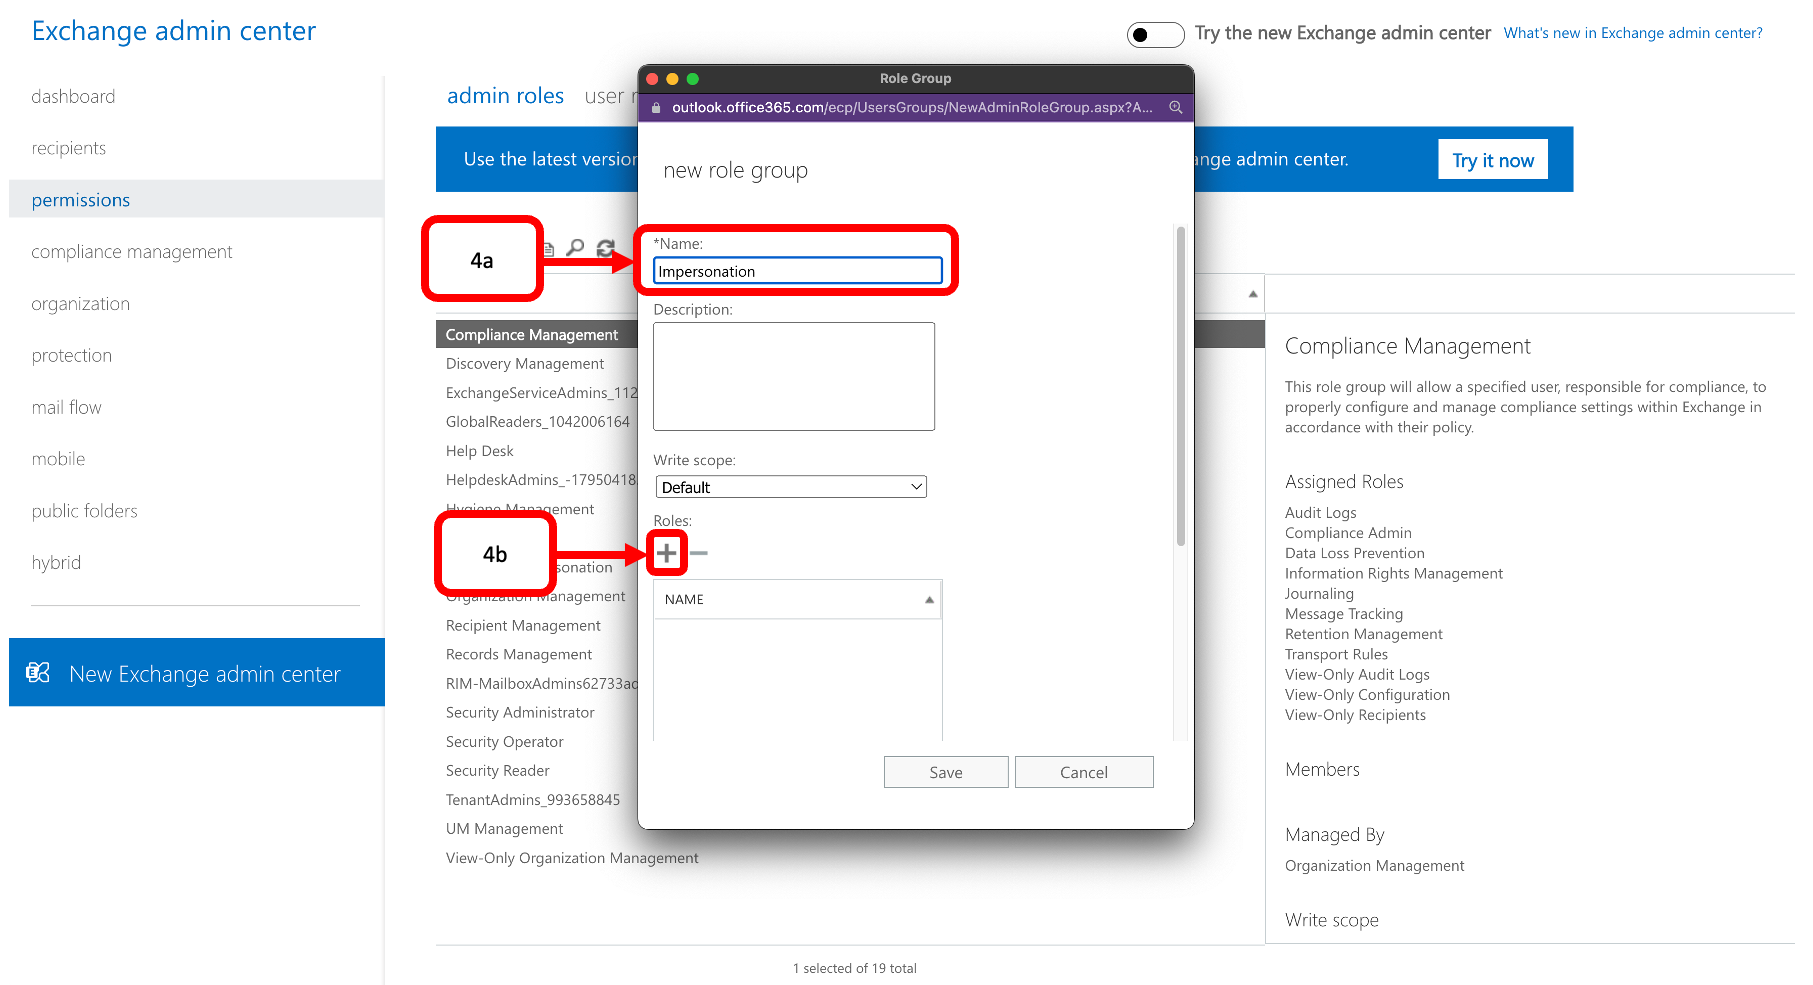
- Provide a name(4a) and click New(4b)
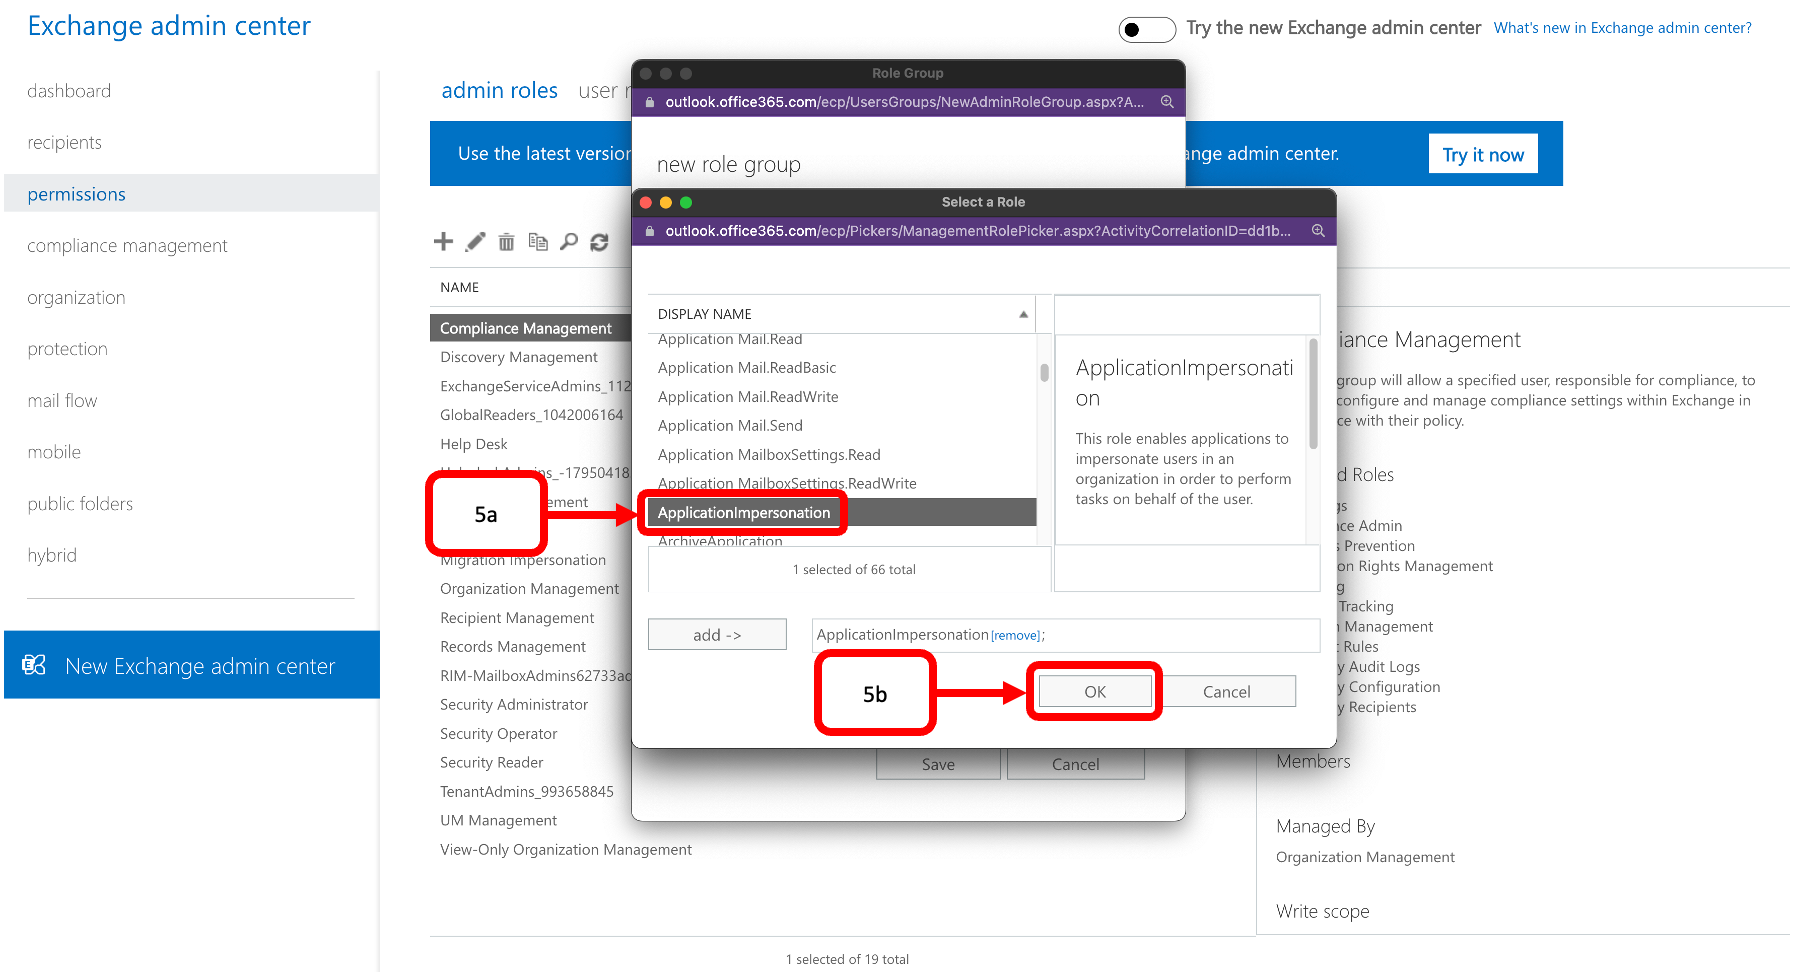
- Find ApplicationImpersonation in the list and double-click it(5a) and click OK(5b)
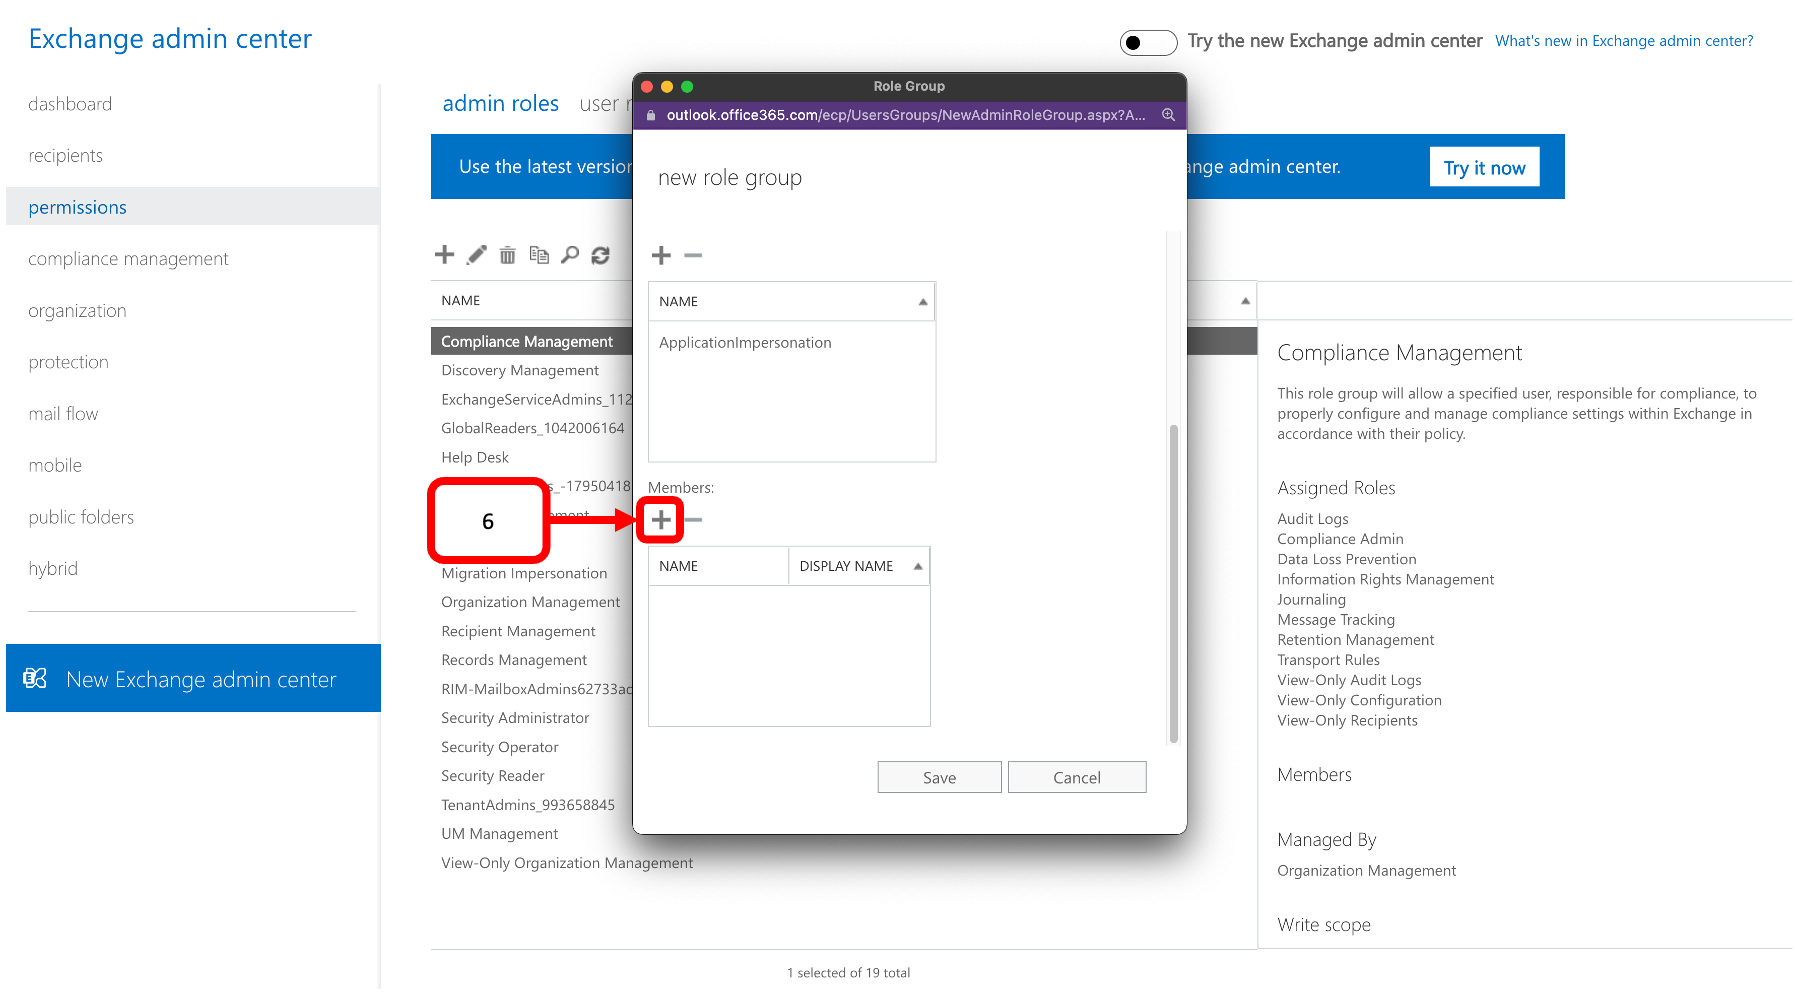
- Click New under Members
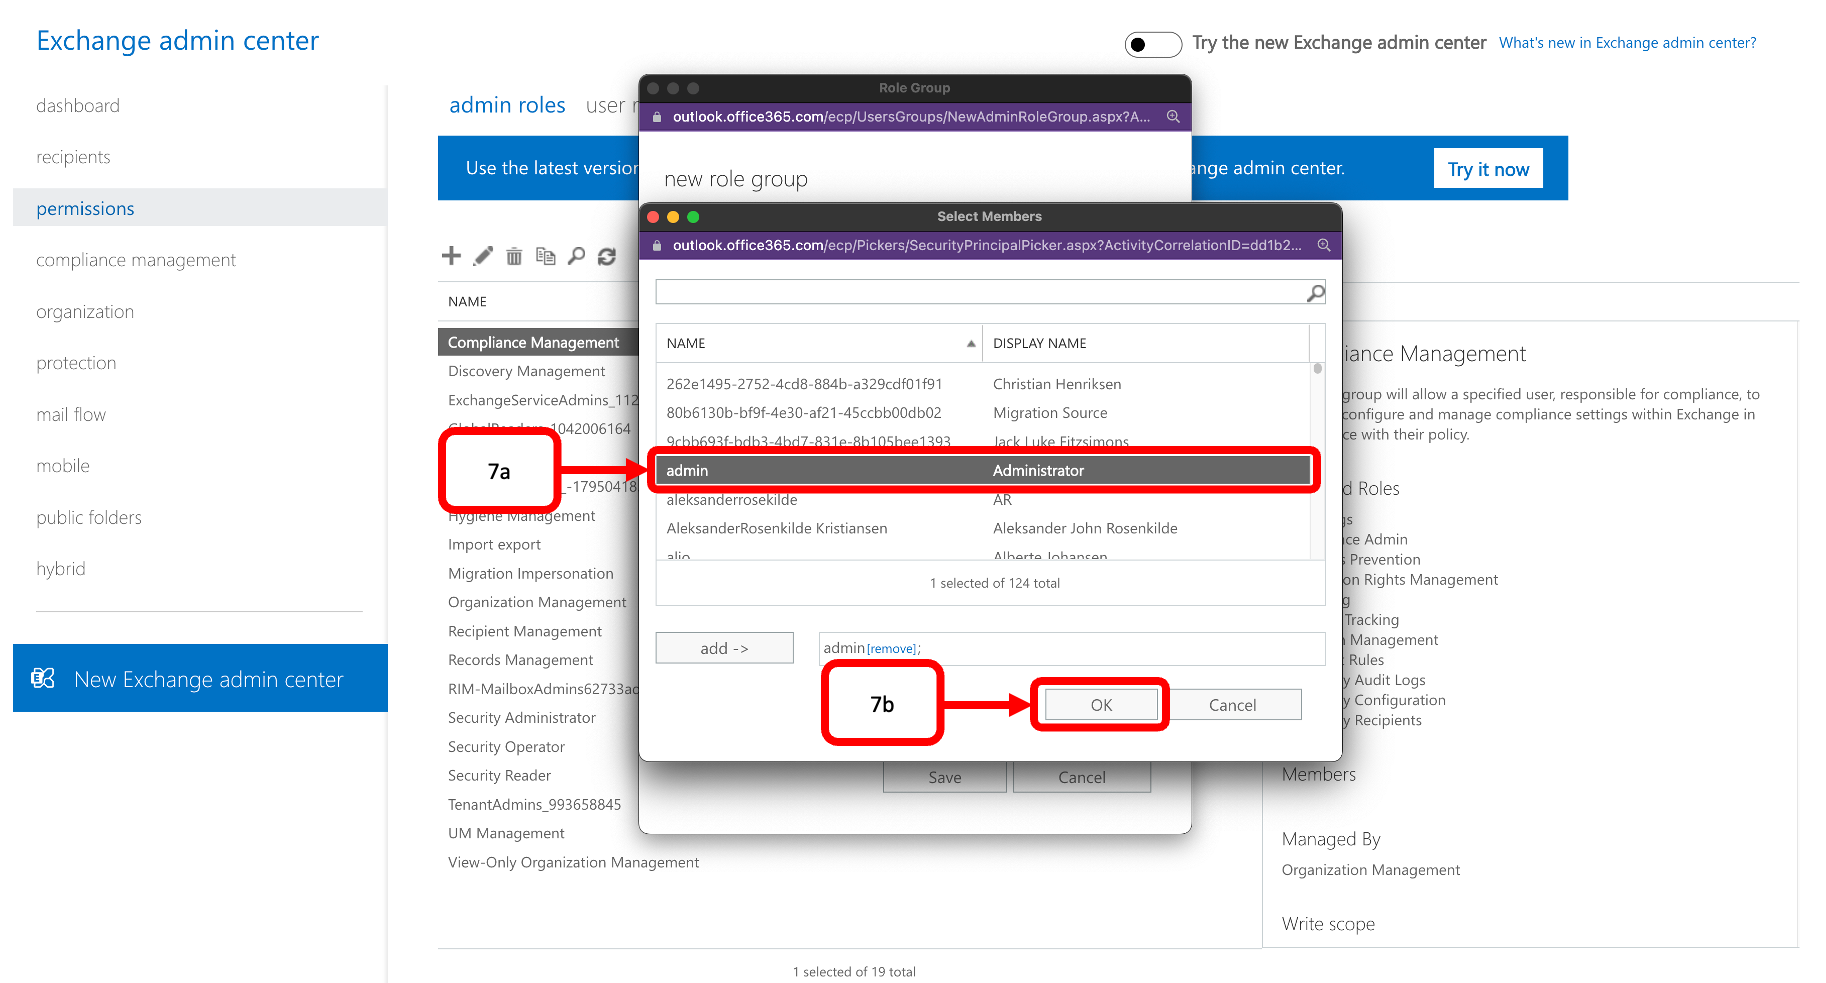
- Find the account to which you will assign ApplicationImpersonation permissions and double-click it(7a) and click OK(7b)
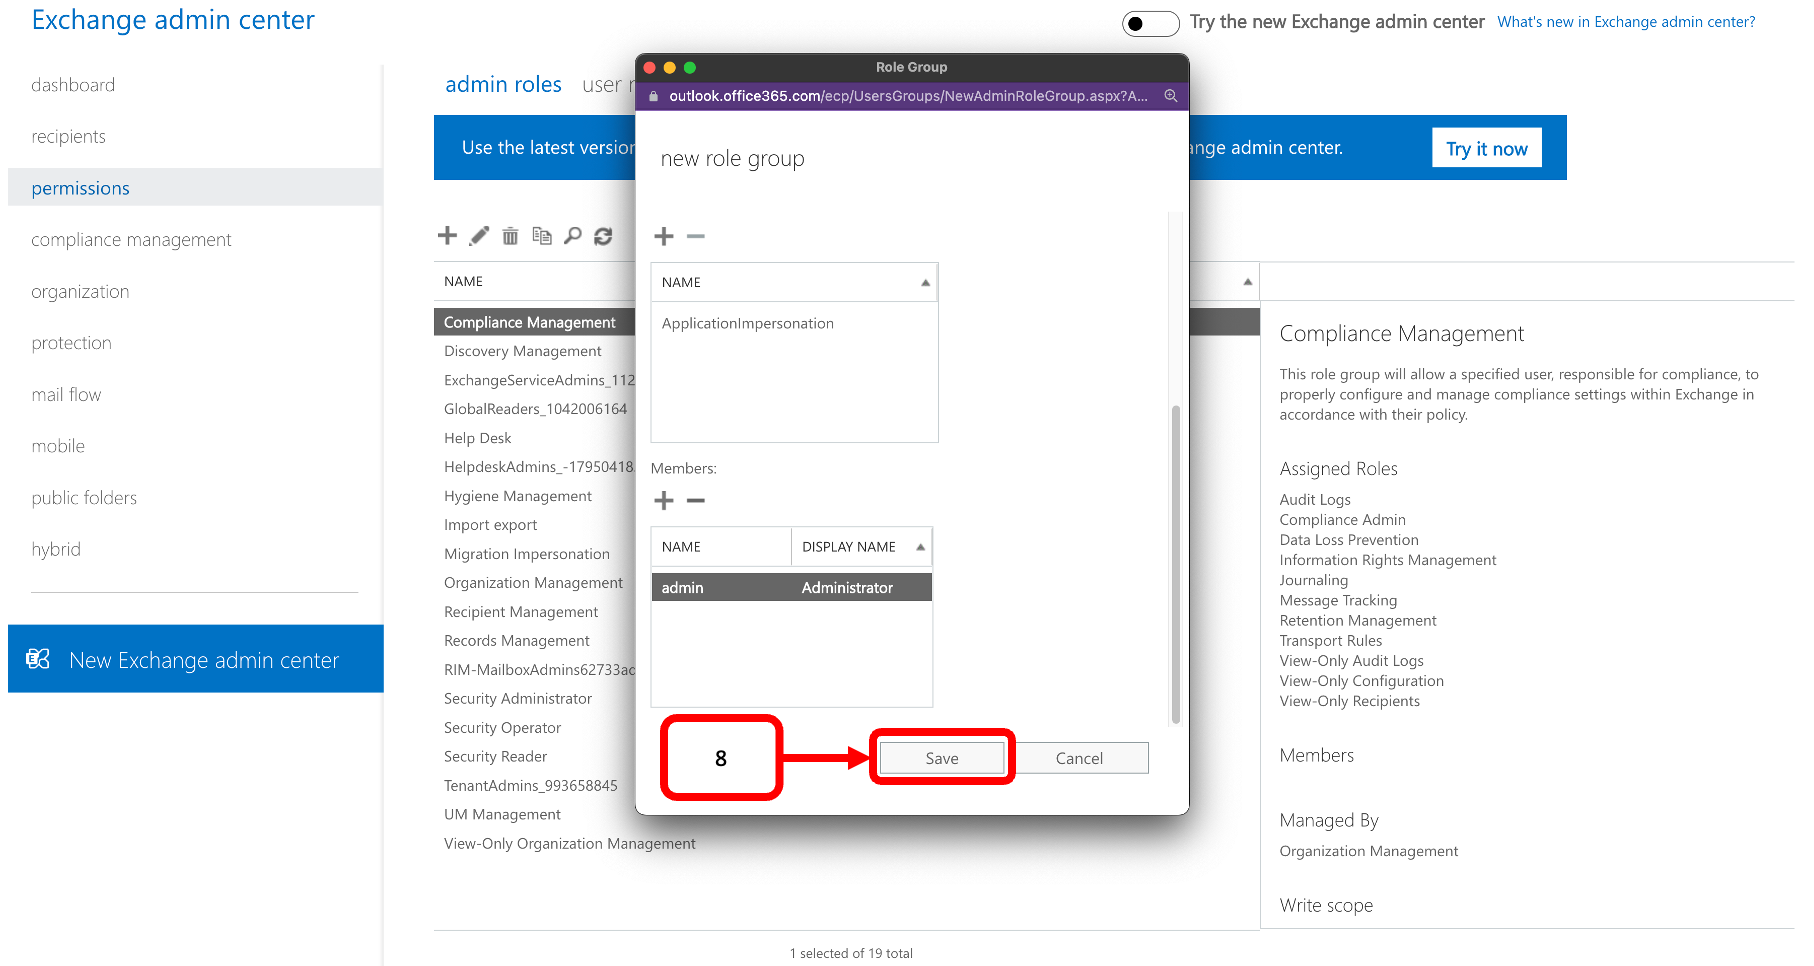
- Click Save
- Go to Data Discovery by Cookie Information and login
- Then go to the Integration page and click Connect on the Exchange Server
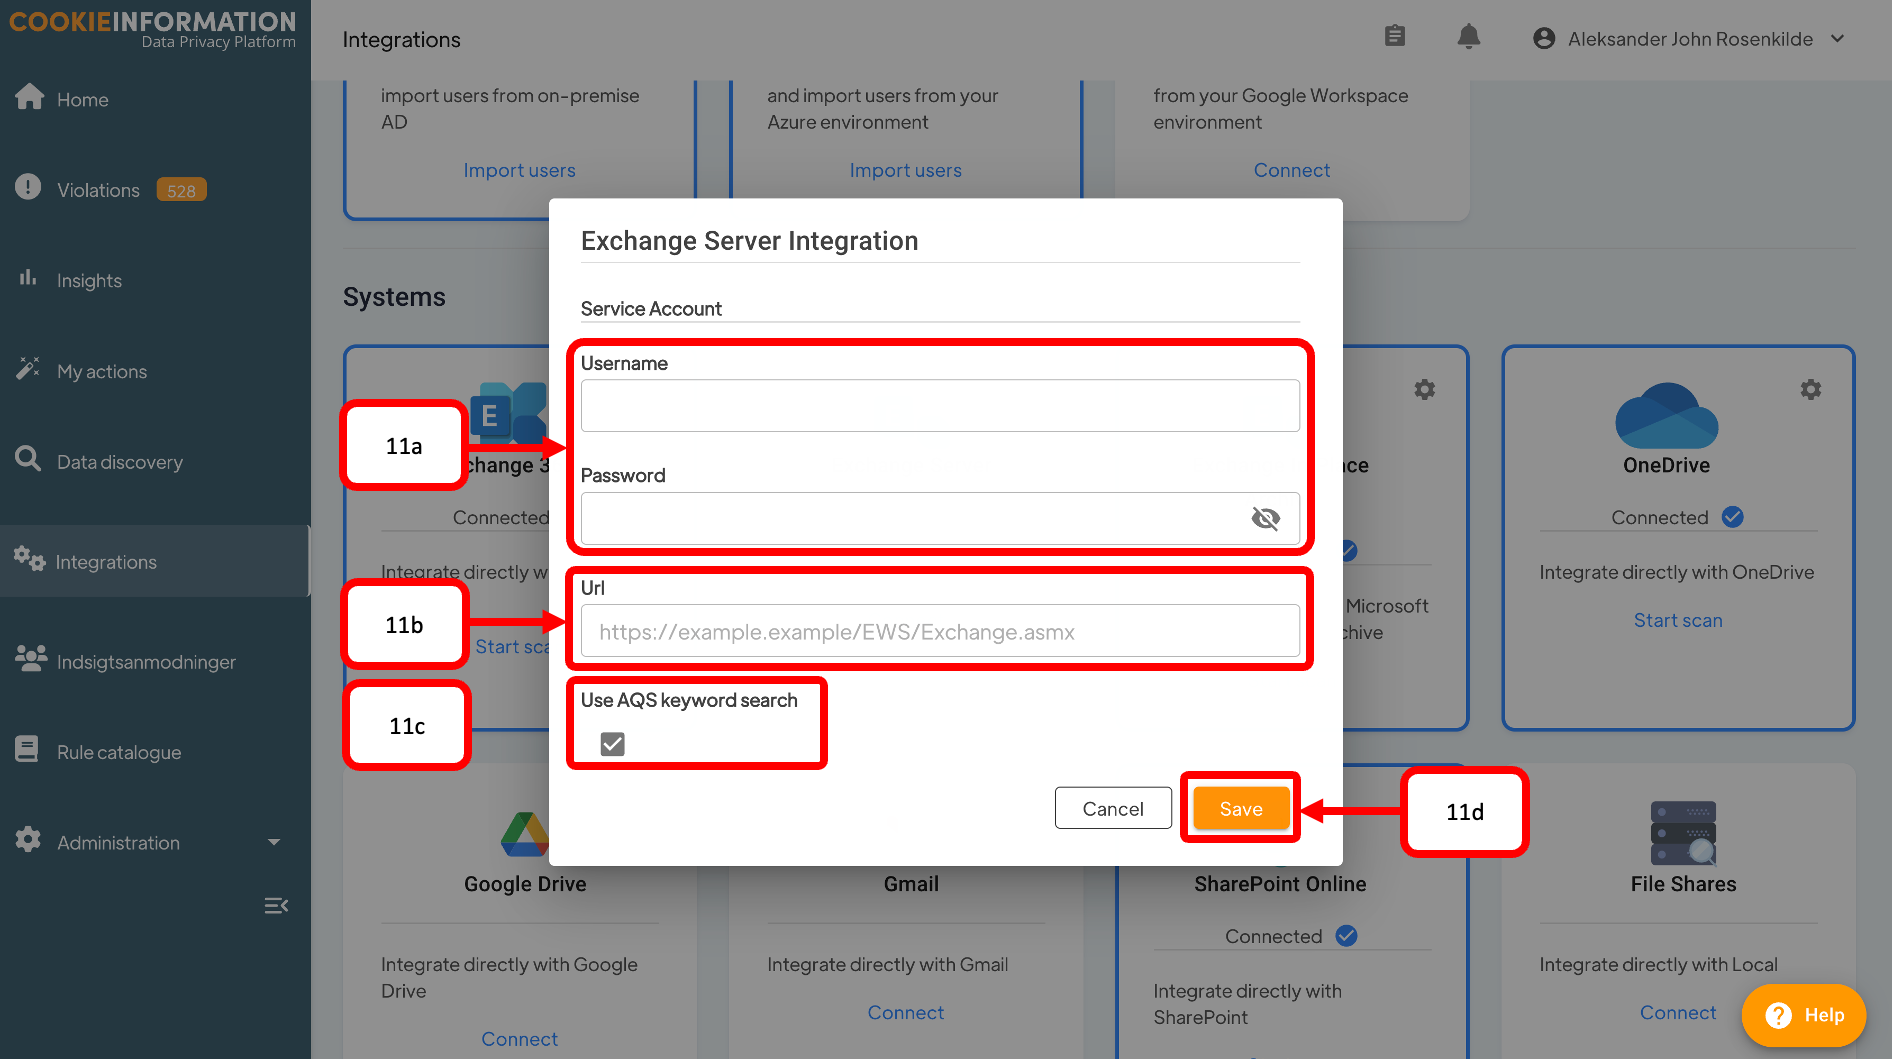
- Fill out the following information regarding your Exchange server and Click(11d).
- Username and Password(11a): The credentials of the service account assigned ApplicationImpersonation permissions earlier.
- Url(11b): Provide the EWS url for your Exchange server(11b) (https://<server name>/EWS/Exchange.asmx).
- Use AQS keyword search(11c): We recommend that you let AQS be active unless your Exchange server does not support it.