Turn off Google consent mode v2 in Cookie Information.
In this guide, we’ll walk you through how to disable Google consent mode v2 step by step.
Before you start
Here are a few things to know before you start:
All consent solutions created on or after February 12, 2024, include the default template and the main installation code that help you use Google consent mode v2.However, to disable Google consent mode v2, you’ll need to change the cookie consent popup template and remove the Google consent mode v2 attribute from the main installation code.
To meet the requirements of the Danish Data Protection Agency (Datatilsynet), we recommend using Overlay v2 or Overlay v3 templates.
Changing the cookie consent template applies only to the current consent solution and the domains connected to it. It won’t affect other consent solutions within your account.
- Google consent mode v2 processes the consent preferences of your users obtained through your consent popup. It adjusts the functioning of analytics, ads, and third-party tags responsible for creating or accessing cookies based on these preferences.There are two different modes available in this version: basic and advanced. You can implement both in Cookie Information. The basic consent mode doesn’t allow you to collect any user data, not even consent status until the user agrees. In the advanced consent mode, Google tags are loaded before the consent popup displays to users. Google collects cookieless data without personal identifiers.
Disable Google consent mode v2
To disable Google consent mode v2, follow these steps:
- Log in to Cookie Information.
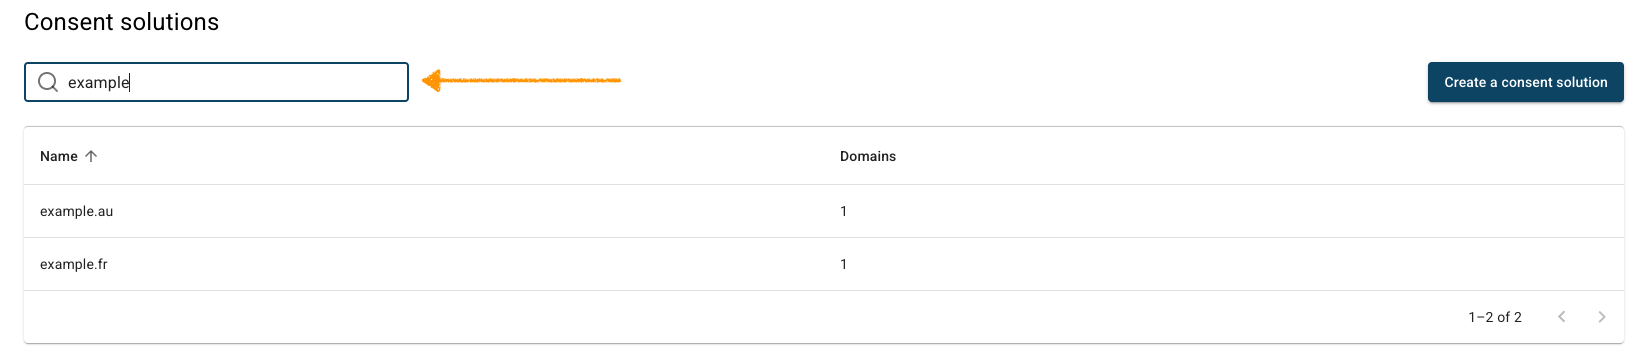
- Go to Consent solutions.
- Find the consent solution where you want to edit the cookie consent popup template.
- Navigate to Consent popup.
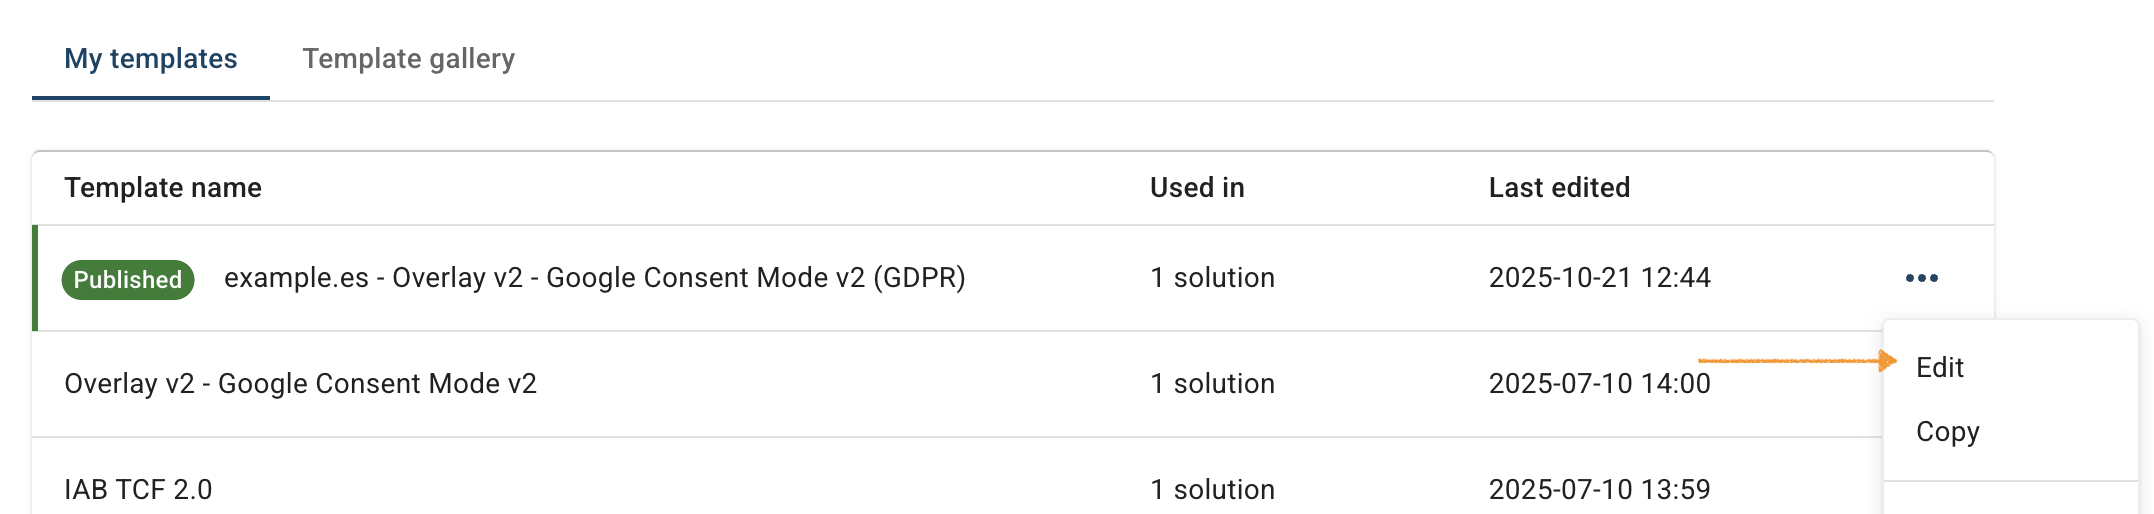
- Click the ⋯ three-doticon next to Overlay v2 – Google Consent Mode v2 (GDPR), then click Edit.
- In Template code, go to HTML code.
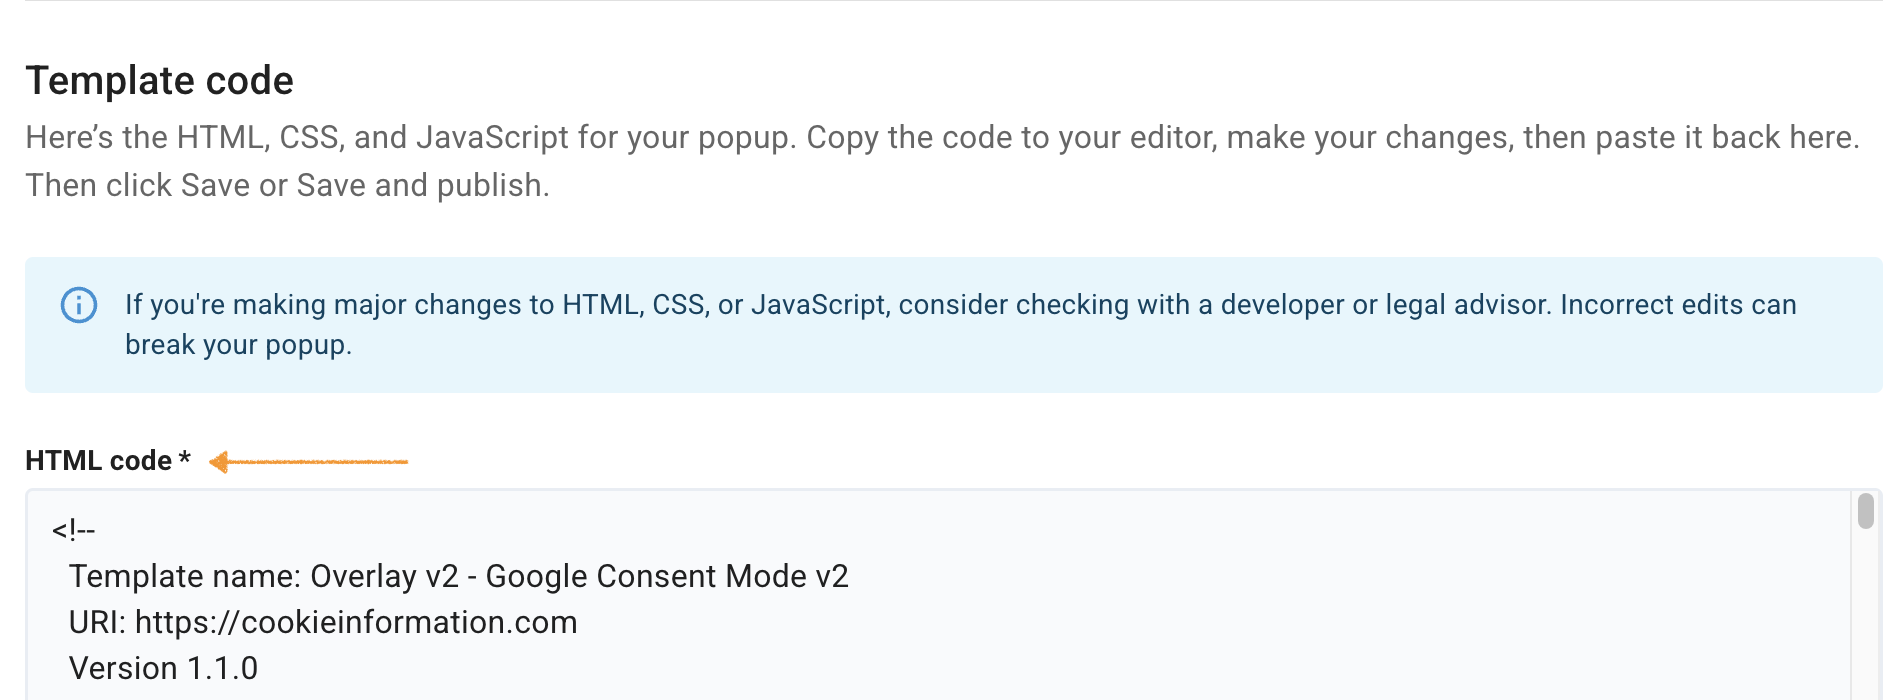
- Find the following code:
<a class="coi-banner__google-privacy-policy" href="https://business.safety.google/privacy/" rel="noopener noreferrer" target="_blank" > {{{translations.google_privacy_policy_link}}} <span class="screen-reader-only">{{{translations.opens_in_new_tab}}}</span></a>- Delete this code.
- Click Save and publish.
Note:
- Changing your template will reset any customizations including text or styling, you have made earlier.
- Clicking Save only saves changes to your template. To publish the updated template, click Save and publish.
- Changes to your consent template may take up to 10 minutes to appear on your domain.
- Go to your website’s source code.
- Remove the Google consent mode v2 attribute
data-gcm-version="2.0"from the main installation code.
Here’s what your script should look like:
<script id="CookieConsent" src="https://policy.app.cookieinformation.com/uc.js"
data-culture="EN" type="text/javascript"></script>Note: The attribute data-culture = "EN" controls the language in which the popup will appear on the page – in this example, it will be displayed in English. To change the language, set the data-culture attribute to a different language code. For more details, see this article.
- Optional: If you had an advanced Google consent mode v2, remove the following code snippet from your website source code:
<script>
window.dataLayer = window.dataLayer || [];
function gtag(){ dataLayer.push(arguments); }
// Set default consent to 'denied' as a placeholder
// Determine actual values based on customer's own requirements
gtag('consent', 'default', {
'ad_storage': 'denied',
'ad_user_data': 'denied',
'ad_personalization': 'denied',
'analytics_storage': 'denied',
'wait_for_update': 500
});
gtag('set', 'ads_data_redaction', true);
gtag('set', 'url_passthrough', true);
</script>- Click Save and publish.
- All set.