If you have installed Google consent mode v2 using a WordPress plugin or by making changes to the main installation code and consent popup template, you can check if it is working correctly.
In this article, we’ll show you how to do it.
Before you start
Here are a few things to know before you start:
- If you’ve implemented Google consent mode v2 via the main installation code, you can check it by reviewing the data layer.
- Your data layer may contain other information as it is specific to each website, so it might look little different than the one in our screenshots.
Check consent mode v2 setup using the main installation code
To check if your Google consent mode v2 implementation works correctly, follow these steps:
- Open the web browser and go to the website with the installed Google consent mode v2.
- Inspect the page by right-clicking anywhere on the website and selecting Inspect or use the keyboard shortcuts:
- Windows: Control + Shift + C
- MacOS: Command + Option + C
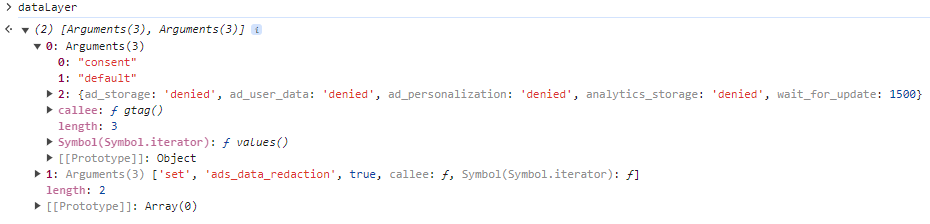
- Navigate to the Console and in the top panel type ‘dataLayer’.

- Look through the events and find the default consent state. The default state is when the popup banner is still showing and the user hasn’t interacted with it yet. All of the consent parameters that represent different consent types are set to ‘denied.’
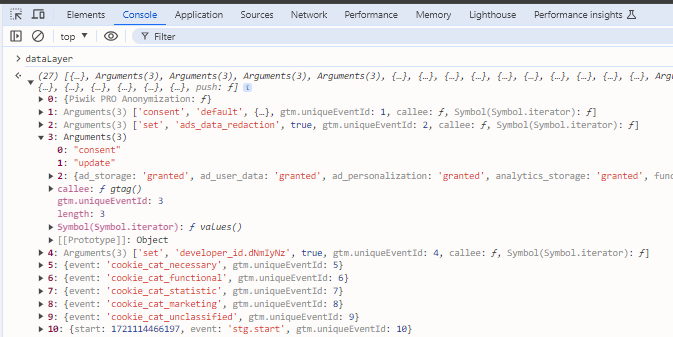
- Accept all cookies on the popup banner and type ‘dataLayer’ again in the Console. All of the consent states should be now set to ‘granted.’
(20) [{…}, Arguments(3), Arguments(3), {…}, {…}, {…}, {…}, {…}, {…}, {…}, {…}, {…}, {…}, {…}, {…}, {…}, {…}, {…}, {…}, {…}, push: ƒ]
0: {Piwik PRO Anonymization: ƒ}
1: Arguments(3) ['consent', 'default', {…}, callee: ƒ, Symbol(Symbol.iterator): ƒ]
2: Arguments(3) ['set', 'ads_data_redaction', true, callee: ƒ, Symbol(Symbol.iterator): ƒ]
3: {start: 1721037875895, event: 'stg.start'}
4: {event: 'stg.pageView'}
5: {event: 'stg.pageLoad'}
6: {event: 'stg.domReady'}
7: {event: 'stg.elementPresence', foundElements: '[class~=elementor-section]'}
8: {event: 'stg.elementPresence', foundElements: '[class~=elementor-section]'}
9: {event: 'stg.elementPresence', foundElements: '[class~=elementor-section]'}
10: {event: 'stg.elementPresence', foundElements: '[class~=elementor-section]'}
11: {event: 'stg.leaveContent', edge: 'any'}
12: {event: 'stg.elementPresence', foundElements: '[class~=elementor-section]'}
13: {event: 'stg.timer', timeOnWebsite: '3 sec', skipExtendSession: true}
14: {event: 'stg.elementPresence', foundElements: '[class~=elementor-section]'}
15: {event: 'stg.elementPresence', foundElements: '[class~=elementor-section]'}
16: {event: 'stg.timer', timeOnWebsite: '5 sec', skipExtendSession: true}
17: {event: 'stg.leaveContent', edge: 'any'}
18: {event: 'stg.timer', timeOnWebsite: '15 sec', skipExtendSession: true}
19: {event: 'stg.leaveContent', edge: 'any'}
push: ƒ ()
length: 20
[[Prototype]]: Array(0)- If your dataLayer looks the same as we described, your implementation works correctly.
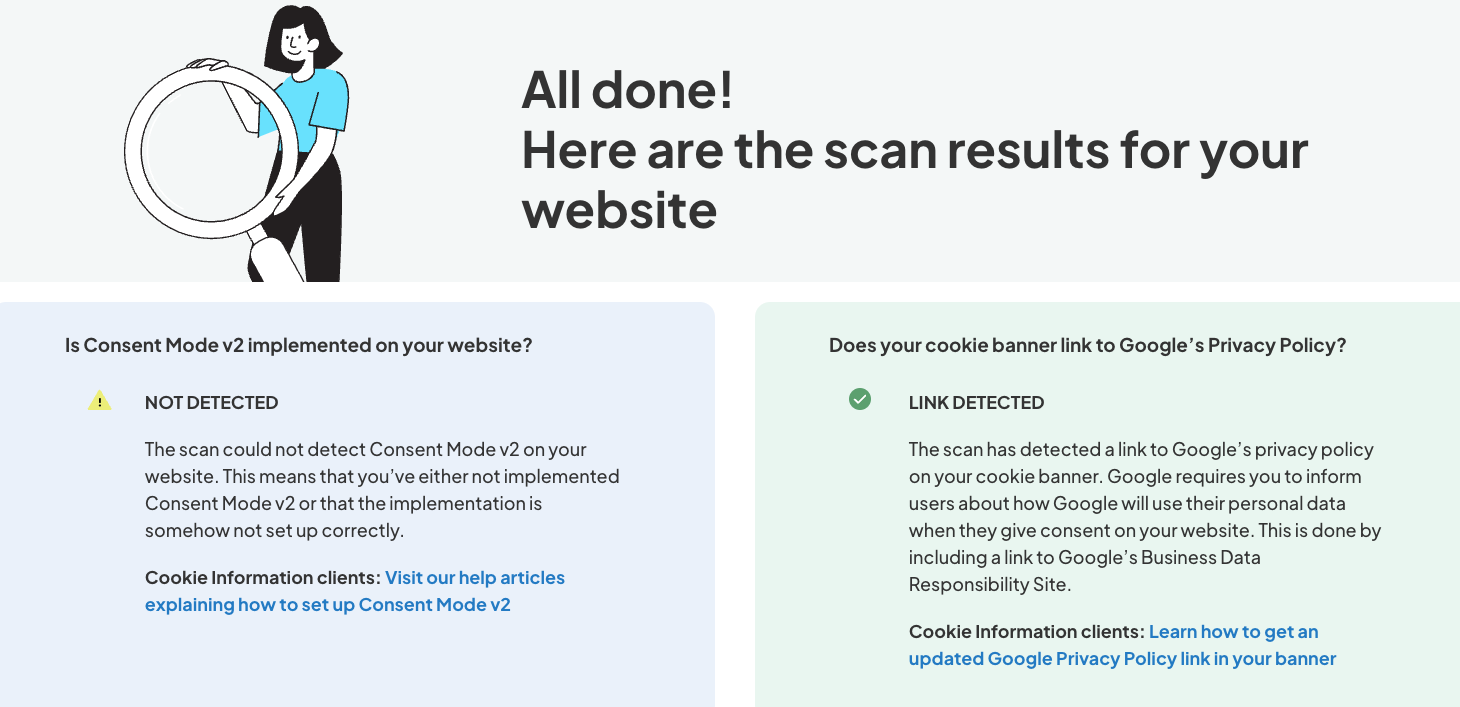
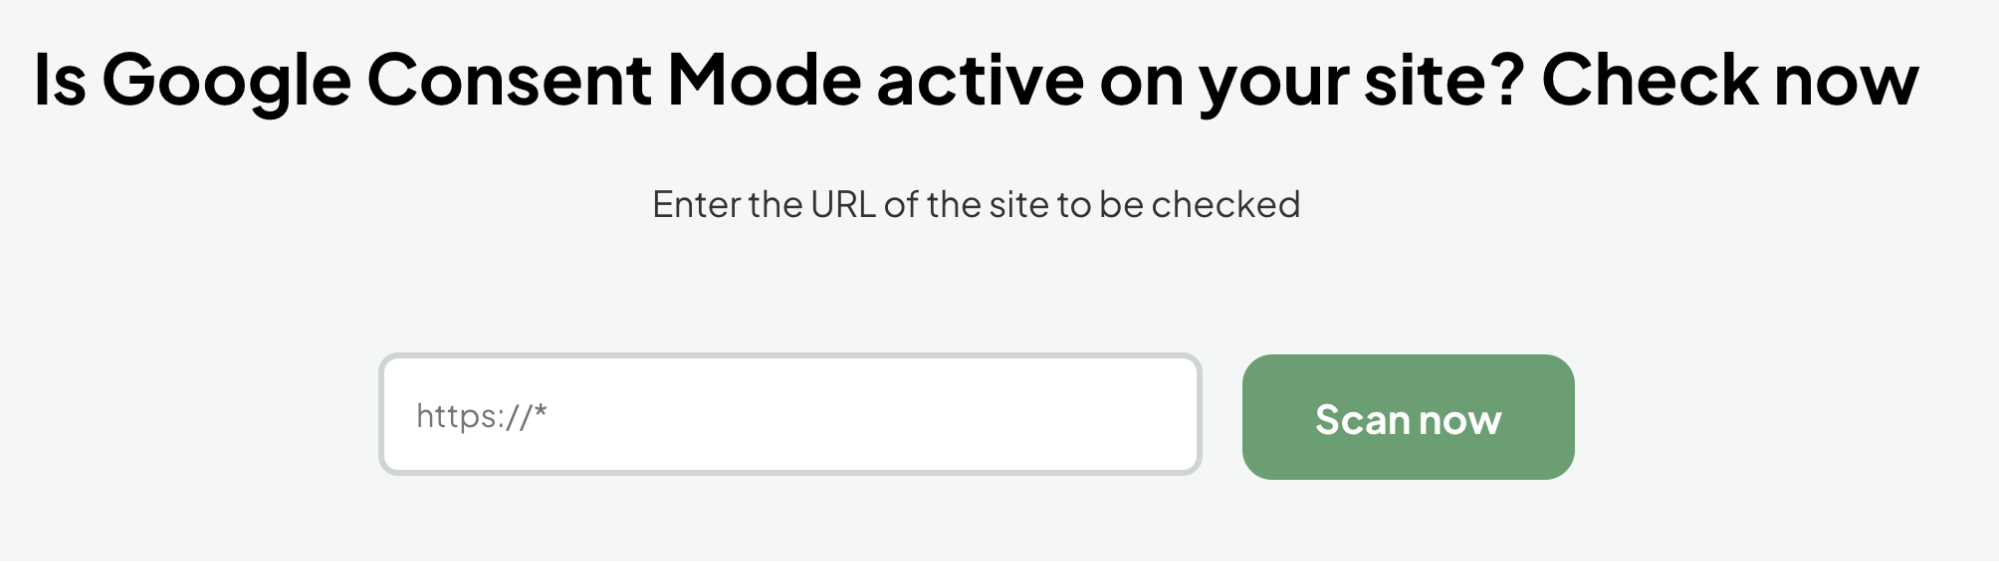
- (Optionally) Go to https://cookieinformation.com/cmv2-scan/.
- Type in your website’s URL, click Scan now. It might take a few minutes before you see the results.
- Voila. When your implementation is correct, you’ll see the following results.