In this article, we’ll show you how to create and set up a Cookie Information account with the WordPress plugin.
If you already have the account, go to Set up a Cookie Information account using the WordPress plugin section.
Create a Cookie Information account in WordPress
To create a Cookie Information account using WordPress plugin, follow these steps:
- Log in to your WordPress account.
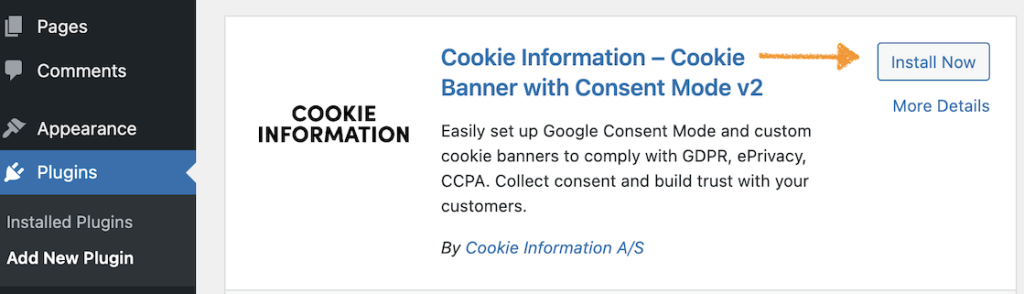
- In your Dashboard, navigate to Plugins.
- Click Add New Plugin.
- Type ‘Cookie Information’ in the search bar.

- Click Install Now.
Note: You can also find the Cookie Information plugin for WordPress here.
- Click Activate.
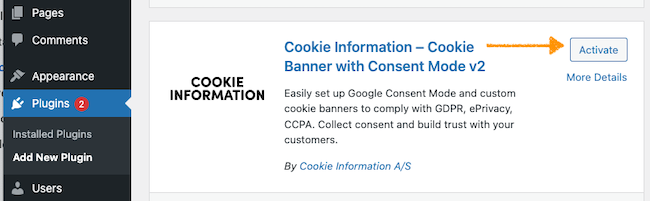
Note: There’s another way to activate the plugin.
Go to Installed Plugins, find Cookie Information in the list, and click Activate.

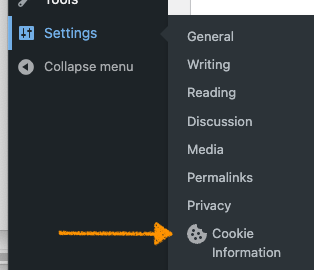
- In Dashboard Settings, go to Cookie Information.
- In Create an account, fill out the required form fields:
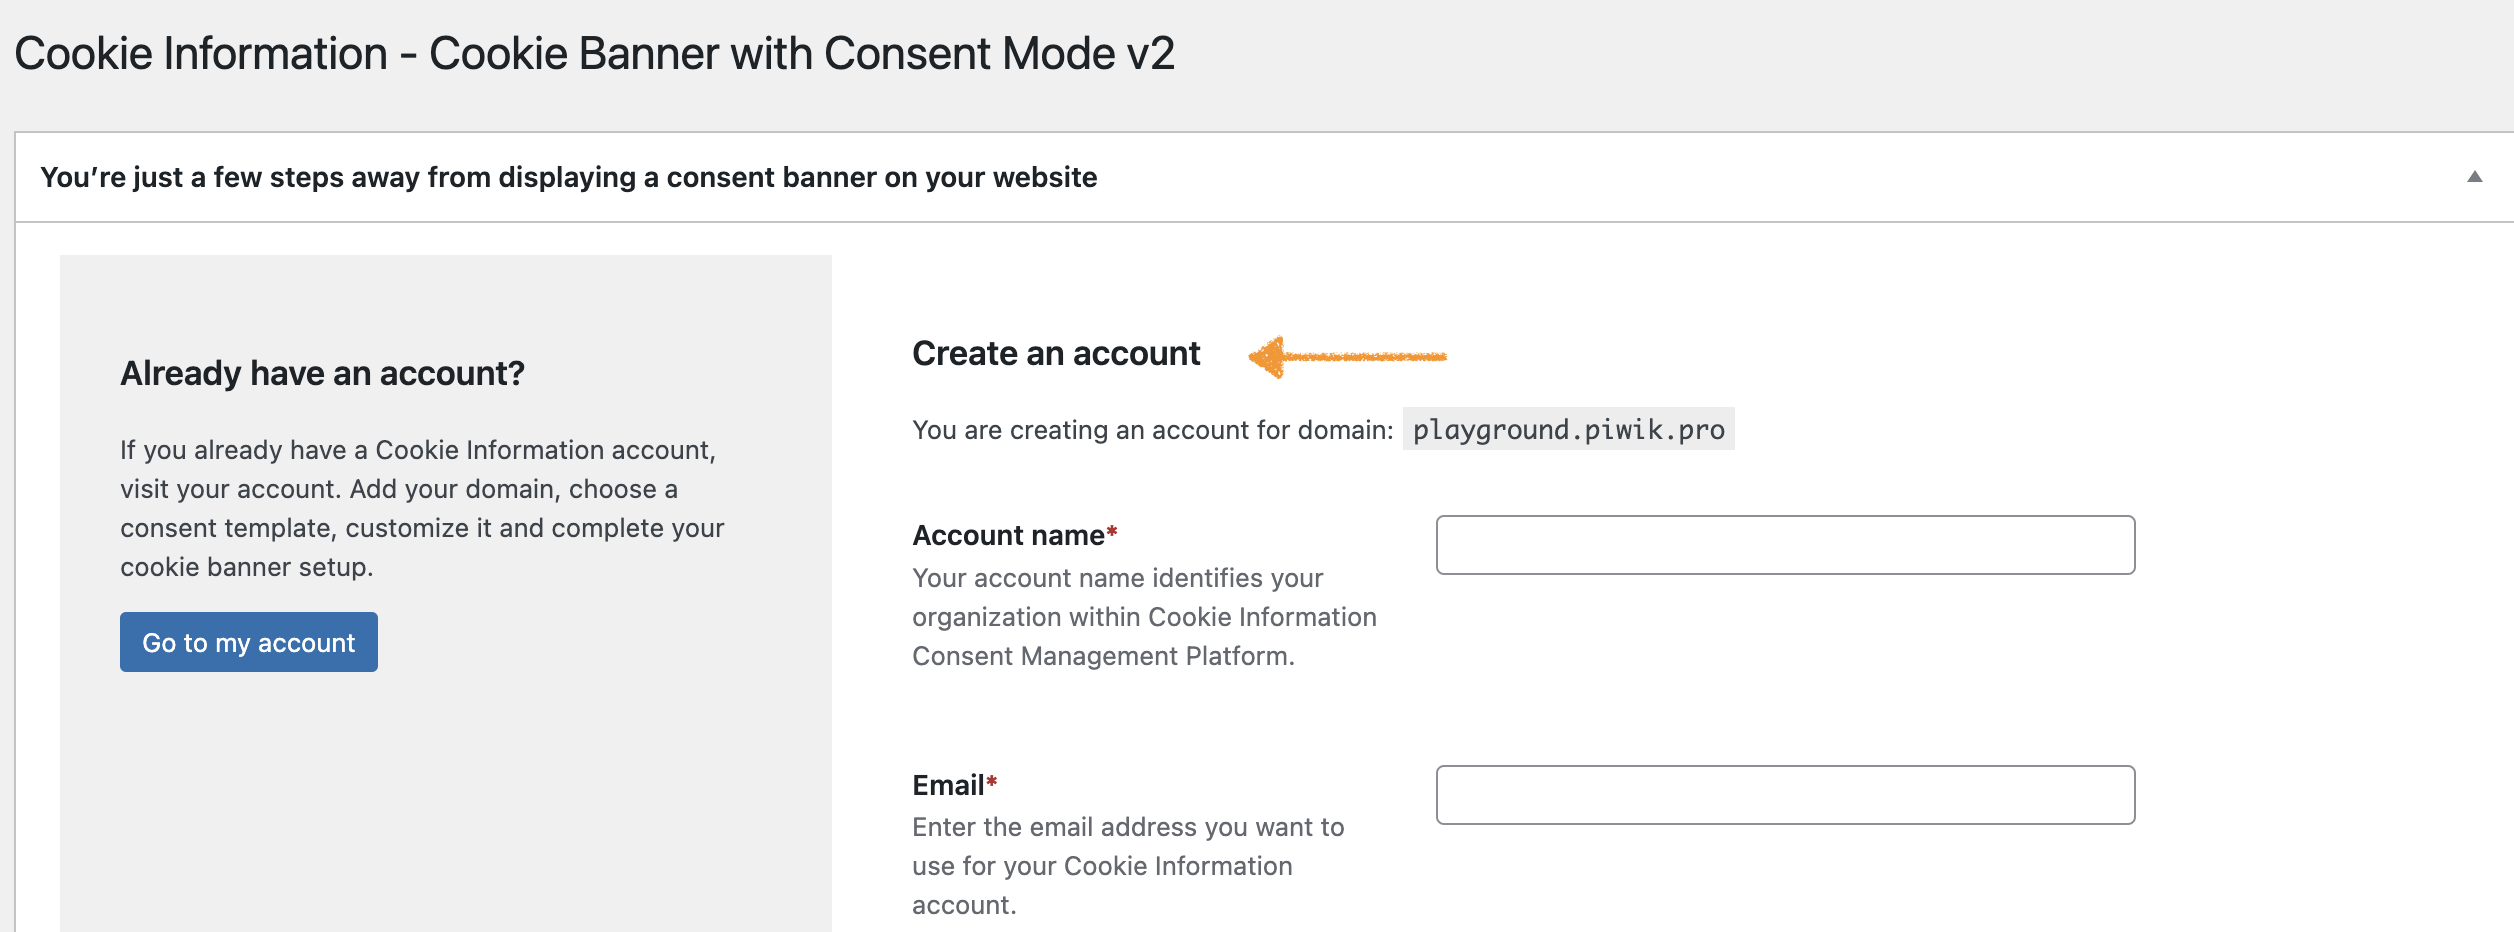
- Account name: Your account name identifies your organization within Cookie Information Consent Management Platform.
- Email: Enter the email address you want to use for your Cookie Information account.
- Password: Use at least 10 characters including uppercase and lowercase letters, plus at least one number.

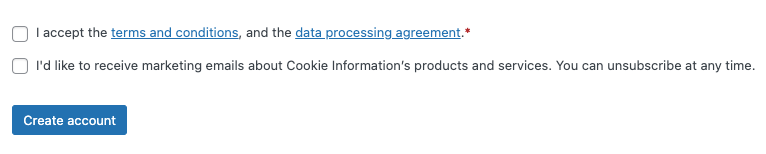
- Accept the terms and services, optionally, agree to receiving marketing emails about Cookie Information products.
- You’ll receive an email asking you to activate your account. Activate it and you’re done.
Set up a Cookie Information account using the WordPress plugin
To set up a Cookie Information account using WordPress plugin, follow these steps:
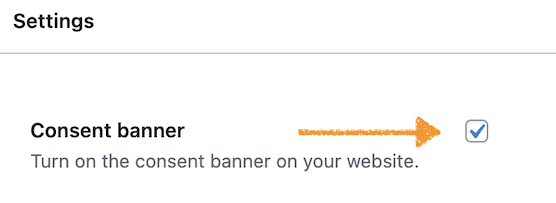
- In WordPress, go to Settings > Cookie Information > Settings.
- Turn on the consent banner.
- (Optional) Turn on IAB TCF v2.
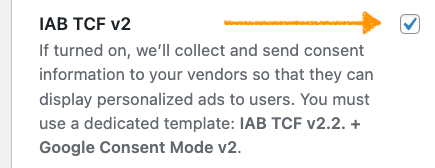
Note: If turned on, we’ll collect and send consent information to your vendors so that they can display personalized ads to users. You must use a dedicated template: IAB TCF v2.2. + Google Consent Mode v2. For more information, see this article.
- (Optional) Turn on Google Consent Mode v2.
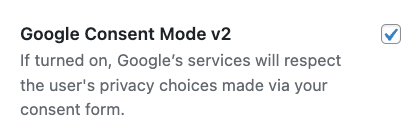
Note: If turned on, Google’s services will respect the user’s privacy choices made via your consent form.For more information, see our support materials here.
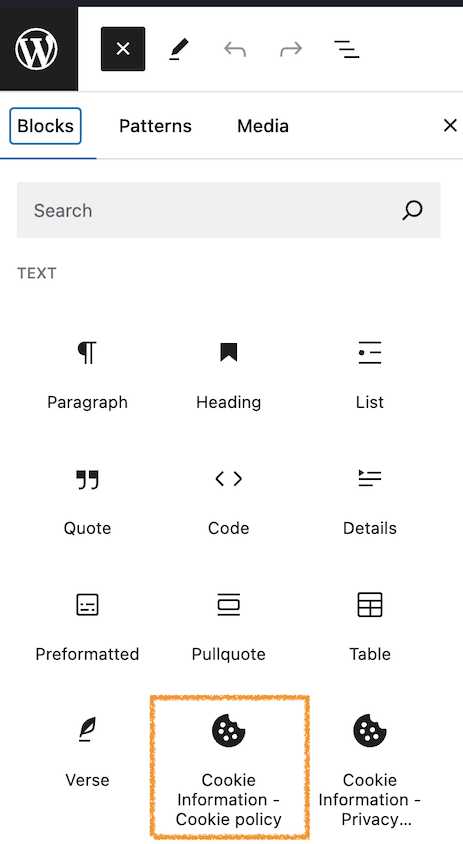
- (Optional) Add cookie policy by adding a dedicated Gutenberg block when building your page. Click Toggle block inserter.

- (Optional) In Blocks, select Cookie Information – Cookie policy block.
Note:
- You can add the Cookie Information policy using the shortcode if you’re using an older WordPress version that doesn’t support Gutenberg blocks. Copy and paste the shortcode to your privacy page:

- To learn more about adding the cookie policy and privacy controls to your website, see this article.
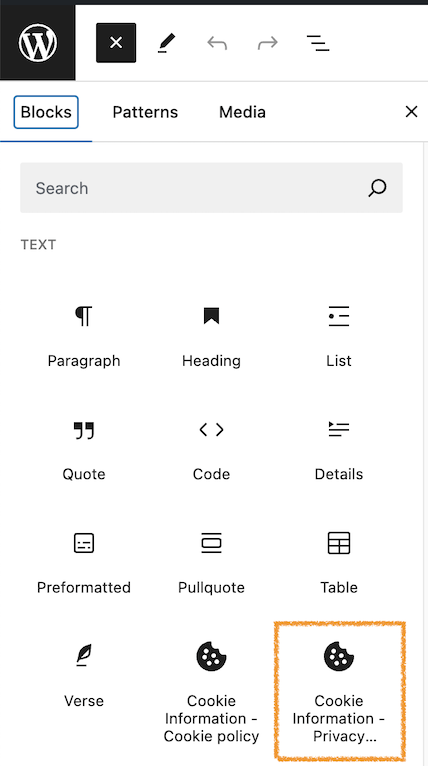
- (Optional) Add privacy controls by adding a dedicated Gutenberg block when building your page. Click Toggle block inserter.

- (Optional) In Blocks, select Cookie Information – Privacy controls block.
Note: You can add the Cookie Information privacy controls using the shortcode if you’re using an older WordPress version that doesn’t support Gutenberg blocks. Copy and paste the shortcode to your privacy page:

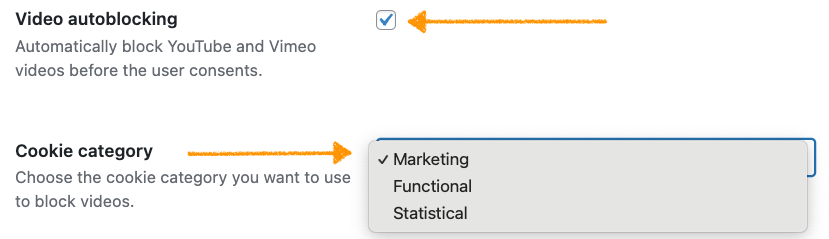
- (Optional) Turn on video auto-blocking and choose the cookie category you want to use to block videos.
- (Optional) In Placeholder text type the text that will appear in place of the blocked video.

- Click Save changes.
- Done.