Our scanner scans the login page but cannot log in, so it will only scan the first page. In this case, you need to create custom cookies to manually add them to the consent banner to inform users about all used cookies.
To add a custom cookie, follow these steps:
- Log in to Cookie Information.
- Go to Consent solutions.
- Find the consent solution you want to add a custom cookie for.

- Navigate to Cookie management. This will take you to the platform’s old UI.
In Add custom scan cookie, fill out the following fields:
- Cookie name: The cookie’s name that will show on the website.
- Cookie domain: The domain on which you can see the cookies
- Cookie persistence: The cookie lifetime, where you have three options:
- Expiring. If selected, choose the expiry period from the list.
- Session
- Permanent
Note: If the cookie expiry value you want to choose is not listed, contact us at support@cookieinformation.com.
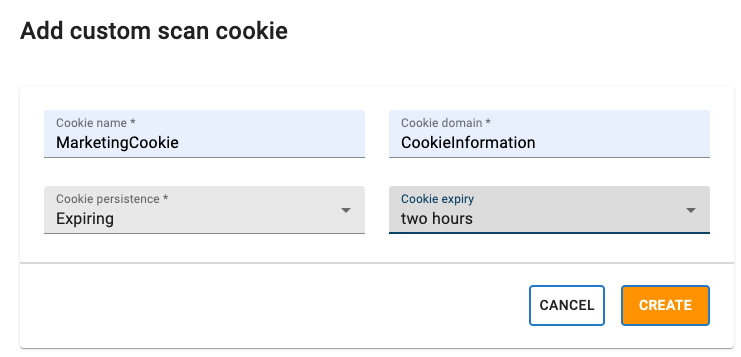
Click Create.
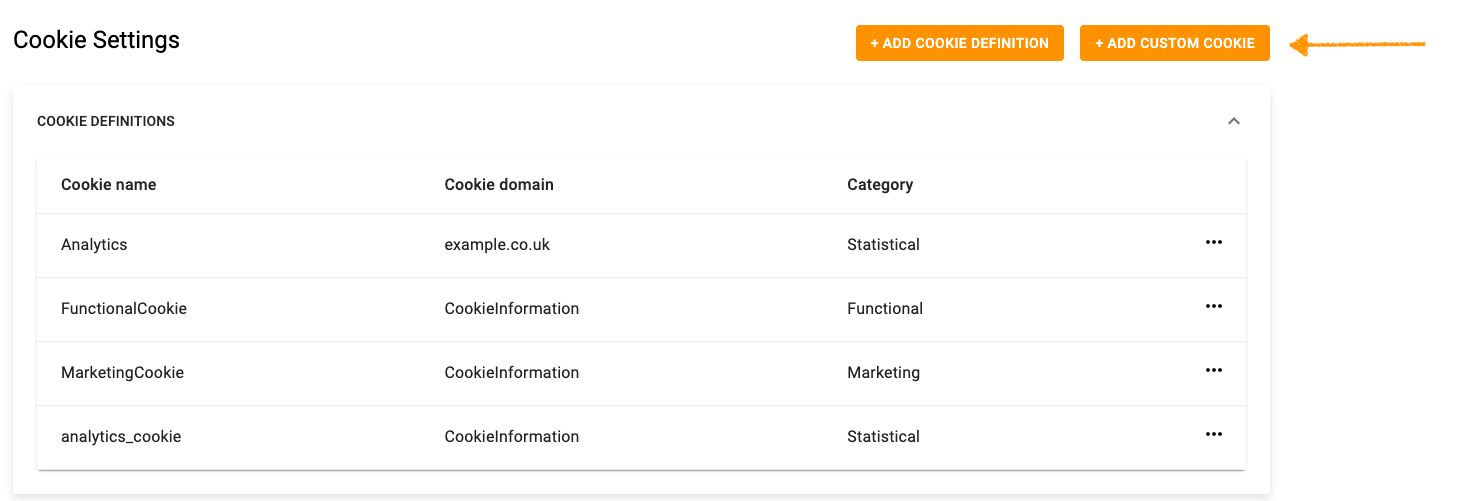
- Now, you need to set a category for that cookie because it is not automatically categorized.
- In Cookie Settings, click + Add cookie definition.
- In Add custom cookie definition, fill out the following fields:
- Choose cookie: The dropdown list contains all cookies across all domains within this consent solution – the ones found by the scanner and custom cookies. You can type in the cookie name to find it on the list.
- Add cookie category: Choose one from the dropdown list.
- Choose a data processor: Type in the name or choose the processor from the list.
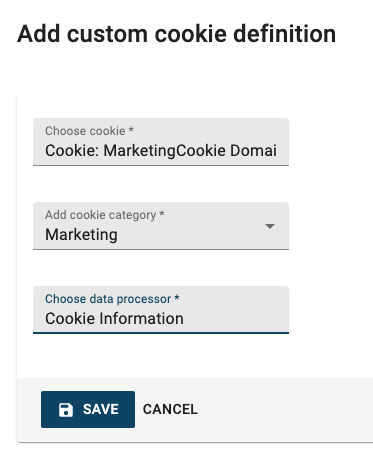
Note: For first-party cookies, this is typically your website. For third-party cookies, a vendor providing services usually sets this cookie.
- Click Save.
- (Optional) If you can’t find the data processor in Choose data processor, create one manually.
- In Choose data processor, type “New” and choose “New Data processor”.
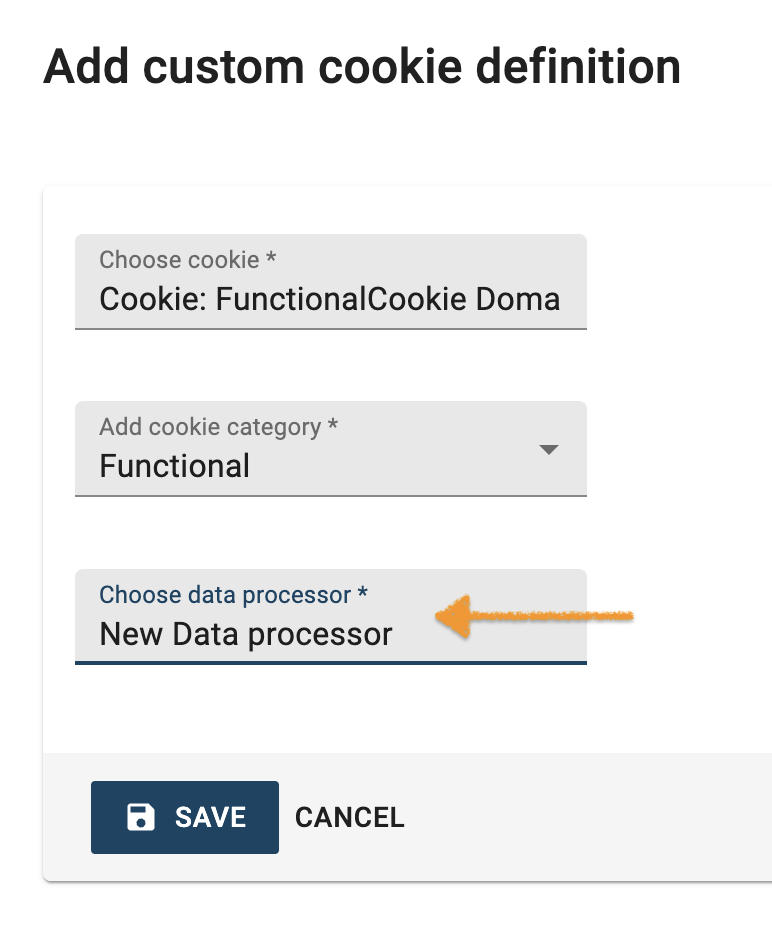
- Click Save.
- Refresh the page for the cookie definition to appear in the list.
- Find your cookie definition and click on the ⋯ three-dot icon next to the cookie category.
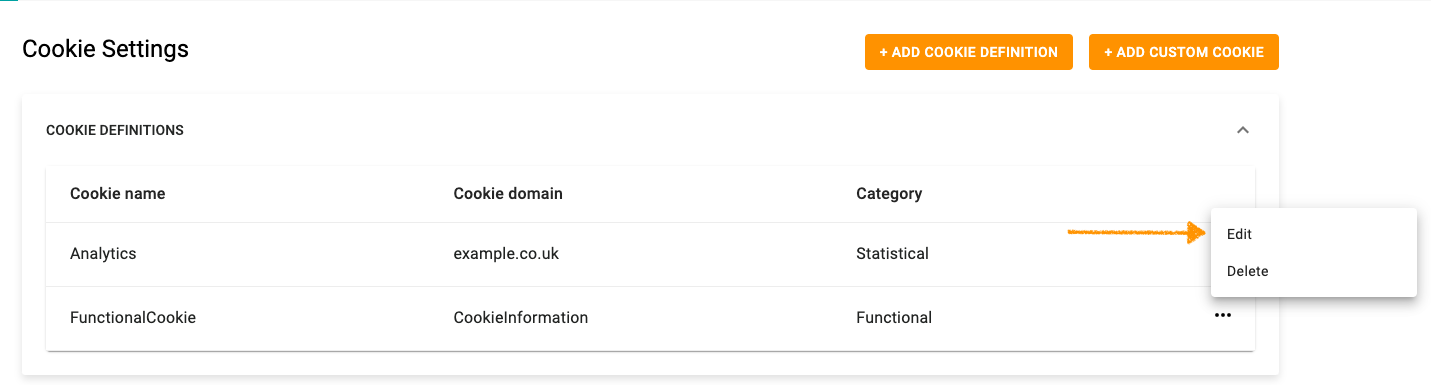
- Click Edit.
- You need to fill out the following fields:
- Data processor: The name of the data processing company or their domain.
- Data processor privacy policy: The link to processor policy.
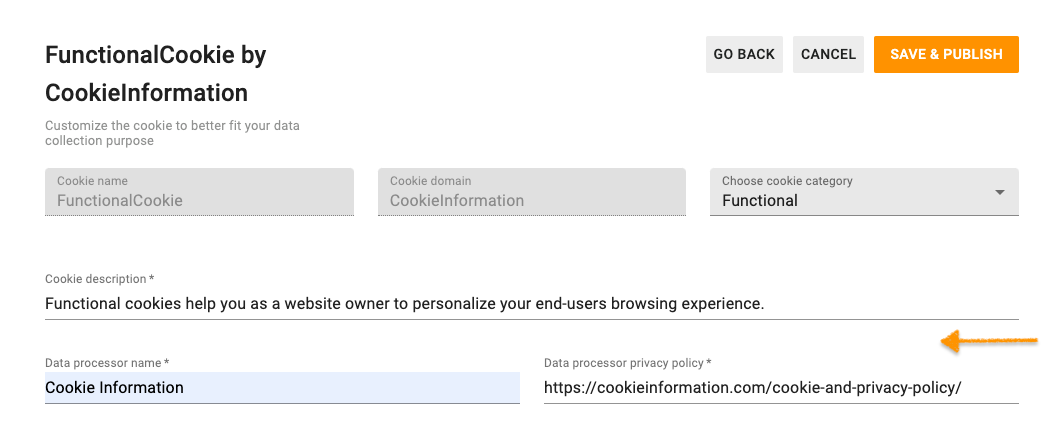
- Click Save & publish.
- Done.