In this article, we will walk you through setting up Microsoft Universal Event Tracking UET for Microsoft Advertising with Cookie Information.
You can also watch the video tutorial on YouTube.
Before you start
Here are a few things to know before you start:
- The following steps use a tag template and a variable template created by the Google Tag Manager community. As these are unofficial resources, our team may not be able to provide support. The instructions are based on Lars Friis’s video and use the community-created templates:
1. the Microsoft UET Consent Mode tag by Markus Baersch (in German)
2. the Cookie Information Consent State variable by Gunnar Griese - You’ll also need to add the official Microsoft Advertising (UET) tag. To configure the UET tag, you’ll need to add a Cookie Information consent banner, using the GTM tag template or by adding the banner directly to the website’s source code.
- If the language options are not visible in your tag template, check if the template is up to date.
- Steps 18-25 are optional, only follow them if you want to set up Google Consent Mode v2. To do so, you’ll need to set up the Cookie Information + Consent Mode v2 template.
Set up Microsoft Universal Event Tracking (UET) with Cookie Information
To set up Microsoft Universal Event Tracking (UET) with Cookie Information, follow these steps:
- Log in to your Google Tag Manager account.
- Go to Menu > Tags and click New.

- Click Tag Configuration.
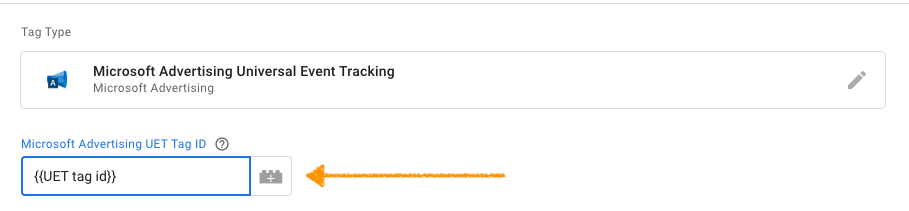
- Search and select Microsoft Advertising Universal Event Tracking (UET).
- Enter your Microsoft Advertising UET ID.
- In Track type select page view (required).
- In Consent settings, make sure Enable consent updates from GTM and Inherit initial consent from GTM are unchecked.

- In Triggering, select Page View.

- Click Save.
- Go to Templates > Tag Templates.
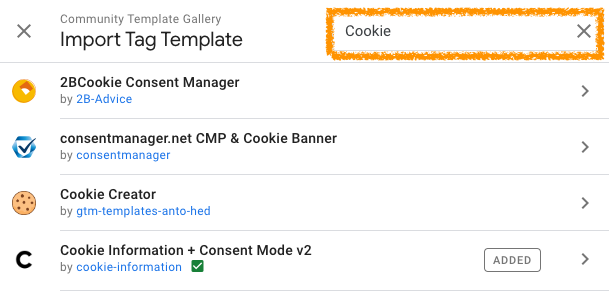
- Click Search Gallery.
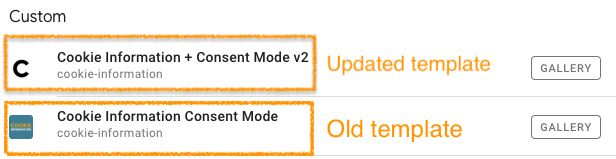
- In Community Template Gallery, find and select Cookie Information + Consent Mode v2.
Note: Make sure you used our updated tag template, not the old one:
- In Variable Templates, Click Search Gallery.
- Find and select Cookie Information Consent State.
Note: You need to set up these two templates to manage consent and read consent signals.
- Go to Tags, click New.
- In Tag Configuration, find and select Cookie Information + Consent Mode v2.
- Select Add Cookie Information Consent Banner.
- Steps 18-25 are optional and intended to our customers who want to set up Google Consent Mode as well. If you already have the tag set up, you can skip ahead to step 26.
In Language options, choose a method for managing language versions:
- None (Default language value will be used): This option is for websites that only need the popup in one language. For these settings, the Default language menu below determines the language of the consent banner. This setting is for websites that only need the popup in one language.
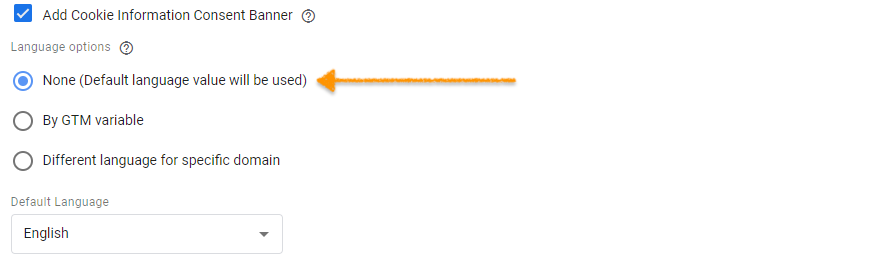
Note: You must select a language that was set up within the Cookie Information platform, otherwise you can’t display the banner.
- By GTM variable: This method allows you to build more sophisticated mechanics using custom variables. The expected input for a language version is the same language code used with the data-culture attribute. For more details, seethis article.
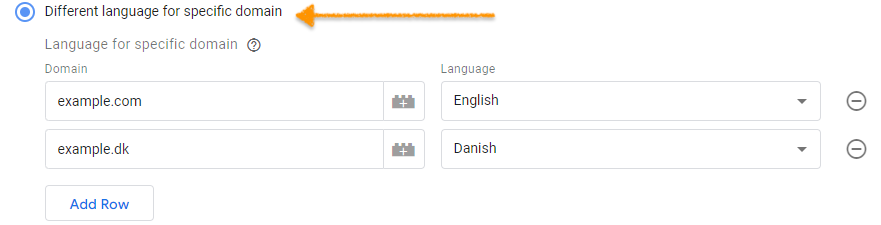
- Different languages for specific domains: You can add different languages for specific domains. Provide the canonical domain without ‘
https://‘, ‘http://‘, or ‘www‘, for example,my-domain.com. Ensure the canonical domain matches those defined in the Cookie Information platform.
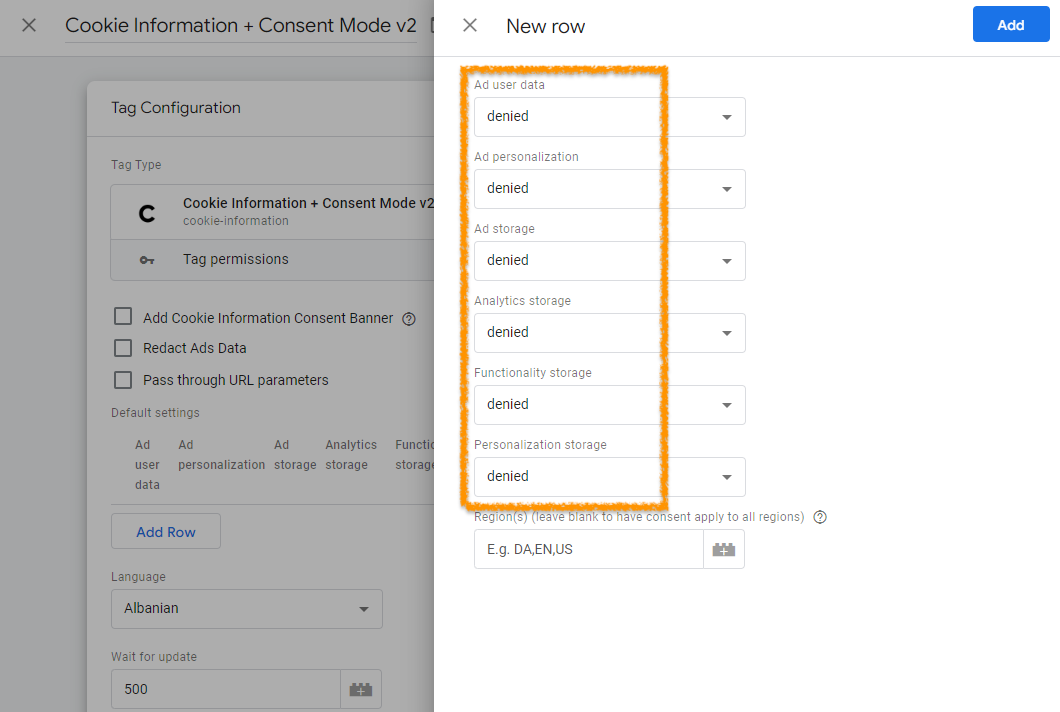
- (Optional) In Default consent settings, click Add Row.

All parameters must be set to denied:
Note: Make sure you’re using the Google consent mode v2 consent banner so your Google consent mode v2 setup works correctly. Read this article for more details.
- (Optional) Click Add.
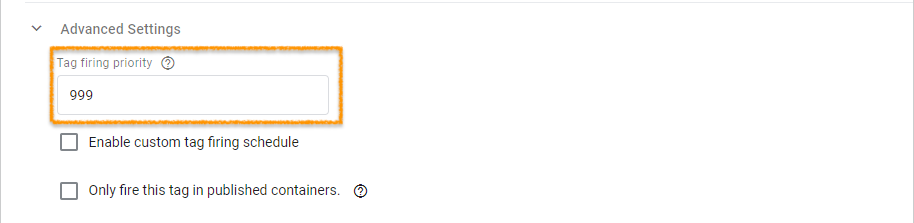
- In Advanced Settings, set the tag firing priority to 999 to ensure it is the first one to fire.
- (Optional) In Triggering, choose the trigger Consent Initialization – All Pages.
- (Optional) Click Save.

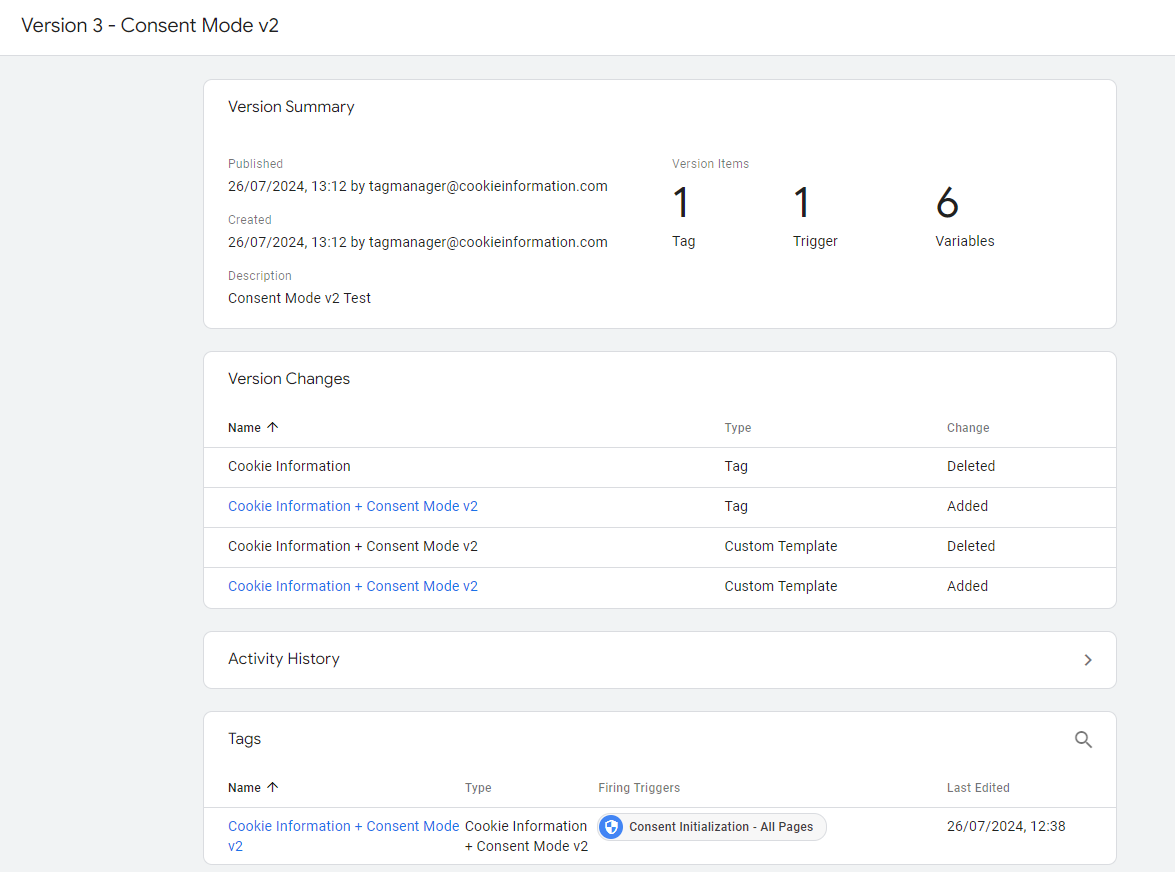
- (Optional) Click Publish to publish your container.
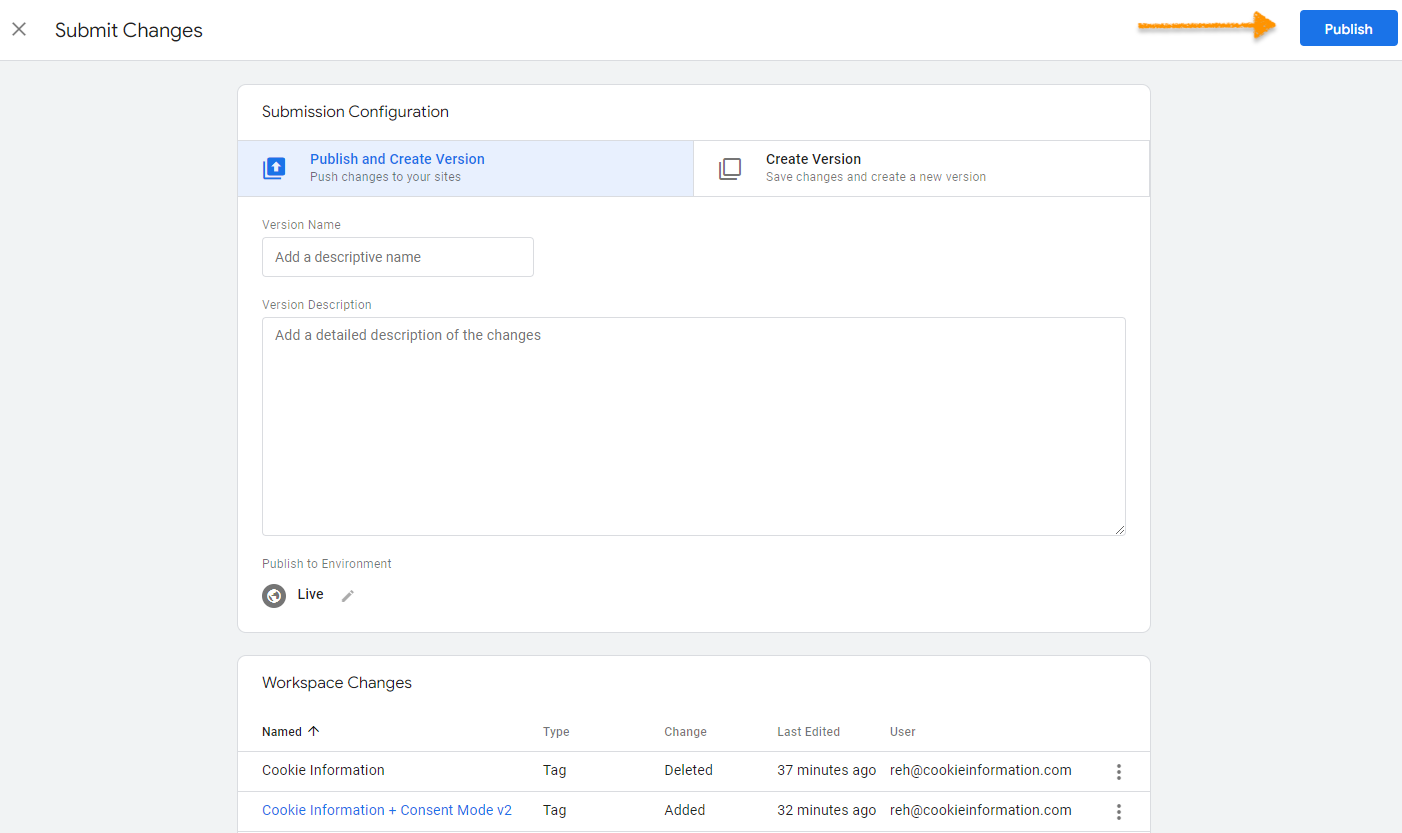
- (Optional) See the Version Summary of the changes to your container.
- In Triggering, choose Consent Initialization – All Pages.

- Click Save.
- Go to Templates > Search Gallery.
- Search and select Microsoft UET Consent Mode.

- Click Add to a workspace.
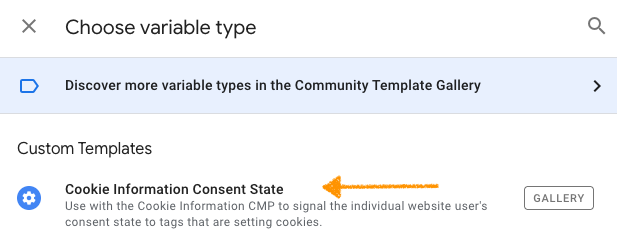
- Go Variables >User-Defined Variables.
- Click New.
- Select Cookie Information Consent State.
- In Consent Type, select
cookie_cat_marketing.

- Click Save.
- (Optional) You can rename the variable ad_storage.

Note: This will be either true or false, depending on whether the user has declined or accepted cookies.
- Click Save.
- Go to Tags, click New.
- Search for and select Microsoft UET Consent Mode.

- In Consent command, set default.
- In Wait for Update, set 15000 milliseconds (15 seconds).

- In ad_storage status, set denied.
- (Optional) Select Set Clarity Consent.

Note: Select Set Clarity Consent if you’re using Microsoft Clarity.
- In Triggering, choose the trigger Consent Initialization – All Pages.
- Rename the tag Microsoft UET Consent Mode – default.
- Click Save.
- In Tags, click New.
- In Tag Configuration find and select Microsoft UET Consent Mode.

- In Consent command, select update.
- In ad_storage status choose
{{ad_storage}}.
Note: The {{ad_storage}} variable is the Cookie Information Consent State variable template.
- (Optional) Select Set Clarity Consent.
Note: Select Set Clarity Consent if you’re using Microsoft Clarity.
- In Triggering, click Choose a trigger.
- Click the+ plus icon.
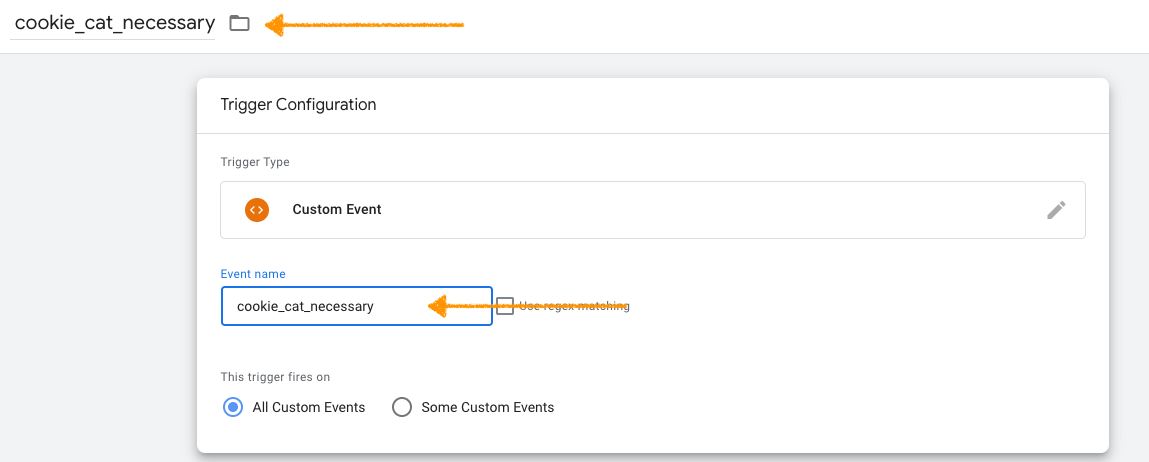
- In Trigger Configuration, search and select Custom Event.
- In Event name, type cookie_cat_necessary.

- Click Save.
- Rename the tag Microsoft UET Consent Mode – update.

- Click Save.
- All set.