
If our scanner didn’t pick up a cookie due to scanner limitations, you need to create a custom cookie. This way you ensure that a particular cookie with its details will be visible in the cookie consent popup. This helps you ensure privacy compliance since the user needs to know exactly which cookies are being used and how their data is being processed.
In this article, we’ll explain how to add a custom cookie.
Before you start
Here are some important things to keep in mind before you start:
- When you add a custom cookie and it doesn’t have a cookie definition yet, it goes into the unclassified category.
- You’ll see custom cookies marked with a special icon in the list:

- To comply with GDPR, we recommend you set a category for all your cookies and make this a routine part of your website maintenance.
- A custom cookie will work only for the domains set up for the specific consent solution.
- In some cases, cookies might have a string of random characters as an ID, e.g.,
Session_ID_asd123, where the string varies from user to user. To improve the user experience and display in the popup banner, commonly used cookies with such IDs are grouped under one ID, e.g.,Session_ID_XXX.
This will stop the consent popup from showing each user’s unique ID.
If this is missing in your setup, please contact us at support@cookieinformation.com and share the following details: cookie name, cookie purpose, cookie category, data processor, and data processor’s privacy policy. Our implementation team will ensure the cookie has the right category.
Prefer to watch? Choose the video tutorial that matches your situation:
- Add a custom cookie with an existing data processor:
- Add a custom cookie and a new data processor:
Add a custom cookie
To add a custom cookie, follow these steps:
1. Log in to Cookie Information.
2. Go to Consent solutions.
3. Find the consent solution you want to add a custom cookie.
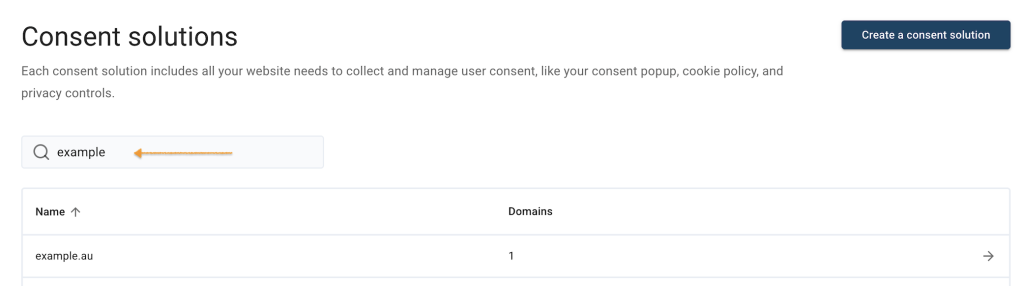
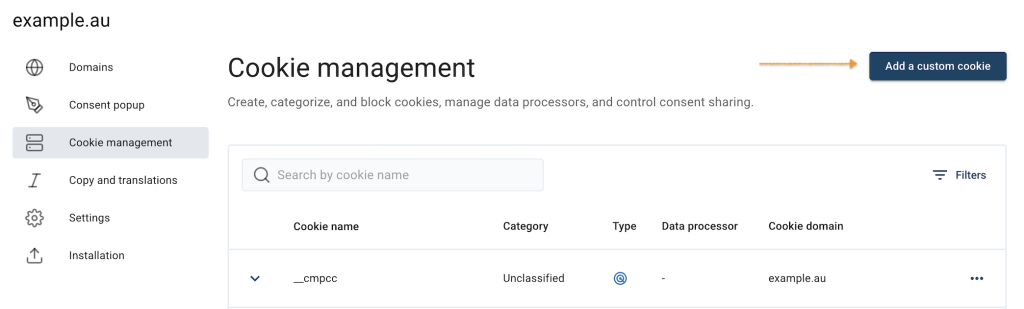
4. Navigate to Cookie management.
5. Select Add a custom cookie.
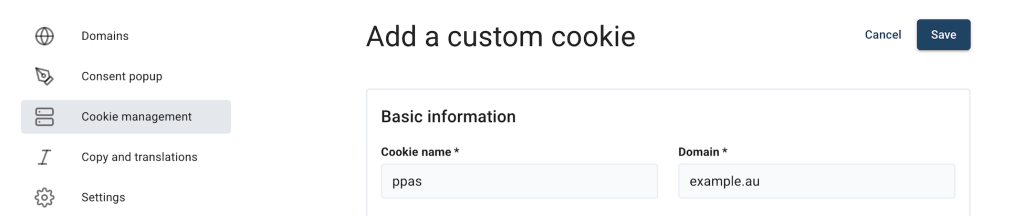
6. In Basic information, enter the cookie name.
7. Enter the domain name.
Note:
- Cookie name: The cookie’s name that will show on the website.
- Domain: The domain on which you can see the cookies.
8. Select a cookie category. The category that shows what the cookie is used for.
9. Set the cookie expiration.
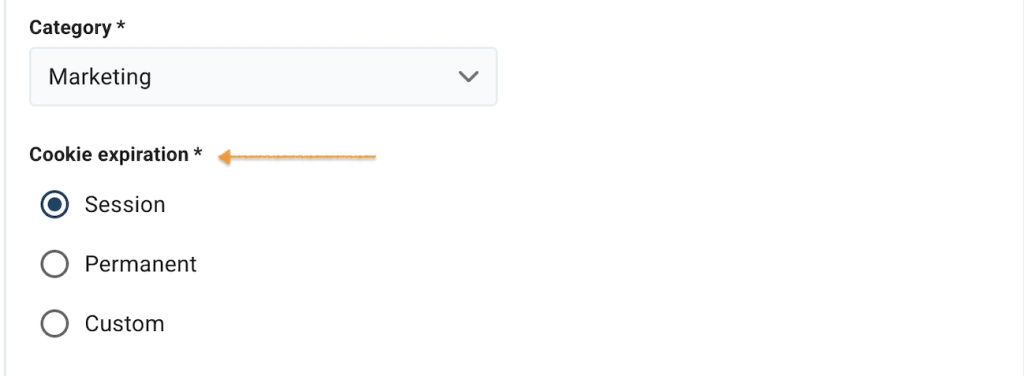
Note: The maximum expiration time is five years.
10. In Data processor, select a data processor from the list or add one.
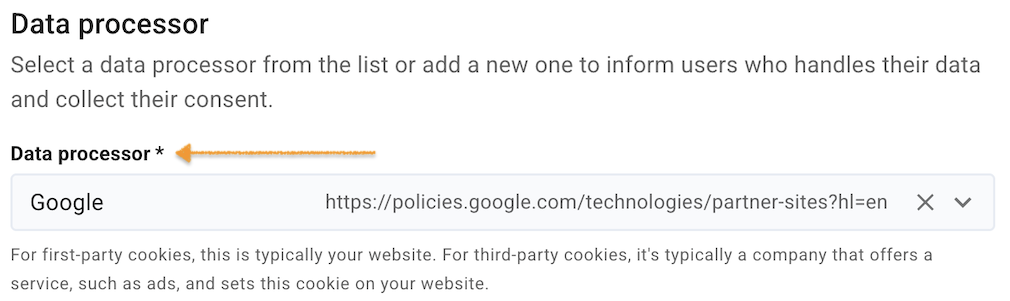
11. (Optional) If a data processor is missing from that list, you need to add it. Click Add a data processor.
12. Enter the data processor name.
Note: You need to include a data processor to inform users about who handles their data and to gather their consent. For first-party cookies, this is typically your website. For third-party cookies, it’s typically a company that offers a service, such as ads, and sets this cookie on your website.
13. Enter the full privacy policy URL, for example, https://example.privacypolicy.com.
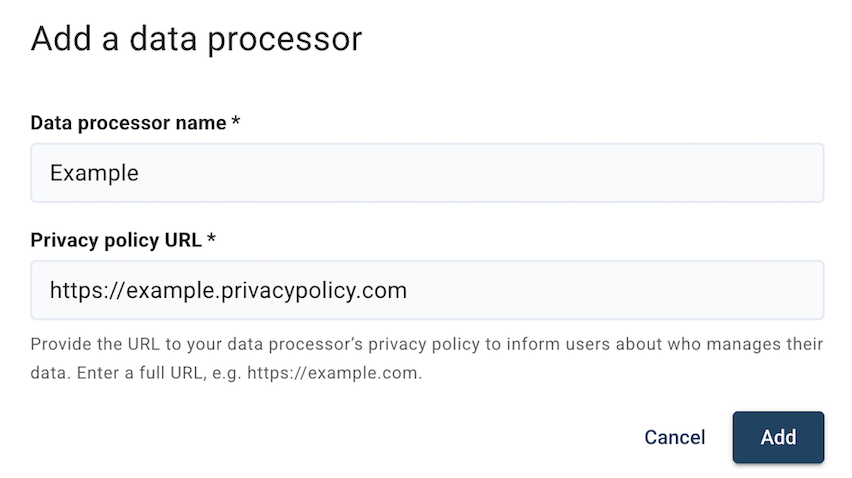
Note: You need to provide the URL to your data processor’s privacy policy to inform users who manage their data.
14. Select Add to save it.
15. In Purpose, Set a purpose for each cookie category, like functional, statistical, or marketing. Add translations to support all languages on your website.
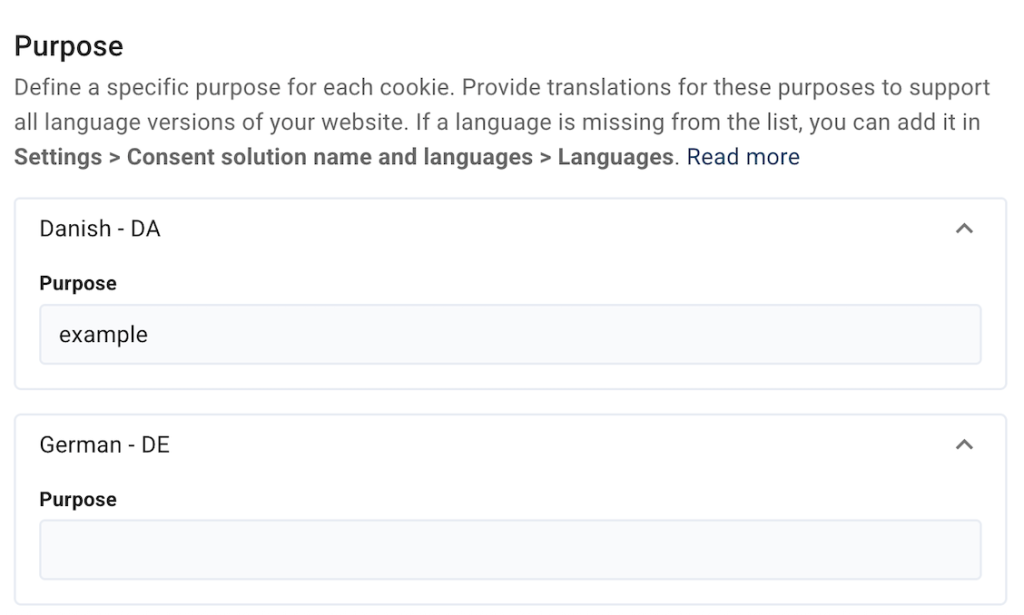
Note: If a language is missing from the list, you can add it in Settings > Add languages > Languages.
16. Select Save.
17. All done.


