In this article, we’ll explain how to check if your Google consent mode v2 works correctly using Google Tag Manager.
Before you start
Here are a few things to know before you start:
- Cookie Information only updates the consent status in the data layer for Google Tag Manager (GTM). GTM then uses this data to fire tags based on the user’s consent choice. In case you have questions or need extra assistance with them, we recommend consulting Google’s support portal.
- You can consult Google’s guide on how to check if your implementation is working correctly using Tag Assistant.
- The Preview mode in GTM is the best way to check if the default and update consent state is correct.
- If you are using Google consent mode v2, you’ll need to use page view triggers. You can find those here.
- To ensure you are not receiving any cookies from previous visits to your website, you’ll need to clear your cache and cookies. Remove only the cookies for the website you’re verifying the Google Consent Mode v2 implementation for. Otherwise, you may be logged out of websites that keep you signed in, and any saved preferences could be lost. This will happen every time a cookie is deleted.
Check if your Google consent mode v2 works correctly using Google Tag Manager
To see if your Google consent mode v2 implementation using Google Tag Manager works correctly follow these steps:
- Login to your Google Tag Manager account.
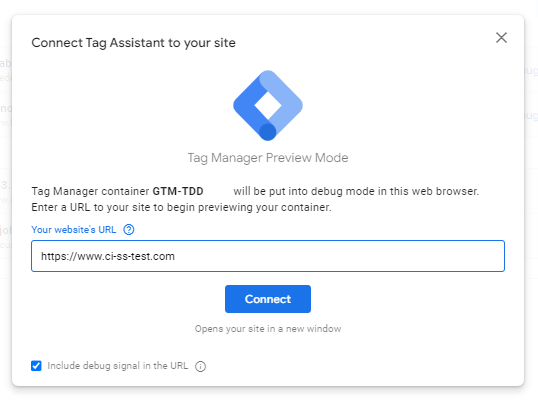
- Navigate to Preview.
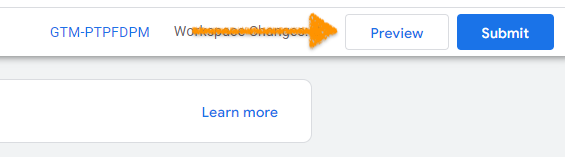
- Enter your website’s URL and click Connect to turn on the preview mode.
- After a successful connection, Tag Manager will display a dedicated popup and your website will open in a new window.
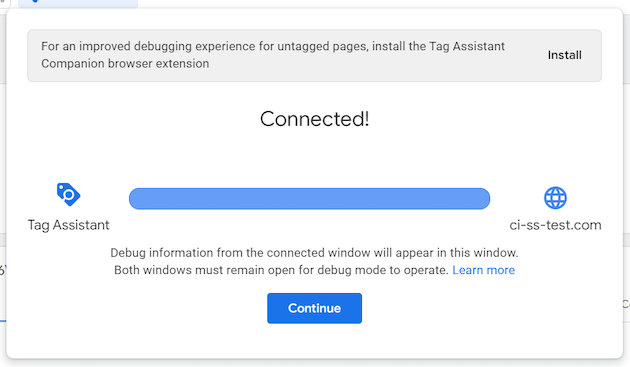
- Go to your website.
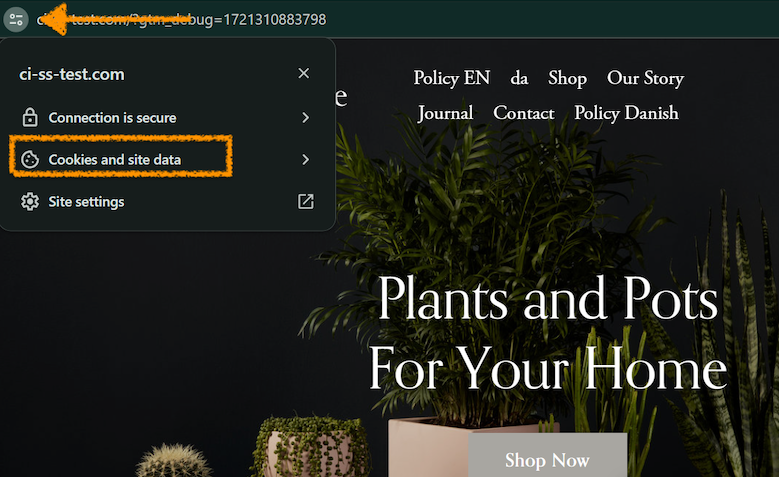
- In the browser, click View site information, and choose Cookies and site data.
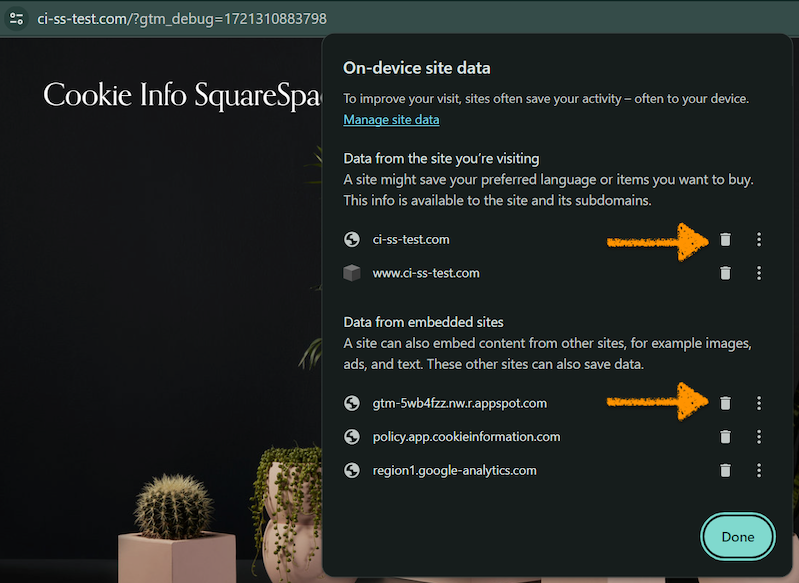
Note: You need to remove cookies but only for the website you’re verifying the Google consent mode v2 implementation for. Otherwise you could be logged out of websites that keep you signed in, and the preferences you’ve saved might be lost. This happens every time a cookie is deleted.
- Clear website cookies and cache, click Done.
- Without interacting with the cookie consent popup, go to GTM Tag Assistant.
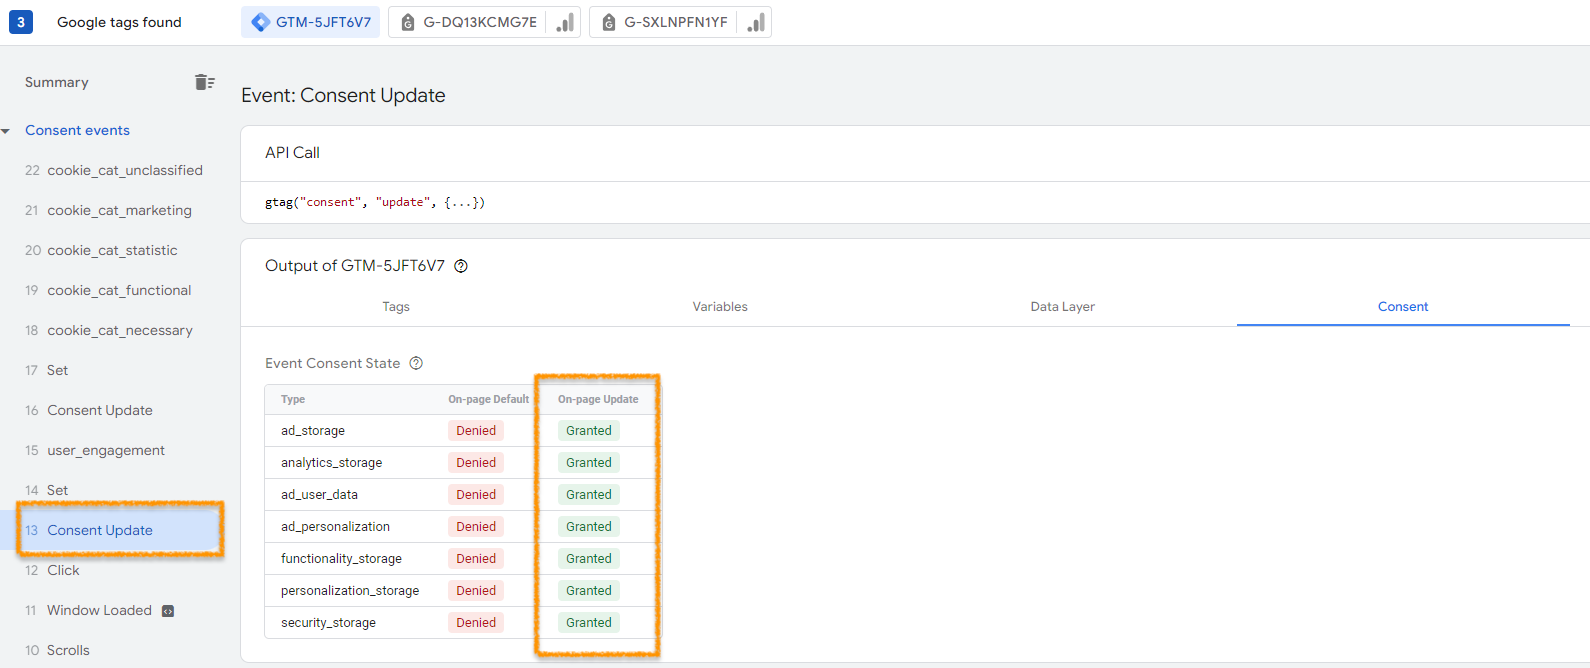
- Navigate to Consent events > Consent Default. Under Consent, all the consent statuses should be set to ‘denied.’

- Go back to your website and click Accept all cookies.
- Navigate to the GTM Tag Assistant page.
- Click the Consent Update in the left-hand side panel. The consent statuses under On-page update should be set to ‘granted’.
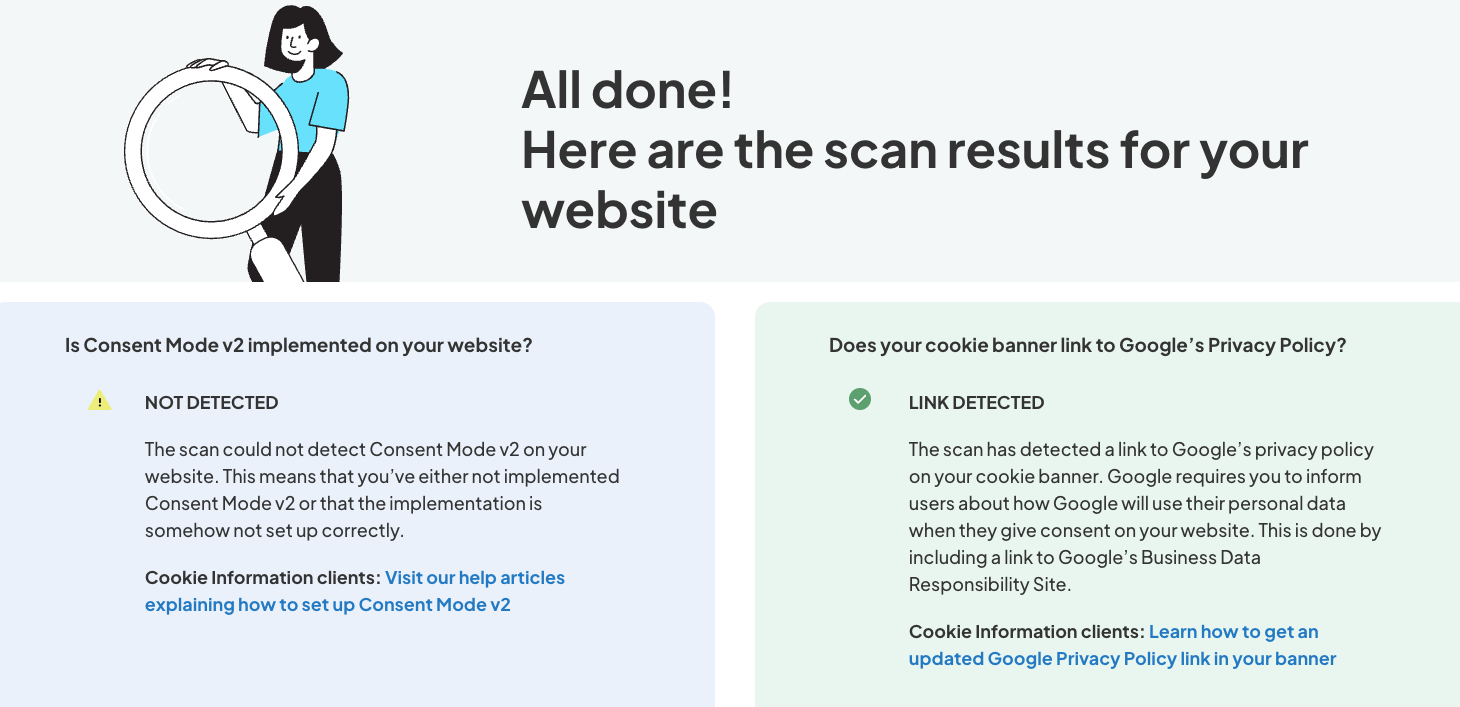
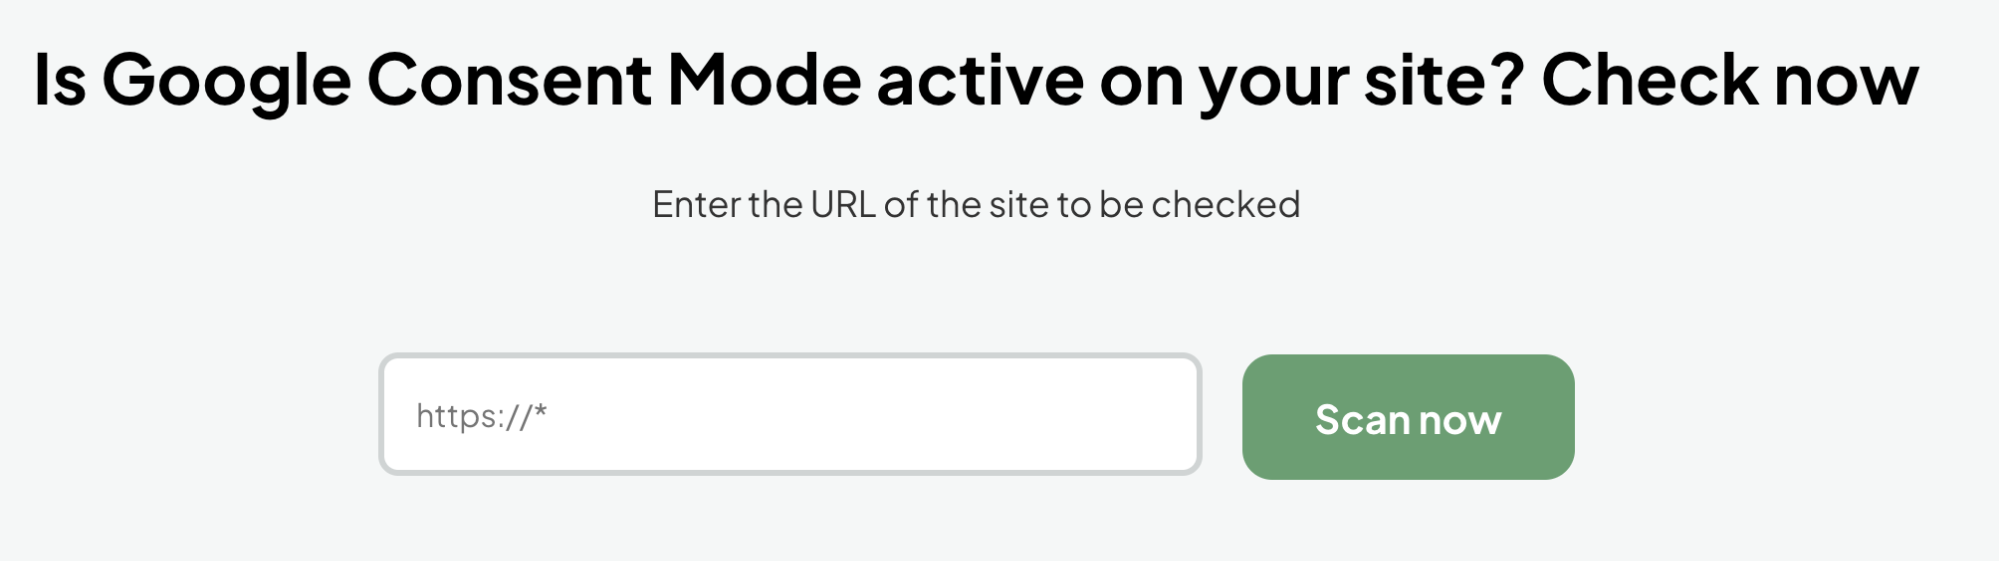
- (Optionally)Go to https://cookieinformation.com/cmv2-scan/.
- Type in your website’s URL, click Scan now. It might take a few minutes before you see the results.
- Voila. When your implementation is correct, you’ll see the following results.