In this article, we’ll show how to set up Google Consent Mode v2 with Cookie Information: using the Google Tag Manager (GTM) tag template.
You can also watch our video tutorial on YouTube.
Before you start
Here are a few things to know before you start:
- Google consent mode v2 comes in two modes: basic and advanced. You can set up both in Cookie Information. The basic consent mode doesn’t allow you to collect any user data, not even consent status, until the user agrees. In the advanced consent mode, Google tags are loaded before the consent popup displays to users. Google collects cookieless data without personal identifiers.
This guide shows how to implement Google consent mode v2 using the advanced mode. If you would like to implement the basic mode, see this article. - To configure a tag, you’ll need to add a Cookie Information consent banner, using the GTM tag template.
- The
data-culture = "EN"attribute controls the language that the popup will appear in on the site – in this example, it will be displayed in the English language. To change the language, set thedata-cultureattribute to a different language code. For more details, see this article. - If the language options are not visible in your tag template, check if the template is up to date.
- If you previously used our Google consent mode v1 consent banner template, pause or delete it. The Google consent mode v2 template replaces the older version and shouldn’t be used simultaneously.
- Here’s the list of Google consent types and categories:
| Consent type | Description | Consent category |
|---|---|---|
ad_storage | Allows storage (such as cookies) related to advertising | Marketing |
analytics_storage | Allows storage (such as cookies) related to analytics e.g. visit duration | Statistical |
functionality_storage | Allows storage that supports the functionality of the website or app e.g. language settings | Functional |
personalization_storage | Allows storage related to personalization e.g. video recommendations | Functional |
security_storage | Allows storage related to security such as authentication functionality, fraud prevention, and other user protection | Necessary |
ad_user_data | Sets consent for sending user data related to advertising to Google | Marketing |
ad_personalization | Sets consent for personalized advertising | Marketing |
Implement Google consent mode v2 using Google Tag Manager tag template
To implement Google consent mode v2 through Google Tag Manager, follow these steps:
- Log in to your Google Tag Manager account.
- Go to Menu > Tags and click New.

- Name the tag, for example, Cookie Information + Consent Mode v2.
- Click on the Tag Configuration panel.
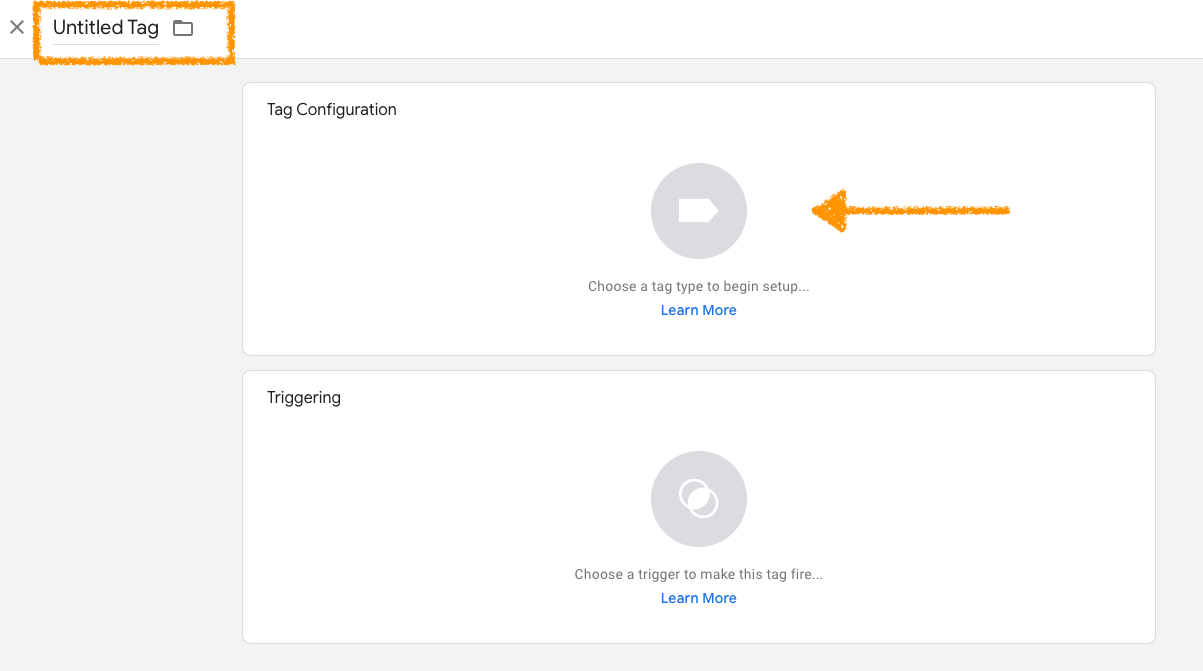
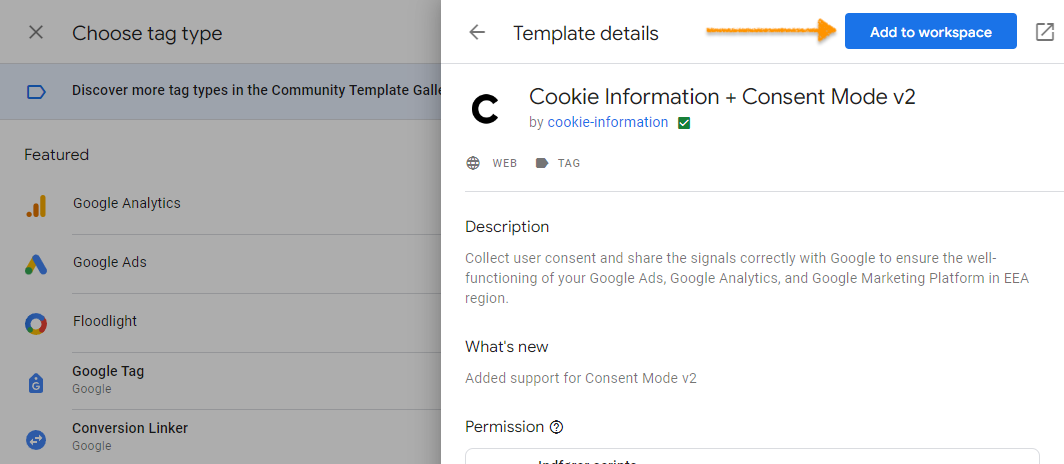
- Click Discover more tag types in the community template gallery.
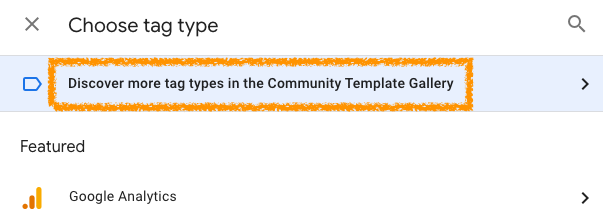
- Type in the name of the Cookie Information + Consent Mode v2 tag template in the search box.
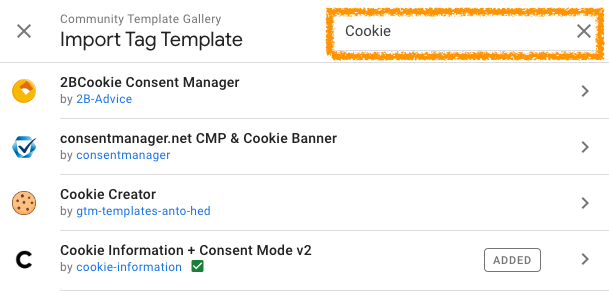
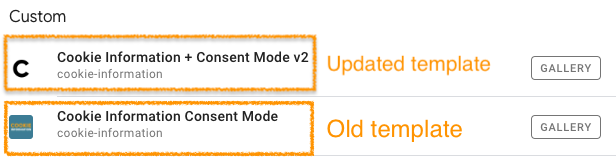
Note: Make sure you used our updated tag template, not the old one:
- Once you’ve selected Cookie Information + Consent Mode v2 template.
- Click Add to workspace.
- Confirm adding the template.
- In Tag Configuration, select Add Cookie Information Consent Banner.
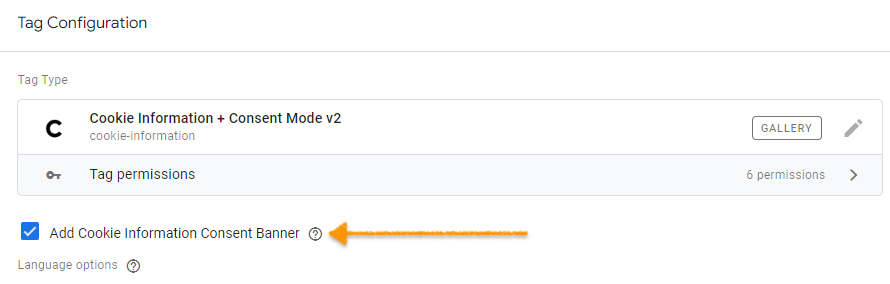
- In Language options, choose a method for managing language versions:
- None (Default language value will be used): This option is for websites that only need the popup in one language. For these settings, the Default Language menu below determines the language of the consent banner. This setting is for websites that only need the popup in one language.
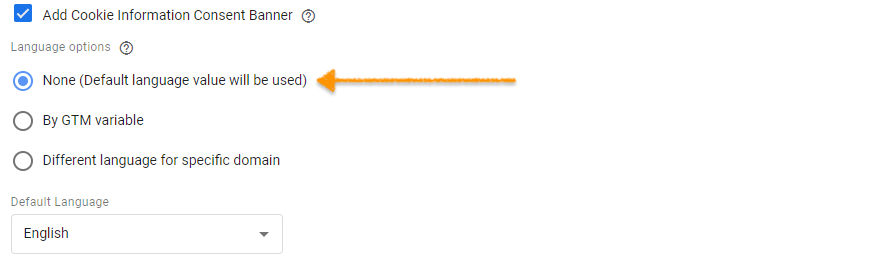
Note: You must select a language that was set up within the Cookie Information platform, otherwise you can’t display the banner.
- By GTM variable: This method allows you to build more sophisticated mechanics using custom variables. The expected input for a language version is the same language code used with the
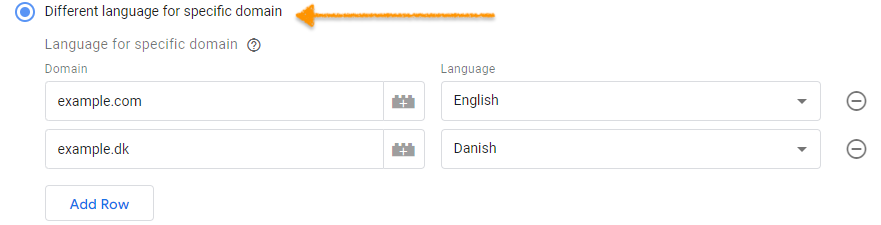
data-cultureattribute. For more details, see this article. - Different languages for specific domains: You can add different languages for specific domains. Provide the canonical domain without ‘https://’, ‘http://’, or ‘www’, for example, my-domain.com. Ensure the canonical domain matches those defined in the Cookie Information platform.
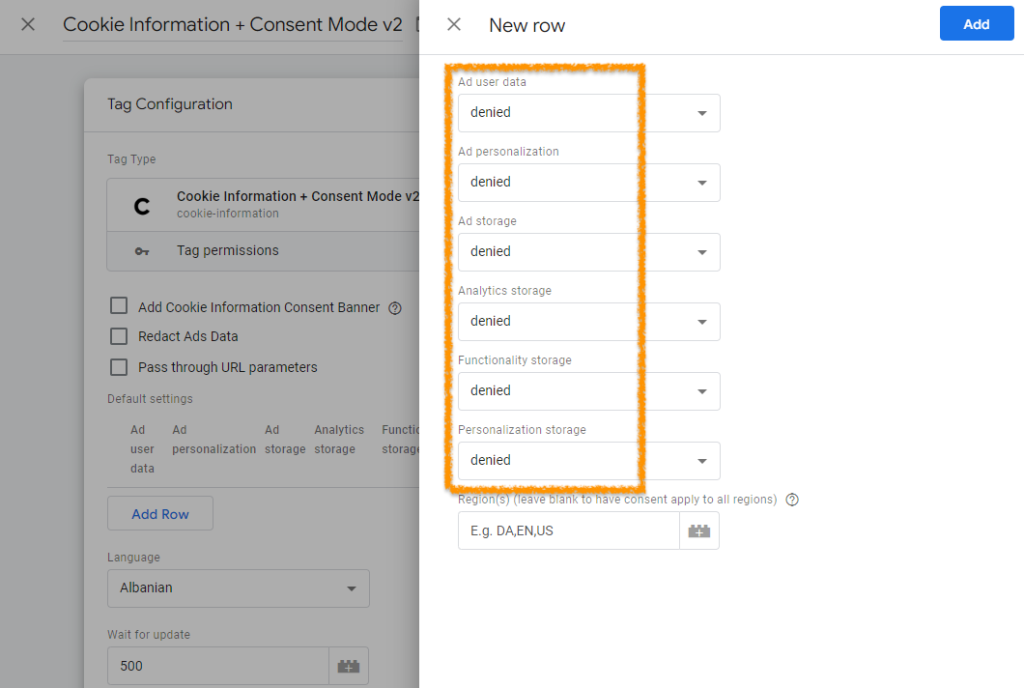
- In Default consent settings, click Add Row. All parameters must be set to
denied.

- Click Add.
- In Advanced Settings, set the tag firing priority to 999 to ensure it is the first one to fire.

- Click on the Triggering panel and choose the trigger Consent Initialization – All Pages.
- Click Save.

- Click Publish to publish your container.
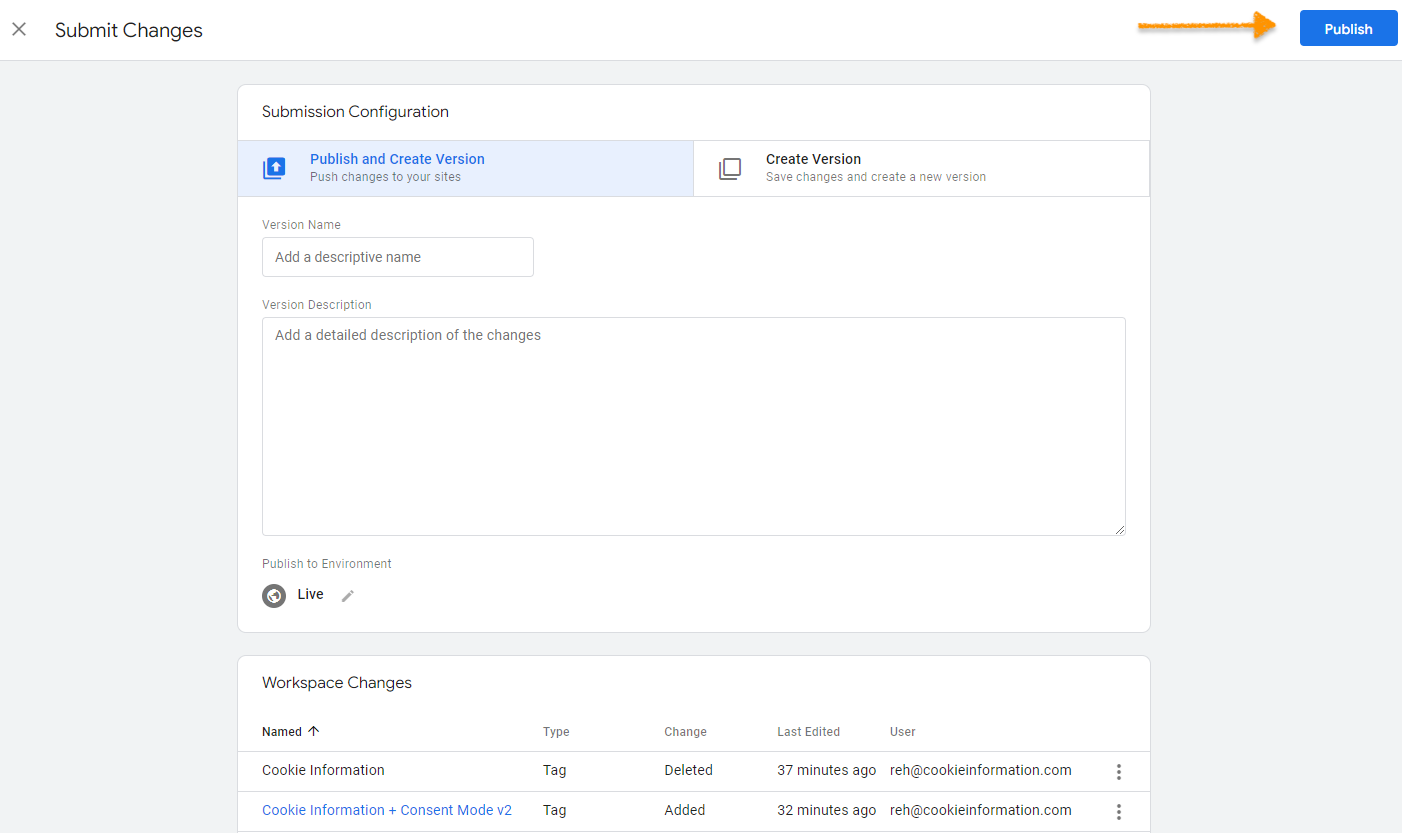
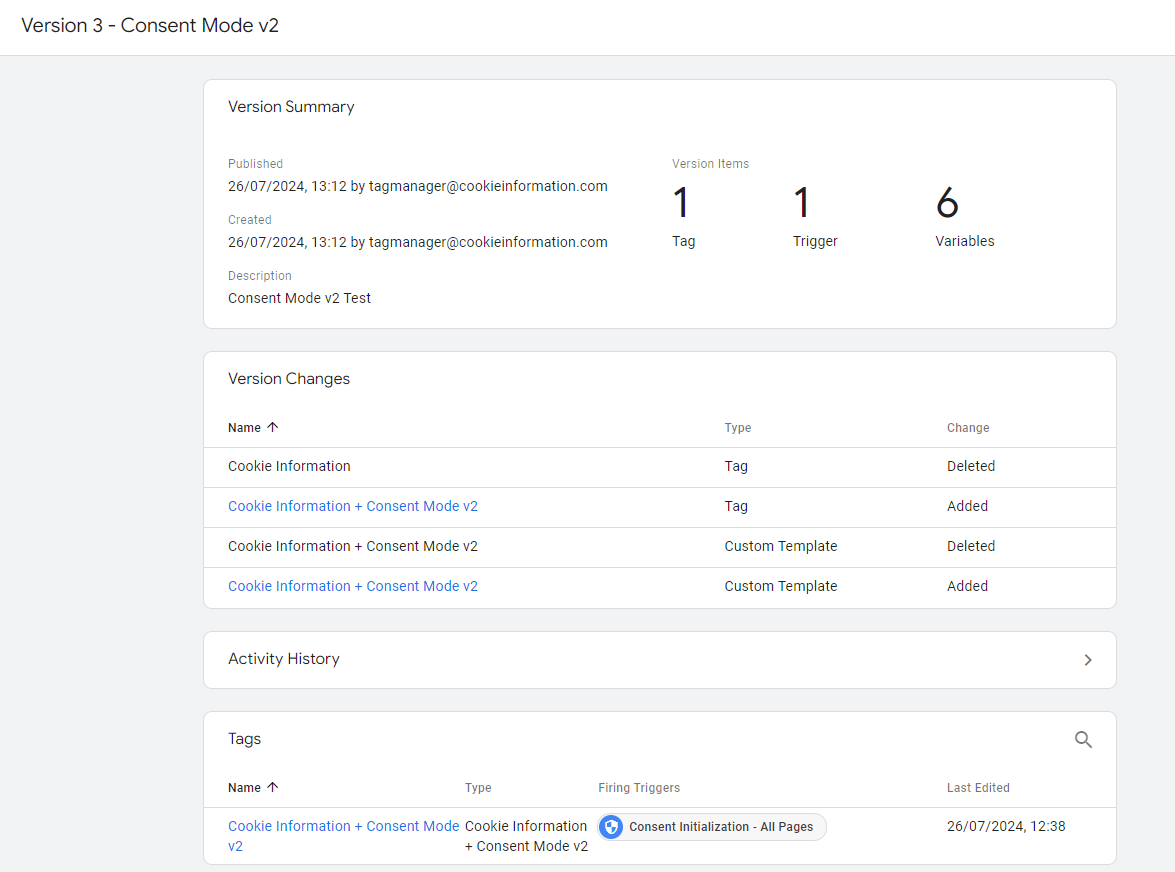
- See the Version Summary of the changes to your container.
- All set!
Optional
Only follow these steps if you upgraded from an earlier version of Google consent mode. New customers using Google consent mode v2 from the start will have the new consent templates set up by default.
- Log in to Cookie Information.
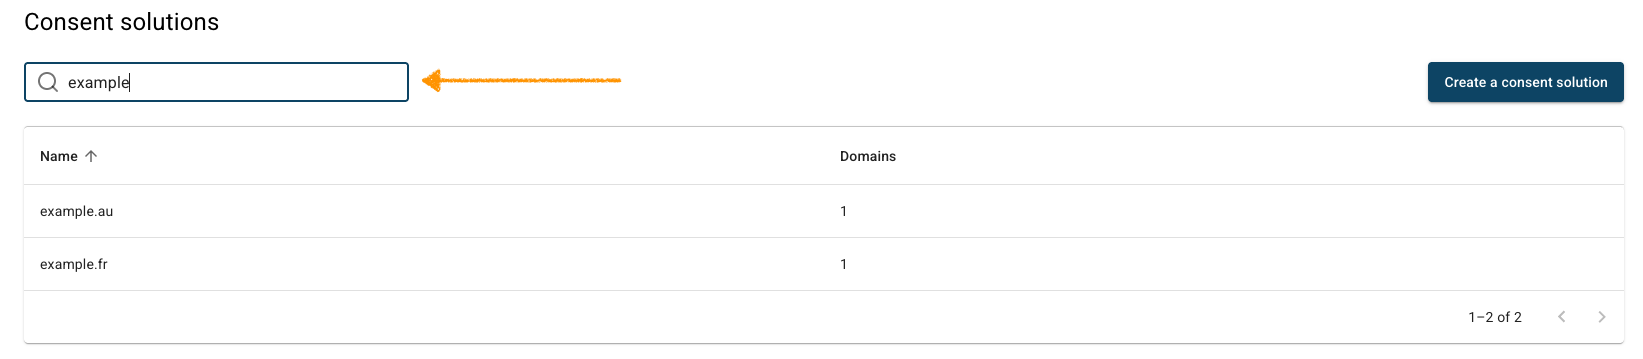
- Go to Consent solutions.
- Find the consent solution you want to use with the consent banner template.
- Go to Consent popup and click Template gallery.
- In Template gallery, click Use this template next to Overlay v2 – Google Consent Mode v2 or Overlay v3 – Google Consent Mode v2.

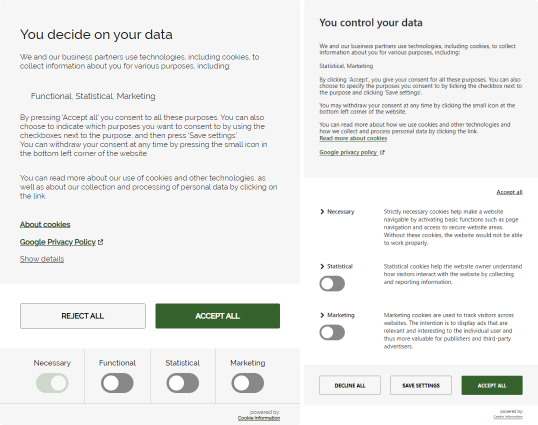
The default versions of overlay v2 and v3 without any customization, look like this:
Note:
- Changing your template will reset any customizations including text or styling, you have made earlier.
- View our template showcase to see all template designs.
- You can customize your template if you want. For more details, see this guide.
- Done!
Check if your Google consent mode v2 is set up correctly
To see if your Google consent mode v2 implementation using Google tag template works correctly, follow these steps:
- Log in to your Google Tag Manager account.
- Navigate to Preview.
- Enter your website’s URL and click Connect to turn on the preview mode.
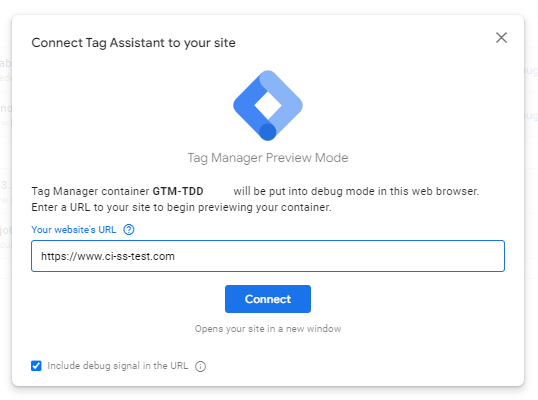
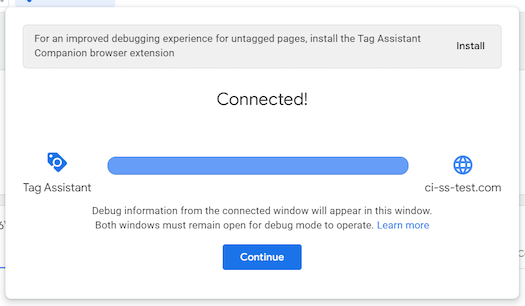
- After a successful connection, Tag Manager will display a dedicated popup and your website will open in a new window.
- Go to your website.
- In the browser, click View site information, and choose Cookies and site data.
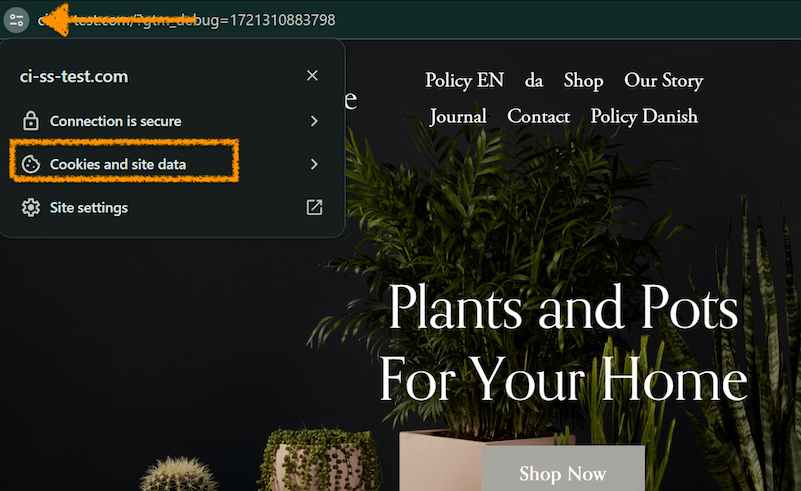
Note: You need to remove cookies but only for the website you’re verifying the Google consent mode v2 implementation for. Otherwise, you could be logged out of websites that keep you signed in, and the preferences you’ve saved might be lost. This happens every time a cookie is deleted.
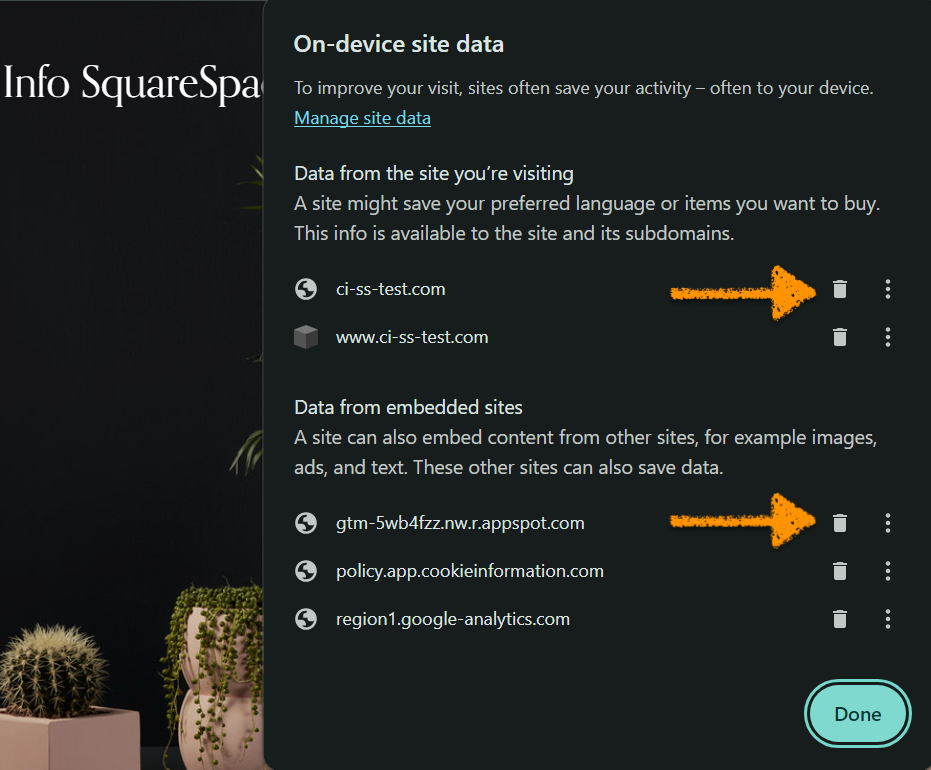
- Clear website cookies and cache, click Done.
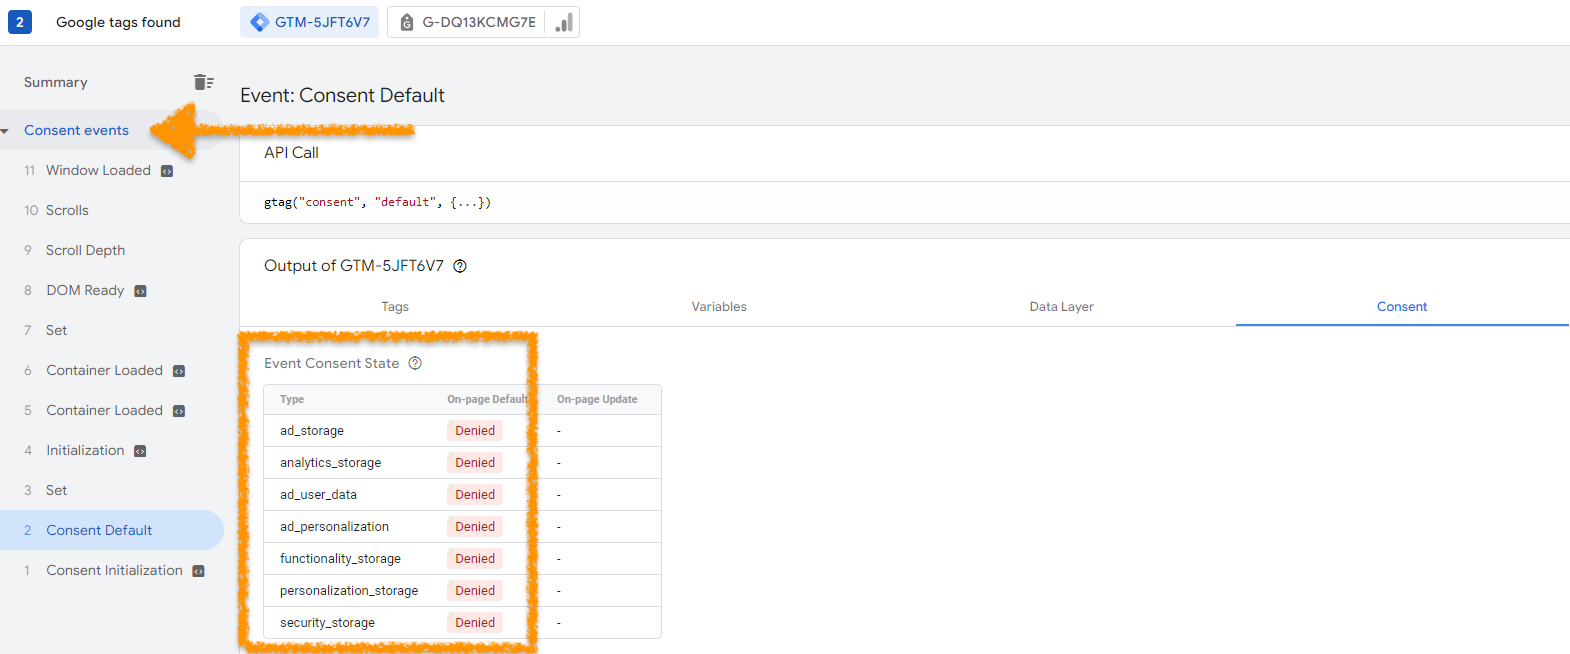
- Without interacting with the cookie consent popup, go to GTM Tag Assistant.
- Navigate to Consent events > Consent Default. Under Consent, all the consent statuses should be set to
denied.
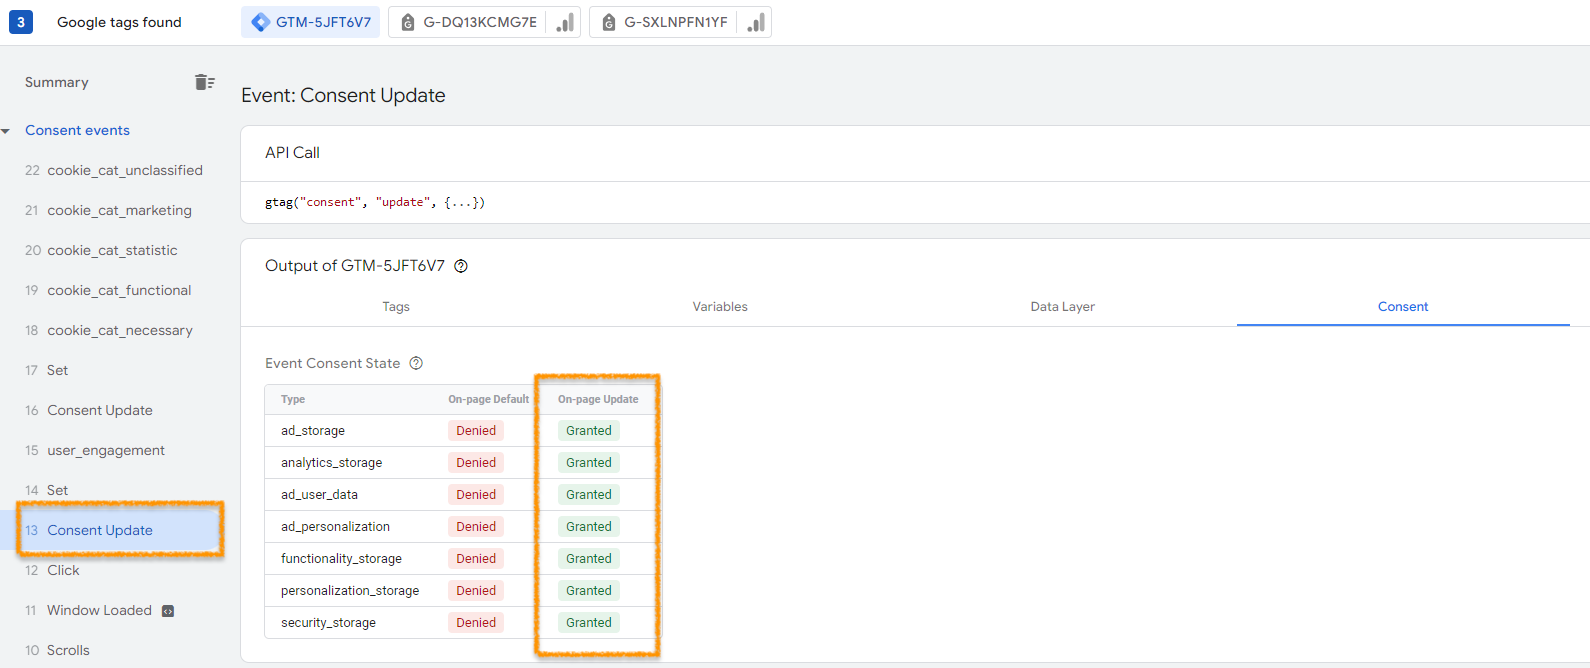
- Go back to your website and click Accept all cookies.
- Navigate to the GTM Tag Assistant page.
- Click the Consent Update in the left-hand side panel. The consent statuses under On-page update should be set to
granted.
- Done.
Troubleshooting
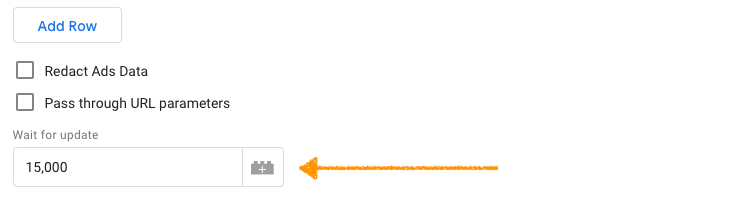
Banner loads too late
What can I do when the banner loads asynchronously and it might not execute before your Google tags?
You can use the ‘Wait for update’ setting with a specified millisecond value to control the delay before data transmission occurs. We recommend setting this up for 15,000. For more details, see Google consent mode v2 documentation.
Banner is heavily customized
If you haven’t updated your Google consent mode to consent mode v2 and your popup banner is heavily customized, you can add the following HTML code to the main text of your banner:
- Go to Consent solutions.
- Find the consent solution you want to use with the consent banner template.
- In Consent popup, go to My templates.
- Click Use this template next to Overlay v2 – Google Consent Mode v2 or Overlay v3 – Google Consent Mode v2.

- In Customize your template, go to Template code.
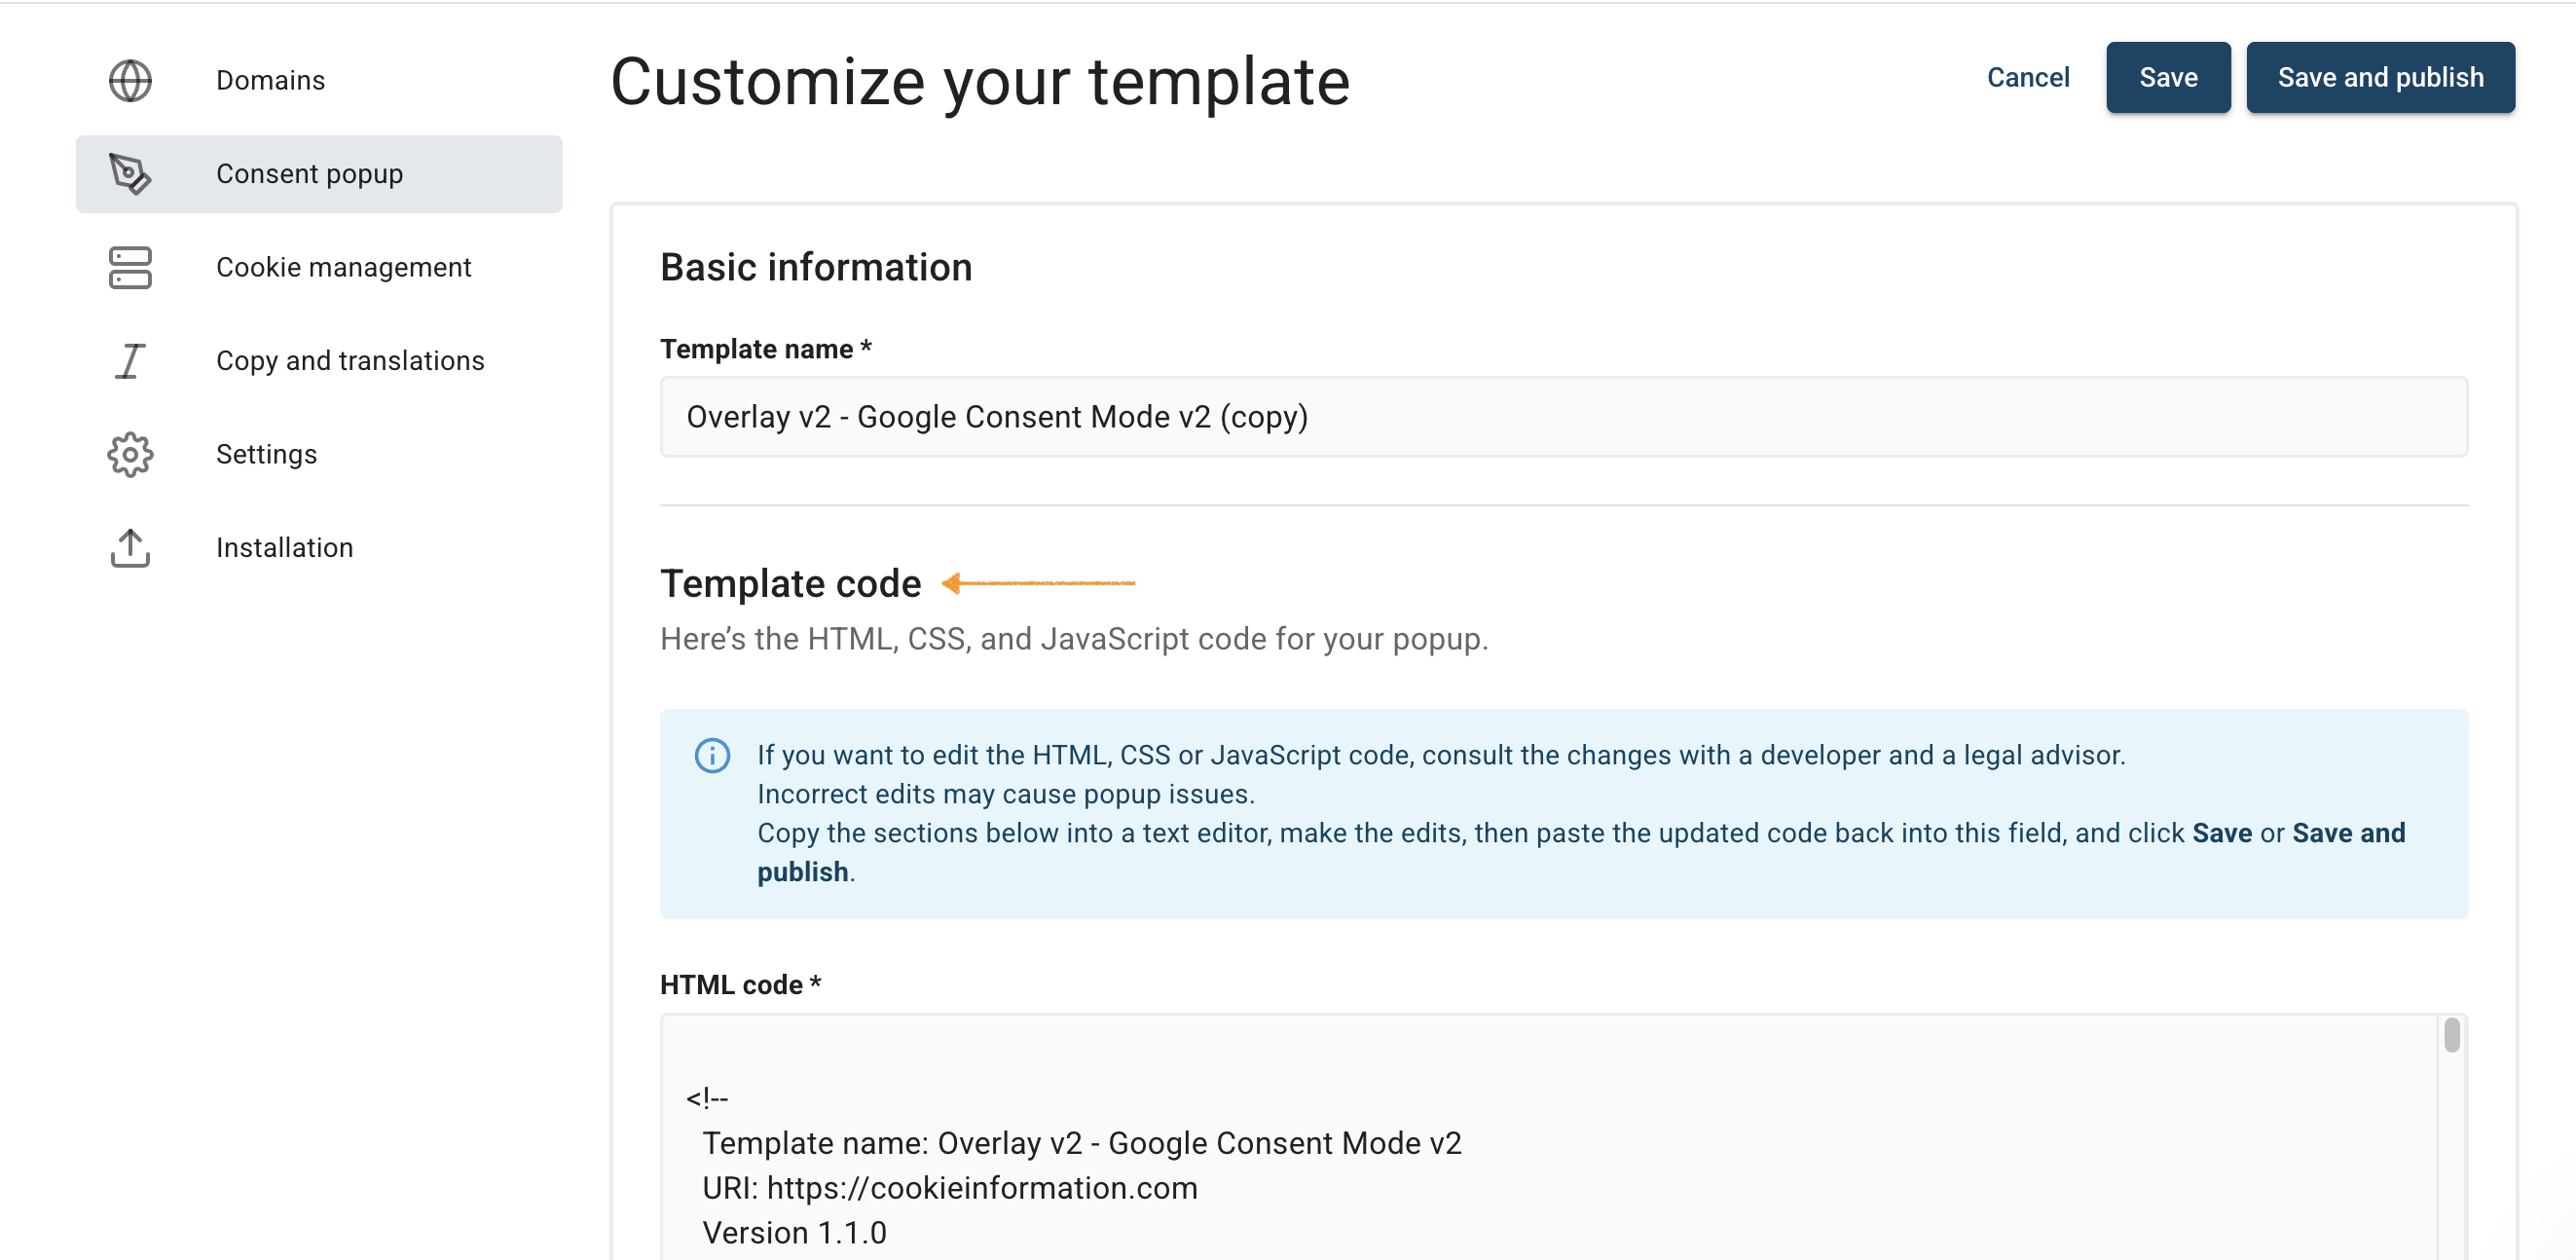
- Go to HTML code. Add the following code to your template’s HTML code:
<a class="coi-banner__google-privacy-policy" aria-label="{{{translations.google_privacy_policy_link}}}" href="https://business.safety.google/privacy/" target="_blank">{{{translations.google_privacy_policy_link}}}</a>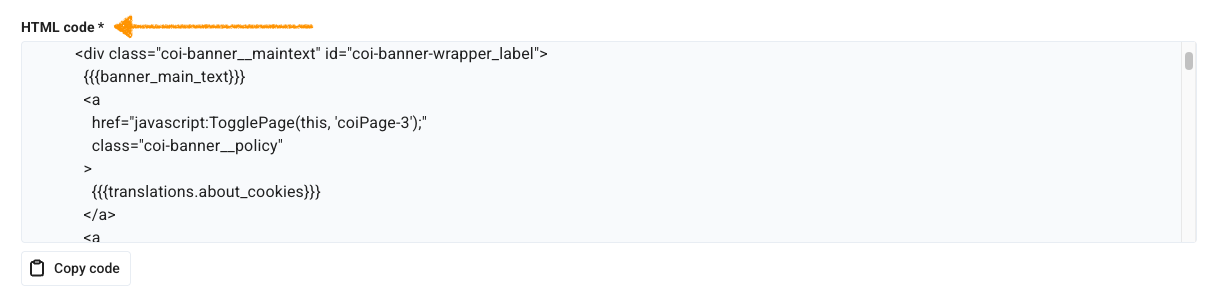
7. Done.
Additional information
Here is some additional information to keep in mind about implementing Google consent mode v2 implementation.
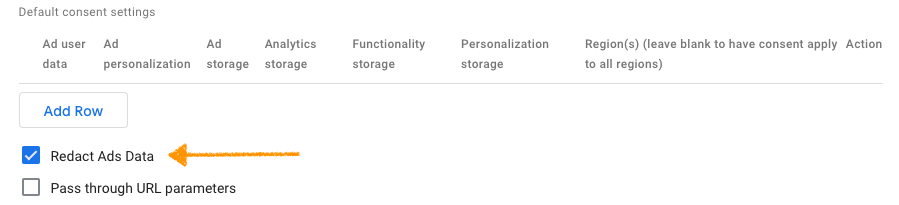
Redact ads data
When you select Redact Ads Data in Tag Configuration and ad_storage is set to denied, ad click identifiers sent in network requests by Google Ads and Floodlight tags will be redacted. Additionally, network requests will be sent through a cookieless domain as an extra privacy measure. For more information about this setting, see the Google documentation.
Pass through URL parameters
When someone clicks on an ad and comes to your website, details about the ad might be added to your website’s URL as a query parameter. This information helps track how well the ad is performing and is usually saved in first-party cookies on your domain.
However, when the Pass through URL parameters option in Tag Configuration is selected, and either ad_storage or analytics_storage is set to denied, this information won’t be stored locally on your domain. Instead, you can choose to transmit information about ad clicks and analytics events through URL parameters across pages, provided certain conditions are met. For more information, see the Google consent mode v2 documentation.